











13. Chubby Snowman Figure
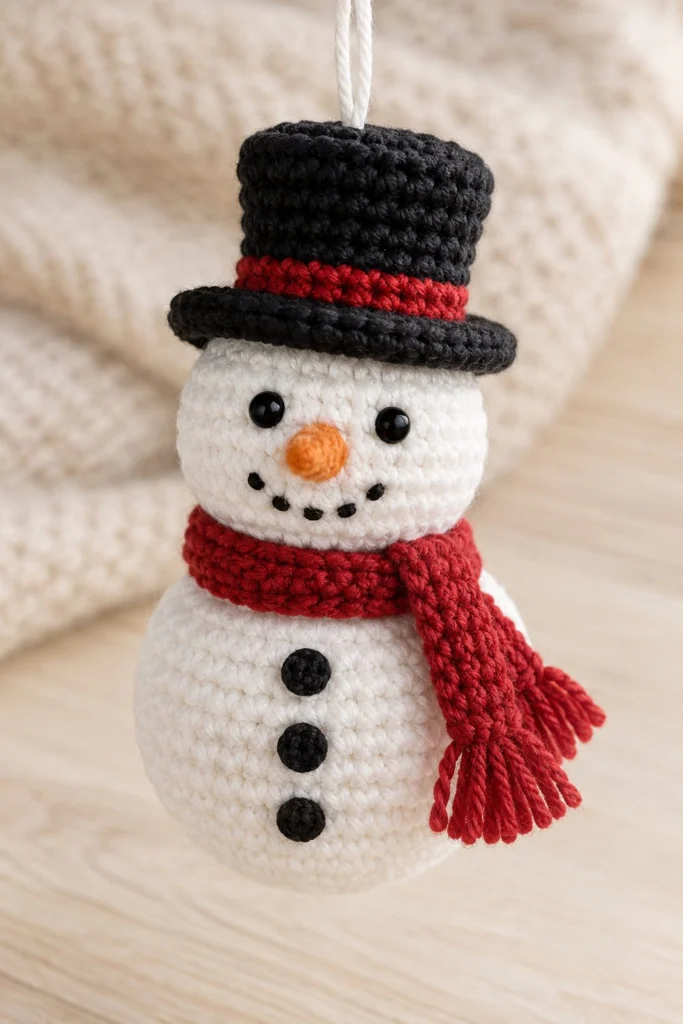
Bring classic winter charm to your holiday tree with this delightful chubby crochet snowman. Featuring a seamlessly constructed two-sphere body, cozy top hat, crimson scarf, and sweet hand-embroidered details, this ornament measures 3.5 inches tall and takes just over an hour to craft.
Quick Facts
| Skill level | Finished size | Yarn | Hook | Time |
|---|---|---|---|---|
| Easy-Intermediate | 3.5 in / 9 cm tall | Sport Weight Cotton (Cat. 2) | 2.5 mm (US C/2) | 1 hour 15 minutes |
Materials You Will Need
- Sport weight cotton yarn (100% cotton, 50 g / 125 m): White (15 g / 38 m), Black (5 g / 13 m), Crimson Red (5 g / 13 m), and a scrap of Orange (1 m)
- 2.5 mm (US C/2) crochet hook
- Polyester fiberfill stuffing
- Yarn needle and embroidery needle
- Stitch marker
- Gold metallic thread (20 cm) for hanging loop
- Scissors
Gauge
Working Rnds 1–4 of the body measures 2.5 cm (1 in) across. Working tightly is essential in amigurumi so fiberfill stuffing does not show through stitches; exact gauge is secondary to tight, uniform tension.
Abbreviations (US Terms)
- ch: chain
- sc: single crochet
- hdc: half double crochet
- inc: single crochet increase (2 sc in same st)
- dec: single crochet invisible decrease (sc2tog using front loops only)
- FLO: front loop only
- BLO: back loop only
- st(s): stitch(es)
- sl st: slip stitch
- MR: magic ring
UK terms: sc = dc, hdc = htr, dc = tr.
Pattern Notes
- The main body and hat are worked in continuous spiral rounds without joining unless specified.
- Use a stitch marker in the first stitch of every round and move it up as you work.
- Numbers in parentheses at the end of each round indicate total stitch count for that round.
- Invisible decreases are recommended for all decreases on rounds to keep standard amigurumi texture smooth.
Instructions
Body and Head – White yarn, make 1
Rnd 1: 6 sc in a magic ring (6)
Rnd 2: inc x 6 (12)
Rnd 3: (1 sc, inc) x 6 (18)
Rnd 4: (2 sc, inc) x 6 (24)
Rnd 5: (3 sc, inc) x 6 (30)
Rnd 6–10: sc in each st around (30)
Rnd 11: (3 sc, dec) x 6 (24)
Rnd 12: (2 sc, dec) x 6 (18)
Rnd 13: (2 sc, inc) x 6 (24)
Rnd 14–18: sc in each st around (24)
Rnd 19: (2 sc, dec) x 6 (18)
Rnd 20: (1 sc, dec) x 6 (12)
Stuff body and head firmly now.
Rnd 21: dec x 6 (6)
Fasten off, leave a 15 cm tail. Thread needle through FLO of remaining 6 sts, pull tight to close, and weave in end.
Top Hat – Black and Crimson Red yarn, make 1
With Black yarn:
Rnd 1: 6 sc in a magic ring (6)
Rnd 2: inc x 6 (12)
Rnd 3: (1 sc, inc) x 6 (18)
Rnd 4: BLO sc in each st around (18)
Rnd 5–6: sc in each st around (18)
Change to Crimson Red yarn:
Rnd 7: sc in each st around (18)
Change to Black yarn:
Rnd 8: FLO (2 sc, inc) x 6 (24)
Rnd 9: (3 sc, inc) x 6 (30)
Fasten off, leave a 30 cm tail for sewing.
Scarf – Crimson Red yarn, make 1
Ch 38.
Row 1: Starting in 2nd ch from hook, hdc in each ch across (37)
Fasten off and weave in ends.
Assembly
1. Lightly stuff the top cylinder of the hat with fiberfill. Center the hat over Rnds 18–21 of the head and sew firmly into place using the long black yarn tail.
2. Wrap the crimson scarf around the neck junction (Rnd 12). Cross the ends across the front chest and stitch through the crossover point with red yarn to hold it securely in place.
Finishing
1. Eyes: Using black yarn, embroider two French knots or small vertical stitches on Rnd 16, spaced 3 stitches apart.
2. Nose: Using orange yarn, embroider 4 overlapping horizontal stitches over 1 stitch between the eyes at Rnd 15 to form a small carrot nose.
3. Coal Buttons: Using black yarn, embroider three French knots down the front of the body on Rnds 5, 7, and 9.
4. Hanging Loop: Thread the 20 cm gold metallic thread through the top center of the hat, tie the ends together in a secure double knot, and hide the knot inside the top of the hat.
Tips and Common Mistakes
- Invisible Decreases: Always use front-loop-only invisible decreases on spheres to prevent visible gaps where stuffing can leak through.
- Stuffing Density: Stuff the neck area extra firmly before closing Rnd 21 so the head does not droop under the weight of the top hat.
- Seamless Color Changes: On the hat band (Rnds 7–8), pull the new color through on the last yarn-over of the stitch preceding the color switch for a clean line.
Frequently Asked Questions
Can I use a different yarn weight for this pattern?
Yes. You can use DK or Worsted weight yarn with an appropriately sized hook (such as 3.0 mm or 3.5 mm). Note that using thicker yarn will increase the overall height of your finished snowman.
Is this snowman ornament safe for small children?
Because all facial features and details are fully hand-embroidered, this design has no plastic safety eyes and is naturally safe for small hands once all yarn ends are securely woven inside.
How do I keep the scarf from untying?
After wrapping the scarf around the neck, take a needle and matching red yarn to place 2 small tacking stitches through the scarf intersection directly into the body.
📄 Your free PDF pattern