
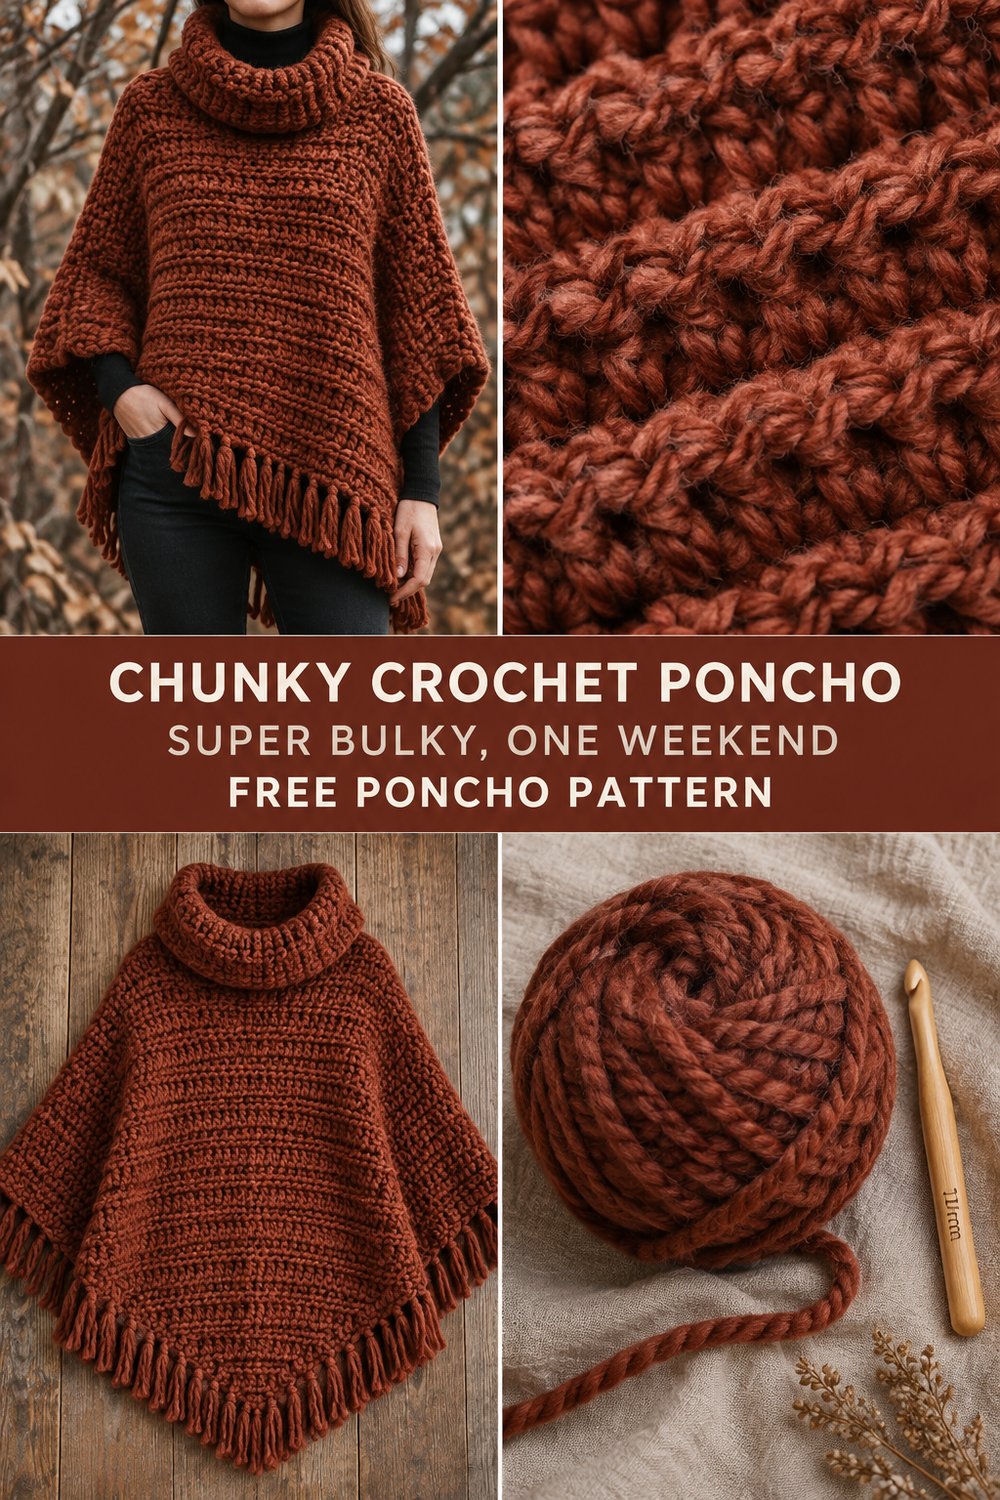
Wrap yourself in pure autumn comfort with a garment that proves handmade luxury doesn’t have to take months to create. Working with super bulky yarn and a large hook means this cozy wrap grows remarkably fast, transforming simple stitches into a stunning wearable piece in just one weekend.
Chunky Crochet Poncho Pattern — Warm, Fast and Beginner Friendly
Quick Facts
- Stitches Used: Chain (ch), Half Double Crochet (hdc), Slip Stitch (sl st)
- Size Fit: One Size (fits US Women’s XS–XL, easily customizable)
- Estimated Hours to Complete: 6–8 hours over a single weekend
- Gift-Appeal Framing: Luxurious, fast-working texture that makes an unforgettable, high-end gift for loved ones or a gorgeous treat for yourself.
💡 Designer Tip: This free crochet pattern is designed to build your confidence if you are transitioning from flat scarves to your very first garment!
What Makes This Chunky Crochet Poncho Special
This chunky crochet poncho achieves its rich, architectural look through a clever combination of minimalist construction and oversized texture. By working simple half double crochet stitches in the back loop only, we create a gorgeous ribbed relief that showcases the thick, tactile plies of a super bulky yarn. The poncho is built from two identical flat rectangles joined at the shoulders, eliminating complex shaping and decreasing. A wide, integrated folded cowl neck provides built-in warmth and structure, while a short, chunky fringe along the bottom hem adds effortless boho-chic style. It is the ultimate beginner crochet poncho project that delivers professional, boutique-quality results.
Skill Level
- Beginner Friendly — Confident beginner (comfort with basic crochet stitches and counting rows)
- Techniques Required: Working in rows, working in the back loop only, simple seaming, and attaching fringe.
⚠️ Note: If you can work a standard half double crochet and count your rows, you have all the skills needed to complete this fast crochet poncho.
Finished Measurements
| Size | Width (Across Shoulders) | Length (Shoulder to Hem) | Fringe Length |
|---|---|---|---|
| One Size (Standard) | 28 inches / 71 cm | 26 inches / 66 cm | 4 inches / 10 cm |
Materials You Will Need
| Material | Description | Quantity / Details |
|---|---|---|
| Yarn | Super Bulky (Weight 6) in Deep Rust | Approx. 650 yards / 594 meters |
| Hook | US P/16 (10mm) crochet hook | Or size needed to obtain gauge |
| Notions | Tapestry needle, locking stitch markers, sharp scissors | For weaving ends and cutting fringe |
Yarn Suggestions
| Yarn Brand & Line | Weight | Skein Yardage | Notes |
|---|---|---|---|
| Lion Brand Wool-Ease Thick & Quick | Super Bulky (6) | 106 yds / 97 m per ball (Need 6 balls) | Excellent stitch definition, wonderful warmth, and rich color saturation. |
| Hobbii Twister Solid Jumbo or equivalent chunky wool blend | Super Bulky (6) | 120 yds / 110 m per ball (Need 6 balls) | Plump, lightweight, and incredibly soft against the skin. |
⚠️ Note: Avoid novelty fuzzy yarns (like eyelash yarn) for your first attempt. They obscure your stitches and make it difficult to locate your working loops, making this warm crochet poncho harder to troubleshoot.
Gauge
- Stitch Gauge: 7 hdc stitches = 4 inches (10 cm)
- Row Gauge: 5 rows = 4 inches (10 cm)
| Measurement Type | Stitches / Rows | Imperial / Metric |
|---|---|---|
| Stitch Gauge | 7 hdc sts | 4 inches / 10 cm |
| Row Gauge | 5 hdc rows | 4 inches / 10 cm |
💡 Designer Tip: Always make a gauge swatch before starting your easy crochet wearable. Because super bulky yarn is heavy, incorrect tension can drastically alter the final drape of your garment.
Abbreviations
| Abbreviation | Full Term |
|---|---|
| ch | chain |
| hdc | half double crochet |
| blo | back loop only |
| st(s) | stitch(es) |
| sl st | slip stitch |
| rep | repeat |
| RS | right side |
| WS | wrong side |
Special Stitches Explained
- Half Double Crochet in the Back Loop Only (hdc-blo): Yarn over, insert hook under the back loop only of the indicated stitch, yarn over, pull up a loop (3 loops on hook), yarn over, pull through all 3 loops on the hook. This creates a distinct horizontal ridge across the fabric.
Pattern Instructions
Section 1: Front Panel
Note: Make 1.
Using your 10mm hook, ch 50 loosely.
– Row 1: Working in the back bumps of the foundation chain, hdc in 3rd ch from hook (skipped 2 chs count as first hdc), hdc in each ch across, turn. (48 hdc)
– Row 2: Ch 2 (counts as first hdc here and throughout), working in blo, hdc in each st across, working last hdc in top of turning chain, turn. (48 hdc)
– Rows 3–28: Rep Row 2. Fasten off, leaving a long tail for seaming.
✅ Checkpoint: Measure your Front Panel. It should measure approximately 28 inches wide by 22 inches long before the collar is added.
Section 2: Back Panel
Note: Make 1 (Identical to Front Panel).
Using your 10mm hook, ch 50 loosely.
– Row 1: Working in the back bumps of the foundation chain, hdc in 3rd ch from hook, hdc in each ch across, turn. (48 hdc)
– Row 2: Ch 2, working in blo, hdc in each st across, working last hdc in top of turning chain, turn. (48 hdc)
– Rows 3–28: Rep Row 2. Fasten off, leaving a long tail for seaming.
Section 3: Assembly and Seaming
- Lay the Front Panel and Back Panel flat on a clean surface with the ribbing running horizontally.
- Align the top edges. Seam the shoulders together using mattress stitch or whipstitch across 11 inches on the left and right shoulders, leaving the center 14 inches open for the head/neck opening.
- Seam the sides starting from the bottom hem up for 12 inches, leaving the remaining top 10 inches open for armholes.
Section 4: Cowl Neck
- With RS facing, join rust yarn with a sl st at the shoulder seam of the neck opening.
- Round 1: Ch 2, work hdc evenly around the entire neck opening, join with sl st to top of beg ch-2. (42 hdc)
- Rounds 2–8: Ch 2, working in blo, hdc in each st around, join with sl st to top of beg ch-2. (42 hdc)
- Fasten off and weave in all loose ends securely. Fold the cowl neck outward to create a wide, cozy double layer.
Section 5: Fringe
- Cut multiple strands of yarn measuring 9 inches long (each fringe piece will be folded in half to finish at 4 inches).
- Attach a 3-strand fringe group to every second stitch along the bottom hem of both the front and back panels. Trim ends evenly with sharp scissors.
Size Customization Tips
- To Adjust Width: Chain an even multiple of stitches plus 2 to start your foundation row. Each 4-stitch addition adds approximately 2 inches of width.
- To Adjust Length: Work fewer or more repeat rows in Sections 1 and 2 before moving on to assembly. Keep in mind that adding length will require slightly more yardage.
Care Instructions
- Hand wash gently in cool water with a mild wool-friendly detergent.
- Do not wring or twist the wet fabric. Gently press out excess water in a clean towel.
- Dry flat in shade, reshaping the cowl and drape carefully while damp. Do not hang while wet to prevent stretching.
Closing
Thank you for creating along with this free crochet pattern! I hope you love wearing your new chunky crochet poncho as much as I loved designing it for you. Be sure to pin this project to your favorite Pinterest boards so you can find it later, and leave a comment below letting me know what color you chose! Tag me in your finished photos on social media using the hashtags #ChunkyCrochet #CrochetPoncho #FreeCrochetPattern #BeginnerCrochet #EasyCrochet so I can admire your gorgeous handmade warm crochet poncho. Happy crocheting!