
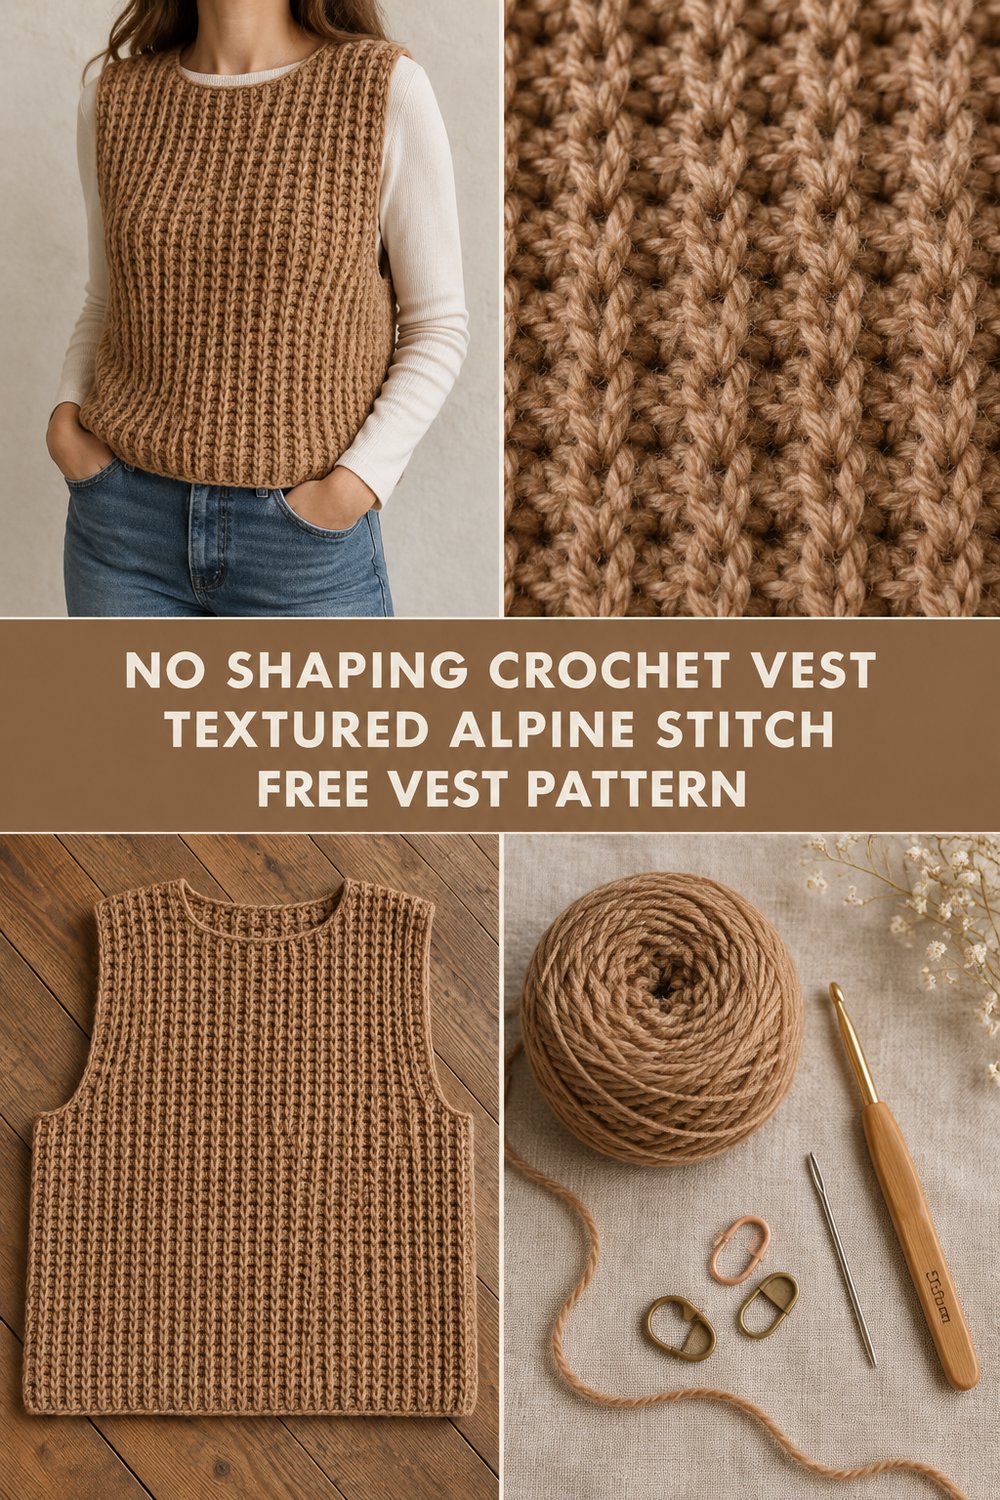
Wrap yourself in the rich, tactile comfort of a relaxed layering piece that proves simplicity can be striking. This effortless handmade garment drapes easily over crisp long-sleeve tops on brisk days and transitions seamlessly into spring, offering timeless style with zero complex pattern math.
Crochet Vest With No Sleeves and No Shaping — Free Pattern
Quick Facts
- Stitches Used: Chain (ch), Single Crochet (sc), Double Crochet (dc), Front Post Double Crochet (fptr).
- Size Fit: Inclusive sizing ranging from XS to 2XL, designed with positive ease for a relaxed, modern silhouette.
- Estimated Hours to Complete: 12 to 16 hours of mindful, rhythmic stitching.
- Gift-Appeal Framing: A stunning, boutique-quality handmade layering garment that makes an unforgettable, heirloom-grade gift for fashion-forward loved ones.
Sizing customization tips are included later in this guide to help you tailor the fit perfectly to your frame.
What Makes This Crochet Vest With No Sleeves and No Shaping Special
This design relies entirely on clean geometry and rich textile architecture. By working completely straight from bottom to hem without a single decrease, increase, or armhole shaping curve, the project lets you focus purely on the meditative rhythm of the alpine stitch. Alternating rows of basic stitches and raised post stitches create a dense, three-dimensional fabric with incredible warmth and a high-end designer look. The garment’s structure comes alive during the final assembly, where two identical rectangles are simply seamed at the shoulders and partially up the sides to naturally form deep, comfortable armholes and a crisp, straight hem.
Skill Level
Advanced Beginner
- Required skills:
- Working flat in rows and turning accurately.
- Executing basic stitches (ch, sc, dc).
- Mastering textured post stitches (fptr).
- Basic mattress stitch or whipstitch seaming.
- Reassurance: If you can comfortably read a basic row repeat and have ever practiced post stitches, you have all the skills needed to complete this vest with confidence.
Finished Measurements
| Size | Bust Circumference (Inches / cm) | Finished Length (Inches / cm) | Armhole Depth (Inches / cm) |
|---|---|---|---|
| XS | 36 in / 91.5 cm | 22 in / 56 cm | 8.5 in / 21.5 cm |
| S | 40 in / 101.5 cm | 22 in / 56 cm | 9 in / 23 cm |
| M | 44 in / 111.5 cm | 23.5 in / 60 cm | 9.5 in / 24 cm |
| L | 48 in / 122 cm | 23.5 in / 60 cm | 10 in / 25.5 cm |
| XL | 52 in / 132 cm | 25 in / 63.5 cm | 10.5 in / 26.5 cm |
| 2XL | 56 in / 142 cm | 25 in / 63.5 cm | 11 in / 28 cm |
Materials You Will Need
- Yarn: Worsted weight (Category 4) wool or acrylic blend.
- Hook: 5.0 mm (US H/8) crochet hook or size needed to obtain gauge.
- Notions: Yarn needle for weaving ends and seaming, locking stitch markers (4 minimum), tape measure.
| Colorway Sequence | Yarn Type / Weight | Total Yardage Needed (XS – 2XL) |
|---|---|---|
| 1. Warm Camel | Worsted Weight (Cat. 4) | 950 – 1450 yds / 870 – 1325 m |
Yarn Suggestions
| Yarn Brand & Line | Weight | Skein Yardage | Notes |
|---|---|---|---|
| Lion Brand Wool-Ease | Worsted (4) | 197 yds / 180 m per skein | Excellent stitch definition with a soft, durable wool-acrylic blend. |
| Knit Picks Wool of the Andes Worsted | Worsted (4) | 110 yds / 100 m per skein | 100% Peruvian wool offering superior warmth and crisp alpine stitch texture. |
| Caron Simply Soft | Worsted (4) | 315 yds / 288 m per skein | Budget-friendly acrylic alternative with a lovely sheen and drape. |
⚠️ Note: Avoid highly textured novelty yarns, fuzzy mohair blends, or novelty boucle, as they completely obscure the raised post stitches that define this alpine texture.
Gauge
- 16 stitches and 12 rows = 4 inches (10 cm) in Alpine Stitch pattern using a 5.0 mm hook.
| Measurement Type | Stitch / Row Count | Target Dimension |
|---|---|---|
| Width Gauge | 16 sts | 4 inches / 10 cm |
| Row Gauge | 12 rows | 4 inches / 10 cm |
💡 Designer Tip: Always make a generous 6-inch swatch in the alpine stitch pattern and block it before beginning. Because post stitches pull fabric vertically, meeting row gauge is just as important as stitch gauge.
Abbreviations
| Abbreviation | Full Term |
|---|---|
| ch | Chain |
| sc | Single Crochet |
| dc | Double Crochet |
| fptr | Front Post Double Crochet |
| st(s) | Stitch(es) |
| rep | Repeat |
| RS | Right Side |
| WS | Wrong Side |
| yo | Yarn over |
Special Stitches Explained
- Front Post Double Crochet (fptr): Yo, insert hook from front to back to front around the post of the indicated stitch two rows below, yo, pull up a loop, [yo, pull through 2 loops] twice.
- Alpine Stitch Row Sequence: A 4-row repeat consisting of:
- Row 1 (WS): All sc across.
- Row 2 (RS): Alternating dc and fptr (or sc and dc depending on offset).
- Row 3 (WS): All sc across.
- Row 4 (RS): Offset alternating fptr and dc.
Pattern Instructions
Section 1: Front Panel (Make 1)
Make 1 foundation chain according to your chosen size below. (Note: Pattern is written for sizes XS (S, M, L, XL, 2XL).
- Foundation Chain: Ch 73 (81, 89, 97, 105, 113).
- Row 1 (WS): Working in the back bumps of the chain, sc in 2nd ch from hook and in each ch across, turn. (72 [80, 88, 96, 104, 112] sc)
- Row 2 (RS): Ch 1, sc in first st, dc in next st, sc in next st; rep from * across, turn. (72 [80, 88, 96, 104, 112] sts)*
- Row 3 (WS): Ch 1, sc in each st across, turn. (72 [80, 88, 96, 104, 112] sc)
- Row 4 (RS): Ch 1, sc in first st, fptr around the dc two rows below directly beneath the next st, sc in next st; rep from * across, turn. (72 [80, 88, 96, 104, 112] sts)*
- Row 5 (WS): Ch 1, sc in each st across, turn. (72 [80, 88, 96, 104, 112] sc)
- Row 6 (RS): Ch 1, sc in first st, sc in next st, fptr around dc two rows below; rep from * across, ending with sc in last st, turn. (72 [80, 88, 96, 104, 112] sts)*
- Rows 7 through 66 (66, 70, 70, 75, 75): Repeat Rows 3 through 6 sequentially, establishing the repeating alpine texture. Fasten off at the end of the final row, leaving a long tail for seaming.
✅ Checkpoint: Measure your completed front panel. It should lie completely flat with crisp, even edges and a dense, raised textured face. Verify your stitch count matches your starting count across every row.
Section 2: Back Panel (Make 1)
Repeat all instructions from Section 1: Front Panel identically to create the second plain rectangle. Fasten off, leaving a long tail.
Section 3: Assembly & Seaming
- Shoulder Seams: Lay both the Front Panel and Back Panel flat with the Right Sides facing up. Align the top edges. Using your yarn needle and the mattress stitch, seam the outer shoulders inward for 4 (4.5, 5, 5.5, 6, 6.5) inches on each side, leaving the center unseamed for the neck opening.
- Side Seams: Fold the joined panels at the shoulder seam so front and back align. Use stitch markers to secure the side edges, leaving an unseamed opening at the top for the armholes matching your desired armhole depth from the Finished Measurements table (e.g., 8.5 to 11 inches down from the shoulder seam).
- Side Seaming: Seam the remaining side edges from the bottom straight hem up to the base of the armhole markers on both sides. Fasten off securely and weave in all remaining yarn tails.
✅ Checkpoint: Turn your finished vest right side out. Check that both armholes match in depth and that the side seams lie flat without puckering the alpine texture.
Size Customization Tips
- Adjusting Length: Because this vest features no shaping, you can easily customize the length by simply working fewer or more pattern repeats in Sections 1 and 2 before finishing. Each 4-row alpine block adds approximately 1.3 inches (3.3 cm) of length.
- Adjusting Width: To alter the bust circumference, adjust your starting chain in multiples of 2 stitches plus 1 to maintain the alternating pattern balance. Each 8-stitch increment alters the finished bust measurement by approximately 2 inches (5 cm).
Care Instructions
- Hand wash gently in cool water using a mild wool-safe detergent.
- Do not wring or twist the fabric; gently press out excess moisture using a clean towel.
- Reshape your garment carefully while damp and lay flat on a blocking mat or flat surface away from direct sunlight to dry.
- Do not iron or hang on narrow coat hangers to prevent shoulder stretching.
Crochet Vest With No Sleeves and No Shaping — Free Pattern
Thank you so much for stitching along with me today! I hope creating this breezy, textured layering staple brings as much joy to your hook as wearing it brings to your wardrobe.
If you make your own version, please share your progress and finished project with me! Tag me on social media using #CrochetVest, #FreeCrochetPattern, and #AlpineStitchVest, save this tutorial to your favorite Pinterest boards for later, and drop a comment below to let me know which colorway you chose!