
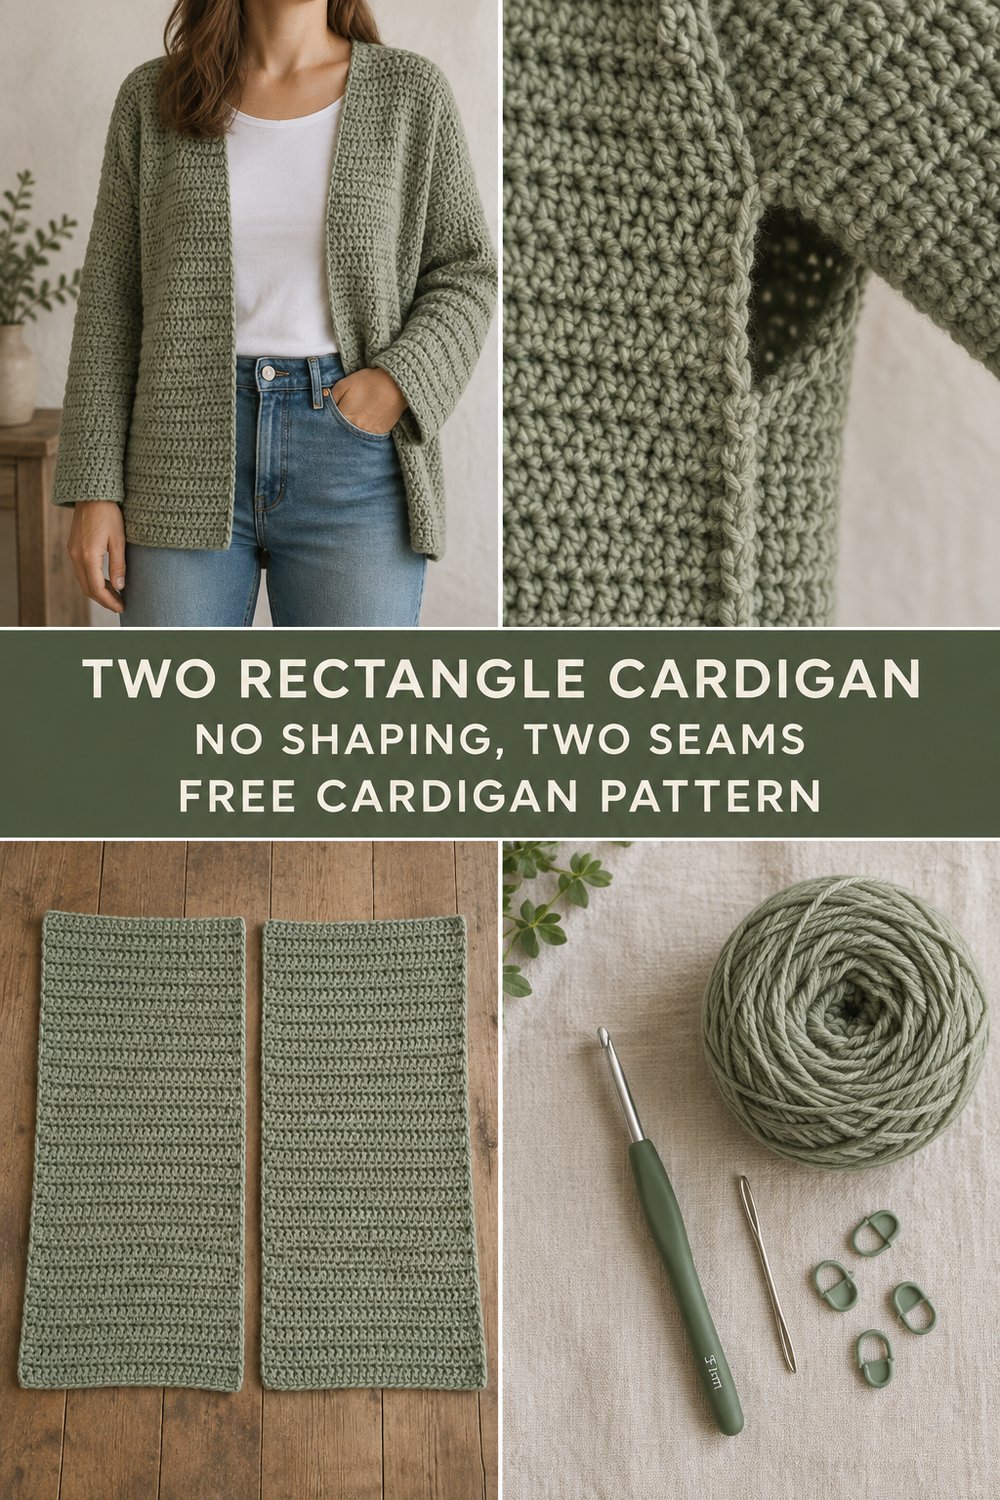
Wrap yourself in airy, hand-stitched comfort with this beautifully relaxed cardigan that feels as luxurious as it looks. Crafted in a soothing soft sage green, this effortless layering piece pairs seamlessly with your favorite white t-shirt and jeans for crisp mornings and cozy afternoons. Best of all, it achieves its slouchy, flattering drape using nothing more than two simple crochet rectangles and four straightforward seams.
Easy Crochet Cardigan From Two Rectangles — Free Pattern
Quick Facts
- Stitches Used: Double Crochet (dc), Chain (ch), Slip Stitch (sl st)
- Size Fit: XS/S through 5XL (Relaxed, oversized fit with drop shoulders)
- Estimated Hours to Complete: 8 to 12 hours
- Gift-Appeal: Highly giftable thanks to easy sizing, classic styling, and minimal finishing work!
Looking for a customized fit? Detailed instructions on adjusting width and length are provided in the Size Customization Tips section below!
What Makes This Easy Crochet Cardigan From Two Rectangles Special
The elegance of this cardigan lies in its clever simplicity. Built entirely from two identical flat rectangles, this project eliminates complex armhole shaping, raglan decreases, or tricky sleeve caps. By working soft sage green yarn in clean, rhythmic rows of standard double crochet, the finished panels develop a supple, fluid drape.
When folded over at the shoulders and joined down the center back and side seams, the width of the rectangles naturally falls off the shoulder to form relaxed, dolman-style long sleeves. The open front allows the cardigan to flow freely, making it the ultimate cozy staple for any wardrobe.
💡 Designer Tip: Because this pattern uses basic stitches worked in flat rows, it is an ideal project for practicing consistent side tension and straight stitch edges!
Skill Level
- Required Skills:
- Basic chain stitch and double crochet.
- Counting stitches to maintain straight rectangular edges.
- Basic seaming with a yarn needle (whip stitch).
- Fastening off and weaving in yarn tails.
If you can crochet a simple rectangular scarf, you already possess every skill required to complete this gorgeous wearable garment with confidence!
Finished Measurements
| Size | Fits Bust Circumference | Cardigan Back Width | Total Unfolded Length | Finished Length (Shoulder to Hem) | Armhole Depth |
|---|---|---|---|---|---|
| XS/S | 28–34 in / 71–86 cm | 20 in / 51 cm | 56 in / 142 cm | 28 in / 71 cm | 7 in / 18 cm |
| M/L | 36–42 in / 91–107 cm | 24 in / 61 cm | 60 in / 152 cm | 30 in / 76 cm | 8 in / 20 cm |
| XL/2XL | 44–50 in / 112–127 cm | 28 in / 71 cm | 64 in / 163 cm | 32 in / 81 cm | 9 in / 23 cm |
| 3XL/4XL | 52–58 in / 132–147 cm | 32 in / 81 cm | 66 in / 168 cm | 33 in / 84 cm | 10 in / 25 cm |
| 5XL | 60–64 in / 152–163 cm | 36 in / 91 cm | 68 in / 173 cm | 34 in / 86 cm | 11 in / 28 cm |
Materials You Will Need
| Color Name | Color Description | Yardage Needed (XS/S, M/L, XL/2XL, 3XL/4XL, 5XL) | Meters Needed |
|---|---|---|---|
| Soft Sage Green | Soft, muted sage green (Worsted Weight #4) | 1,100 / 1,350 / 1,650 / 1,950 / 2,250 yds | 1,005 / 1,235 / 1,510 / 1,783 / 2,057 m |
- Hook Size: 5.0 mm (US Size H-8) crochet hook (or size needed to meet gauge).
- Tools: Tapestry / yarn needle, locking stitch markers, tape measure, sharp scissors.
Yarn Suggestions
| Yarn Brand & Line | Fiber Content | Skein Yardage | Notes |
|---|---|---|---|
| Lion Brand Heartland (Sagebrush) | 100% Premium Acrylic | 251 yds / 230 m (142g) | Extremely soft texture, gentle sheen, and gorgeous natural drape. |
| Caron Simply Soft (Sage) | 100% Acrylic | 315 yds / 288 m (170g) | Budget-friendly, silky feel, and excellent stitch definition. |
| Cascade Yarns 220 Superwash (Sage) | 100% Superwash Wool | 220 yds / 200 m (100g) | Breathable, warm natural fiber choice with rich stitch clarity. |
⚠️ Note: Avoid using stiff cottons or tightly twisted linen yarns for this pattern. This garment relies on flexible, medium-weight yarns with soft drape to allow the drop shoulders to lay flat against the arms.
Gauge
| Measurement | Stitch / Row Count | Tool Used |
|---|---|---|
| 4 x 4 inches (10 x 10 cm) | 14 double crochet stitches x 8 rows | 5.0 mm (US H-8) Hook |
💡 Designer Tip: Always crochet a 5 x 5 inch test swatch before starting. If your swatch is too small, switch to a larger hook; if it is too large, switch to a smaller hook.
Abbreviations
| Abbreviation | Full Meaning |
|---|---|
| ch | Chain |
| dc | Double Crochet |
| st(s) | Stitch(es) |
| sl st | Slip Stitch |
| RS | Right Side |
| WS | Wrong Side |
| rep | Repeat |
Special Stitches Explained
1. Turning Chain 3 (Counts as 1 DC)
At the start of every double crochet row, chain 3. This chain replaces the first double crochet stitch of that row. When working across the following row, ensure your final stitch is placed directly into the top chain of this turning chain-3 to keep your edges straight and even.
2. Whip Stitch Seaming
Place the two rectangular edges parallel with Right Sides facing inward. Thread a tapestry needle with a 30-inch strand of sage yarn. Pass the needle under both loops of the outer stitch edge on panel A, then under both loops of the corresponding stitch edge on panel B. Draw yarn snug, repeating evenly along the join.
Pattern Instructions
The pattern is written for size XS/S with larger sizes in parentheses: XS/S (M/L, XL/2XL, 3XL/4XL, 5XL).
       [ RECTANGLE 1 ]            [ RECTANGLE 2 ]
    +-------------------+      +-------------------+
    |                   |      |                   |
    |                   |      |                   |
    |                   |      |                   |
    |<-  20(24,28,32,36)  ->|  |<-  20(24,28,32,36)  ->|
    |       inches      |      |       inches      |
    |                   |      |                   |
    |                   |      |                   |
    +-------------------+      +-------------------+
             ^                          ^
             |-- 56(60,64,66,68) inches --|
Section 1: Main Rectangles (Make 2 Identical Panels)
With 5.0 mm hook and Soft Sage Green yarn, ch 72 (86, 100, 114, 128).
Row 1 (RS): Dc in the 4th ch from hook (skipped 3 ch count as first dc), dc in each ch across. Turn. (70 (84, 98, 112, 126) dc)
Row 2 (WS): Ch 3 (counts as first dc here and throughout), skip first st, dc in second st and in each dc across, working final dc into the top of the turning ch-3 from previous row. Turn. (70 (84, 98, 112, 126) dc)
✅ Checkpoint: Measure the width of your row flat. It should measure approximately 20 (24, 28, 32, 36) inches / 51 (61, 71, 81, 91) cm across.
Rows 3–112 (120, 128, 132, 136): Repeat Row 2. (70 (84, 98, 112, 126) dc per row)
Fasten off leaving a long yarn tail (approx. 36 inches / 90 cm) for seaming.
Repeat Rows 1–112 (120, 128, 132, 136) for Panel 2.
✅ Checkpoint: You now have two identical flat rectangles measuring 20 (24, 28, 32, 36) inches wide by 56 (60, 64, 66, 68) inches long.
Section 2: Assembly and Seaming
        +-------------------+-------------------+
        |      FRONT 1      |      FRONT 2      |
        |                   |                   |
=================== SHOULDER FOLD LINE ===================
        |      BACK 1       |      BACK 2       |
        |                   |                   |
        +-------------------+-------------------+
                            ^
                     Center Back Seam
Step 1: Laying Out & Folding Panels
- Lay both finished rectangles flat side-by-side on a clean floor or table, long edges touching, with Right Sides facing up.
- Fold each rectangle in half end-to-end widthwise so Row 1 meets Row 112 (120, 128, 132, 136). The fold top line now creates your shoulder line.
Step 2: Center Back Seam
- Align the inner long edges of the two back sections.
- Using yarn needle and whip stitch, seam the inner back edges together starting from the bottom back hem up to the top shoulder fold line.
- Fasten off and weave in end.
⚠️ Note: Do NOT seam the front inner edges! Leave the front open to create the open cardigan silhouette.
                  SHOULDER FOLD
                  /           \
                 /             \
    Unseamed    /               \   Unseamed
    Armhole    |  BACK   FRONT   |  Armhole
    Opening    |  SEAM   OPENING |  Opening
               |   ||      ||    |
               +---||------||----+
                   ||      ||
               Side Seam   Side Seam
Step 3: Side Seams & Armhole Openings
- Measure down from the top shoulder fold along each outer side edge to define your armholes: 7 (8, 9, 10, 11) inches / 18 (20, 23, 25, 28) cm.
- Place a stitch marker at this point on both left and right sides to mark the bottom of the armholes.
- Thread yarn needle with sage yarn. Beginning at the bottom hem corner, whip stitch the front and back outer edges together up to the stitch marker.
- Fasten off and weave in all yarn ends.
✅ Checkpoint: Try on your seamed cardigan! The back center will be fully closed, the side seams will hold the body together below the armholes, and the oversized panel width will drop gracefully down your upper arms.
Size Customization Tips
- Adjusting Cardigan Length: To make your cardigan longer (or cropped), simply add or subtract rows in pairs of two. Every 2 rows added or subtracted changes the total unfolded panel length by 1 inch (adjusting finished shoulder-to-hem length by 0.5 inches / 1.3 cm).
- Adjusting Width / Sleeve Drop: To make the cardigan wider across the back and give more sleeve drop, add starting chains in multiples of 1. Every 3.5 chain stitches added increases the width of each panel by 1 inch (2.5 cm), widening the back by 2 inches (5 cm) total.
Care Instructions
To preserve the soft feel and shape of your handmade cardigan:
1. Washing: Machine wash on gentle cycle in cold water inside a mesh laundry bag, or hand wash with mild wool wash.
2. Drying: Gently press excess water out with a towel—never wring or twist. Lay flat on a blocking mat or towel to dry completely.
3. Storage: Fold flat in a drawer rather than hanging on a coat hanger to prevent shoulder stretching over time.
Easy Crochet Cardigan From Two Rectangles — Free Pattern
Thank you so much for stitching along with me! I hope you love wearing this effortlessly stylish sage cardigan as much as I loved designing it. If you enjoyed this pattern, please save it to your favorite Pinterest crochet boards, leave a comment below with your yarn choices, and tag @yourcraftstudio on social media so I can see your beautiful finished cardigans! Happy crocheting!