
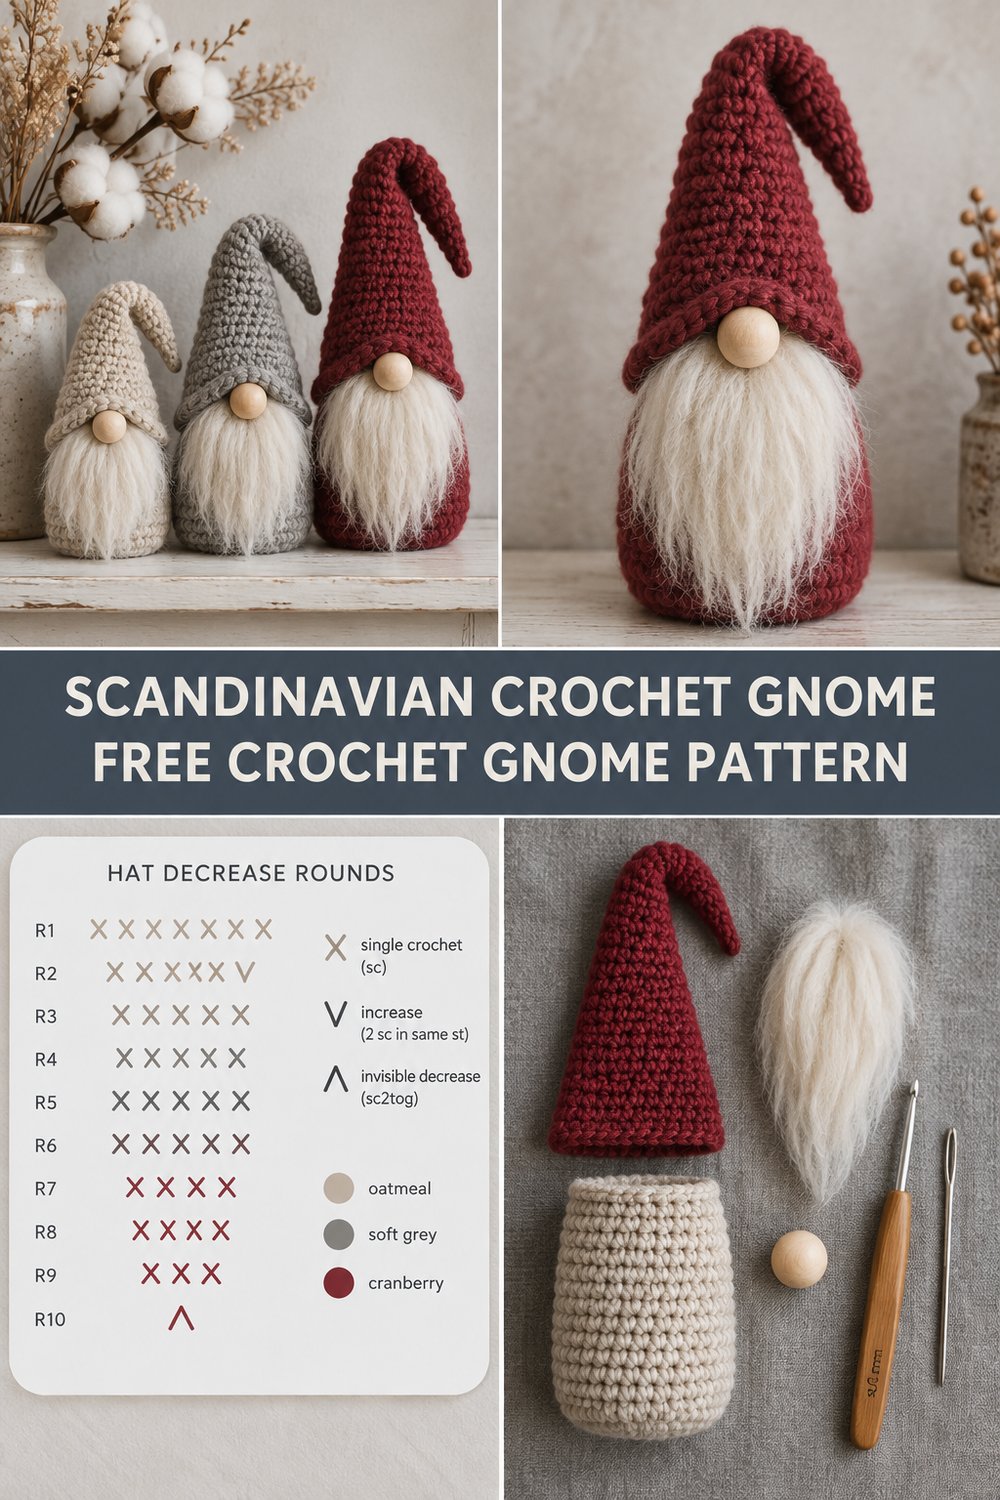
Cozy up your home with a touch of Nordic charm! These adorable Scandinavian crochet gnomes bring warmth and whimsy to any space, perfect for adding a handmade touch to your seasonal decor or gifting to loved ones. Their simple yet iconic design, featuring a long, slouchy hat and a fluffy beard, makes them an instant favorite.
Quick Facts
These delightful gnomes are constructed primarily using single crochet and slip stitches, making them a fantastic project for improving your amigurumi skills. They are designed to stand freely as decorative accents and make charming holiday crochet gifts or year-round whimsical decor. Expect to spend approximately 2-4 hours per gnome, depending on its size and your crochet speed.
Looking to personalize your gnome’s height or girth? Customization tips for sizing are included later in the pattern!
This Scandinavian crochet gnome pattern captures the quintessential gnome aesthetic through a combination of straightforward techniques. The hats are designed with a gentle, continuous decrease that creates that characteristic long pointed slouchy hat silhouette, with the shaping meticulously mapped out in the accompanying chart for visual clarity. The bodies are worked in simple rounds, forming a stable base. The fluffy beards are achieved using a brush-out technique on brushed alpaca or similar fiber, giving a wonderfully authentic and tactile feel. The prominent round wooden-bead nose is a delightful focal point, giving each gnome a distinct personality without the need for intricate facial features. This construction method ensures a quick, satisfying make with a professional, handcrafted finish that truly embodies the Scandinavian gnome spirit.
Skill Level
This pattern is suitable for Intermediate crocheters.
- Magic Ring (MR)
- Single Crochet (sc)
- Slip Stitch (sl st)
- Single Crochet Decrease (sc2tog)
- Working in continuous rounds
- Basic sewing and assembly skills
If you’re comfortable with fundamental crochet stitches and working in the round, you’ll find this easy crochet gnome project a joy to create!
Finished Measurements
| Gnome Size | Height (including hat) | Base Diameter |
|---|---|---|
| Small | 7.5 in / 19 cm | 2.5 in / 6.5 cm |
| Medium | 9.5 in / 24 cm | 3 in / 7.5 cm |
| Large | 11.5 in / 29 cm | 3.5 in / 9 cm |
Materials You Will Need
| Color | Weight/Type | Yardage (approx.) |
|---|---|---|
| Oatmeal | Worsted weight (Cat. 4) acrylic | 60 yds / 55 m |
| Soft Grey | Worsted weight (Cat. 4) acrylic | 70 yds / 64 m |
| Cranberry | Worsted weight (Cat. 4) acrylic | 80 yds / 73 m |
| White/Cream | Worsted weight (Cat. 4) acrylic | 10 yds / 9 m |
| Light Pink | DK weight (Cat. 3) for nose | 5 yds / 4.5 m |
- 4mm (G/6) crochet hook
- Tapestry needle
- Stitch marker
- Polyester fiberfill for stuffing
- Dried cotton stems (for optional display)
- 1 inch (2.5 cm) wooden bead (for nose)
- Brushed alpaca yarn or similar fiber for beard (approx. 5-10 yds, matching body color or white)
- Scissors
Yarn Suggestions
For that authentic tactile feel and visible stitch definition, I recommend using a good quality acrylic or wool blend.
| Brand/Line | Weight | Yardage/Skein | Notes |
|---|---|---|---|
| Lion Brand Vanna’s Choice | Worsted | 170 yds | Great stitch definition, wide color range. |
| Red Heart Super Saver | Worsted | 364 yds | Economical, durable, good for beginner amigurumi. |
| Caron Simply Soft | Worsted | 315 yds | Soft drape, slight sheen, good for cozy feel. |
⚠️ Note: Avoid novelty yarns that are overly fuzzy or have irregular texture for the main body and hat, as they can obscure stitch definition and make decreases harder to see. For the beard, however, a brushed alpaca or mohair blend works beautifully!
Gauge
| Stitch/Round | Measurement |
|---|---|
| 4 sc x 4 rounds | 1 inch / 2.5 cm |
| 15 sc x 15 rounds | 4 inches / 10 cm |
💡 Designer Tip: Always swatch first! A slight difference in gauge can significantly alter the finished size of your gnome. Adjust your hook size up or down as needed to meet the stated gauge.
Abbreviations
| Abbreviation | Full Term |
|---|---|
| ch | chain |
| sc | single crochet |
| sl st | slip stitch |
| MR | magic ring |
| sc2tog | single crochet 2 together (decrease) |
| st(s) | stitch(es) |
| rnd | round |
| fo | fasten off |
Special Stitches Explained
There are no complex “special stitches” beyond standard single crochet and decreases used in this pattern. The magic ring (MR) is used to start the hat and body, ensuring a tight closure.
Pattern Instructions
We will be working in continuous rounds unless otherwise stated. Use a stitch marker to keep track of the first stitch of each round.
### Section 1: Gnome Body (Make 1 per gnome)
Using your chosen body color (Oatmeal, Soft Grey, or Cranberry) and 4mm hook.
For Small Gnome Body:
* Rnd 1: 6 sc in MR. (6 sc)
* Rnd 2: 2 sc in each st around. (12 sc)
* Rnd 3: (1 sc, 2 sc in next st) repeat 6 times. (18 sc)
* Rnd 4: (2 sc, 2 sc in next st) repeat 6 times. (24 sc)
* Rnd 5: (3 sc, 2 sc in next st) repeat 6 times. (30 sc)
* Rnd 6: Sc in each st around. (30 sc)
* Rnd 7: (4 sc, 2 sc in next st) repeat 6 times. (36 sc)
* Rnd 8-18: Sc in each st around. (11 rounds) (36 sc)
* Stuff body firmly with fiberfill as you go, continuing to add stuffing until fully formed.
* Rnd 19: (4 sc, sc2tog) repeat 6 times. (30 sc)
* Rnd 20: Sc in each st around. (30 sc)
* Rnd 21: (3 sc, sc2tog) repeat 6 times. (24 sc)
* Rnd 22: Sc in each st around. (24 sc)
* Rnd 23: (2 sc, sc2tog) repeat 6 times. (18 sc)
* Rnd 24: Sc in each st around. (18 sc)
* Sl st to next st. Fo, leaving a long tail for closing.
* Using tapestry needle, weave tail through front loop of remaining 18 stitches and pull tight to close. Weave in end.
✅ Checkpoint: At the end of Rnd 7, your body base should measure approximately 1.75 inches / 4.5 cm in diameter.
For Medium Gnome Body:
* Rnd 1: 6 sc in MR. (6 sc)
* Rnd 2: 2 sc in each st around. (12 sc)
* Rnd 3: (1 sc, 2 sc in next st) repeat 6 times. (18 sc)
* Rnd 4: (2 sc, 2 sc in next st) repeat 6 times. (24 sc)
* Rnd 5: (3 sc, 2 sc in next st) repeat 6 times. (30 sc)
* Rnd 6: Sc in each st around. (30 sc)
* Rnd 7: (4 sc, 2 sc in next st) repeat 6 times. (36 sc)
* Rnd 8: Sc in each st around. (36 sc)
* Rnd 9: (5 sc, 2 sc in next st) repeat 6 times. (42 sc)
* Rnd 10-22: Sc in each st around. (13 rounds) (42 sc)
* Stuff body firmly with fiberfill as you go.
* Rnd 23: (5 sc, sc2tog) repeat 6 times. (36 sc)
* Rnd 24: Sc in each st around. (36 sc)
* Rnd 25: (4 sc, sc2tog) repeat 6 times. (30 sc)
* Rnd 26: Sc in each st around. (30 sc)
* Rnd 27: (3 sc, sc2tog) repeat 6 times. (24 sc)
* Rnd 28: Sc in each st around. (24 sc)
* Sl st to next st. Fo, leaving a long tail for closing.
* Using tapestry needle, weave tail through front loop of remaining 24 stitches and pull tight to close. Weave in end.
✅ Checkpoint: At the end of Rnd 9, your body base should measure approximately 2 inches / 5 cm in diameter.
For Large Gnome Body:
* Rnd 1: 6 sc in MR. (6 sc)
* Rnd 2: 2 sc in each st around. (12 sc)
* Rnd 3: (1 sc, 2 sc in next st) repeat 6 times. (18 sc)
* Rnd 4: (2 sc, 2 sc in next st) repeat 6 times. (24 sc)
* Rnd 5: (3 sc, 2 sc in next st) repeat 6 times. (30 sc)
* Rnd 6: Sc in each st around. (30 sc)
* Rnd 7: (4 sc, 2 sc in next st) repeat 6 times. (36 sc)
* Rnd 8: Sc in each st around. (36 sc)
* Rnd 9: (5 sc, 2 sc in next st) repeat 6 times. (42 sc)
* Rnd 10: Sc in each st around. (42 sc)
* Rnd 11: (6 sc, 2 sc in next st) repeat 6 times. (48 sc)
* Rnd 12-26: Sc in each st around. (15 rounds) (48 sc)
* Stuff body firmly with fiberfill as you go.
* Rnd 27: (6 sc, sc2tog) repeat 6 times. (42 sc)
* Rnd 28: Sc in each st around. (42 sc)
* Rnd 29: (5 sc, sc2tog) repeat 6 times. (36 sc)
* Rnd 30: Sc in each st around. (36 sc)
* Rnd 31: (4 sc, sc2tog) repeat 6 times. (30 sc)
* Rnd 32: Sc in each st around. (30 sc)
* Sl st to next st. Fo, leaving a long tail for closing.
* Using tapestry needle, weave tail through front loop of remaining 30 stitches and pull tight to close. Weave in end.
✅ Checkpoint: At the end of Rnd 11, your body base should measure approximately 2.25 inches / 5.5 cm in diameter.
### Section 2: Gnome Hat (Make 1 per gnome)
Using your chosen hat color (Oatmeal, Soft Grey, or Cranberry) and 4mm hook. The hat is worked in continuous rounds.
For Small Gnome Hat:
* Rnd 1: 6 sc in MR. (6 sc)
* Rnd 2: Sc in each st around. (6 sc)
* Rnd 3: (1 sc, 2 sc in next st) repeat 3 times. (9 sc)
* Rnd 4-6: Sc in each st around. (3 rounds) (9 sc)
* Rnd 7: (2 sc, 2 sc in next st) repeat 3 times. (12 sc)
* Rnd 8-10: Sc in each st around. (3 rounds) (12 sc)
* Rnd 11: (3 sc, 2 sc in next st) repeat 3 times. (15 sc)
* Rnd 12-14: Sc in each st around. (3 rounds) (15 sc)
* Rnd 15: (4 sc, 2 sc in next st) repeat 3 times. (18 sc)
* Rnd 16-18: Sc in each st around. (3 rounds) (18 sc)
* Rnd 19: (5 sc, 2 sc in next st) repeat 3 times. (21 sc)
* Rnd 20-22: Sc in each st around. (3 rounds) (21 sc)
* Rnd 23: (6 sc, 2 sc in next st) repeat 3 times. (24 sc)
* Rnd 24-26: Sc in each st around. (3 rounds) (24 sc)
* Rnd 27: (7 sc, 2 sc in next st) repeat 3 times. (27 sc)
* Rnd 28-30: Sc in each st around. (3 rounds) (27 sc)
* Rnd 31: (8 sc, 2 sc in next st) repeat 3 times. (30 sc)
* Rnd 32-34: Sc in each st around. (3 rounds) (30 sc)
* Rnd 35: (9 sc, 2 sc in next st) repeat 3 times. (33 sc)
* Rnd 36-38: Sc in each st around. (3 rounds) (33 sc)
* Rnd 39: (10 sc, 2 sc in next st) repeat 3 times. (36 sc)
* Rnd 40-42: Sc in each st around. (3 rounds) (36 sc)
* Sl st to next st. Fo, weave in ends.
💡 Designer Tip: For a slightly floppier hat, add a few more plain sc rounds between increase rounds. For a stiffer hat, omit a round or two.
For Medium Gnome Hat:
* Rnd 1: 6 sc in MR. (6 sc)
* Rnd 2: Sc in each st around. (6 sc)
* Rnd 3: (1 sc, 2 sc in next st) repeat 3 times. (9 sc)
* Rnd 4-6: Sc in each st around. (3 rounds) (9 sc)
* Rnd 7: (2 sc, 2 sc in next st) repeat 3 times. (12 sc)
* Rnd 8-10: Sc in each st around. (3 rounds) (12 sc)
* Rnd 11: (3 sc, 2 sc in next st) repeat 3 times. (15 sc)
* Rnd 12-14: Sc in each st around. (3 rounds) (15 sc)
* Rnd 15: (4 sc, 2 sc in next st) repeat 3 times. (18 sc)
* Rnd 16-18: Sc in each st around. (3 rounds) (18 sc)
* Rnd 19: (5 sc, 2 sc in next st) repeat 3 times. (21 sc)
* Rnd 20-22: Sc in each st around. (3 rounds) (21 sc)
* Rnd 23: (6 sc, 2 sc in next st) repeat 3 times. (24 sc)
* Rnd 24-26: Sc in each st around. (3 rounds) (24 sc)
* Rnd 27: (7 sc, 2 sc in next st) repeat 3 times. (27 sc)
* Rnd 28-30: Sc in each st around. (3 rounds) (27 sc)
* Rnd 31: (8 sc, 2 sc in next st) repeat 3 times. (30 sc)
* Rnd 32-34: Sc in each st around. (3 rounds) (30 sc)
* Rnd 35: (9 sc, 2 sc in next st) repeat 3 times. (33 sc)
* Rnd 36-38: Sc in each st around. (3 rounds) (33 sc)
* Rnd 39: (10 sc, 2 sc in next st) repeat 3 times. (36 sc)
* Rnd 40-42: Sc in each st around. (3 rounds) (36 sc)
* Rnd 43: (11 sc, 2 sc in next st) repeat 3 times. (39 sc)
* Rnd 44-46: Sc in each st around. (3 rounds) (39 sc)
* Rnd 47: (12 sc, 2 sc in next st) repeat 3 times. (42 sc)
* Rnd 48-50: Sc in each st around. (3 rounds) (42 sc)
* Sl st to next st. Fo, weave in ends.
For Large Gnome Hat:
* Rnd 1: 6 sc in MR. (6 sc)
* Rnd 2: Sc in each st around. (6 sc)
* Rnd 3: (1 sc, 2 sc in next st) repeat 3 times. (9 sc)
* Rnd 4-6: Sc in each st around. (3 rounds) (9 sc)
* Rnd 7: (2 sc, 2 sc in next st) repeat 3 times. (12 sc)
* Rnd 8-10: Sc in each st around. (3 rounds) (12 sc)
* Rnd 11: (3 sc, 2 sc in next st) repeat 3 times. (15 sc)
* Rnd 12-14: Sc in each st around. (3 rounds) (15 sc)
* Rnd 15: (4 sc, 2 sc in next st) repeat 3 times. (18 sc)
* Rnd 16-18: Sc in each st around. (3 rounds) (18 sc)
* Rnd 19: (5 sc, 2 sc in next st) repeat 3 times. (21 sc)
* Rnd 20-22: Sc in each st around. (3 rounds) (21 sc)
* Rnd 23: (6 sc, 2 sc in next st) repeat 3 times. (24 sc)
* Rnd 24-26: Sc in each st around. (3 rounds) (24 sc)
* Rnd 27: (7 sc, 2 sc in next st) repeat 3 times. (27 sc)
* Rnd 28-30: Sc in each st around. (3 rounds) (27 sc)
* Rnd 31: (8 sc, 2 sc in next st) repeat 3 times. (30 sc)
* Rnd 32-34: Sc in each st around. (3 rounds) (30 sc)
* Rnd 35: (9 sc, 2 sc in next st) repeat 3 times. (33 sc)
* Rnd 36-38: Sc in each st around. (3 rounds) (33 sc)
* Rnd 39: (10 sc, 2 sc in next st) repeat 3 times. (36 sc)
* Rnd 40-42: Sc in each st around. (3 rounds) (36 sc)
* Rnd 43: (11 sc, 2 sc in next st) repeat 3 times. (39 sc)
* Rnd 44-46: Sc in each st around. (3 rounds) (39 sc)
* Rnd 47: (12 sc, 2 sc in next st) repeat 3 times. (42 sc)
* Rnd 48-50: Sc in each st around. (3 rounds) (42 sc)
* Rnd 51: (13 sc, 2 sc in next st) repeat 3 times. (45 sc)
* Rnd 52-54: Sc in each st around. (3 rounds) (45 sc)
* Rnd 55: (14 sc, 2 sc in next st) repeat 3 times. (48 sc)
* Rnd 56-58: Sc in each st around. (3 rounds) (48 sc)
* Sl st to next st. Fo, weave in ends.
### Section 3: Gnome Nose (Make 1 per gnome)
Using Light Pink DK weight yarn and 4mm hook.
* Rnd 1: 6 sc in MR. (6 sc)
* Rnd 2: 2 sc in each st around. (12 sc)
* Rnd 3: (1 sc, 2 sc in next st) repeat 6 times. (18 sc)
* Rnd 4-5: Sc in each st around. (2 rounds) (18 sc)
* Rnd 6: (1 sc, sc2tog) repeat 6 times. (12 sc)
* Stuff lightly with fiberfill.
* Rnd 7: Sc2tog repeat 6 times. (6 sc)
* Sl st to next st. Fo, leaving a long tail for sewing. Weave tail through front loop of remaining 6 stitches and pull tight to close.
### Section 4: Beard
Using white or body-matching brushed alpaca yarn (or similar fluffy fiber).
- Cut approximately 30-40 strands of yarn, each about 6-8 inches (15-20 cm) long. Adjust quantity based on desired beard fullness.
- Fold each strand in half.
- Using your crochet hook or tapestry needle, attach each folded strand to the front of the gnome body, starting from the center front and working outwards in a “U” shape. Insert the hook into an sc stitch, pull the folded loop through, then pull the two ends of the yarn through the loop to create a fringe (lark’s head knot).
- Attach rows of fringe until you have a full beard that covers the front of the body where the hat will sit.
- Once all strands are attached, use a slicker brush (a pet brush works well!) or a wire brush to gently brush out the yarn fibers. This will separate the plies and create a soft, fluffy texture. Be patient, it takes some brushing!
- Trim the beard to your desired length and shape.
💡 Designer Tip: If you don’t have brushed alpaca, you can achieve a similar effect with regular worsted weight acrylic yarn by unraveling the plies of each strand before attaching, then brushing.
### Section 5: Assembly
- Position the beard on the gnome body.
- Center the crochet nose slightly above the beard. Using the long tail, sew the nose securely to the body, tucking it just under the rim of where the hat will sit.
- Place the hat over the gnome body, allowing the rim to rest just above the nose and beard. Position the hat so it flops charmingly to one side, as desired.
- Using the hat’s body color yarn and tapestry needle, stitch the rim of the hat to the gnome body all the way around to secure it. This also helps to hold the beard in place.
✅ Checkpoint: Once assembled, give your gnome a gentle squeeze to ensure it’s firmly stuffed and all parts are securely attached.
Size Customization Tips
- To increase height: Add more plain sc rounds between the increase rounds for both the body and the hat. Each added round will increase height by approximately 0.25 inches / 0.6 cm.
- To increase width: Add more increase rounds to the base of the body and the widest part of the hat. For example, instead of (X sc, 2 sc in next st) repeat 6 times, you could do (X+1 sc, 2 sc in next st) repeat 6 times, and then add corresponding rounds to the hat. Each additional increase round will add about 0.5 inches / 1.25 cm to the diameter.
- To decrease height/width: Reverse the above tips – remove plain sc rounds or decrease rounds.
Care Instructions
Spot clean your gnomes with a damp cloth and mild soap. Do not machine wash or dry, as this can distort the shape and damage the fiberfill and beard. Allow to air dry completely.
I hope you’ve enjoyed creating your very own little piece of Nordic magic! These charming crochet tomte are not just for Christmas; they bring joy year-round. Share your finished gnomes with me – I love seeing your creations! Tag me on social media with #ScandinavianCrochetGnome and save this pattern to your Pinterest board so others can find it too. Drop a comment below and let me know which color combination is your favorite! Happy crocheting!