












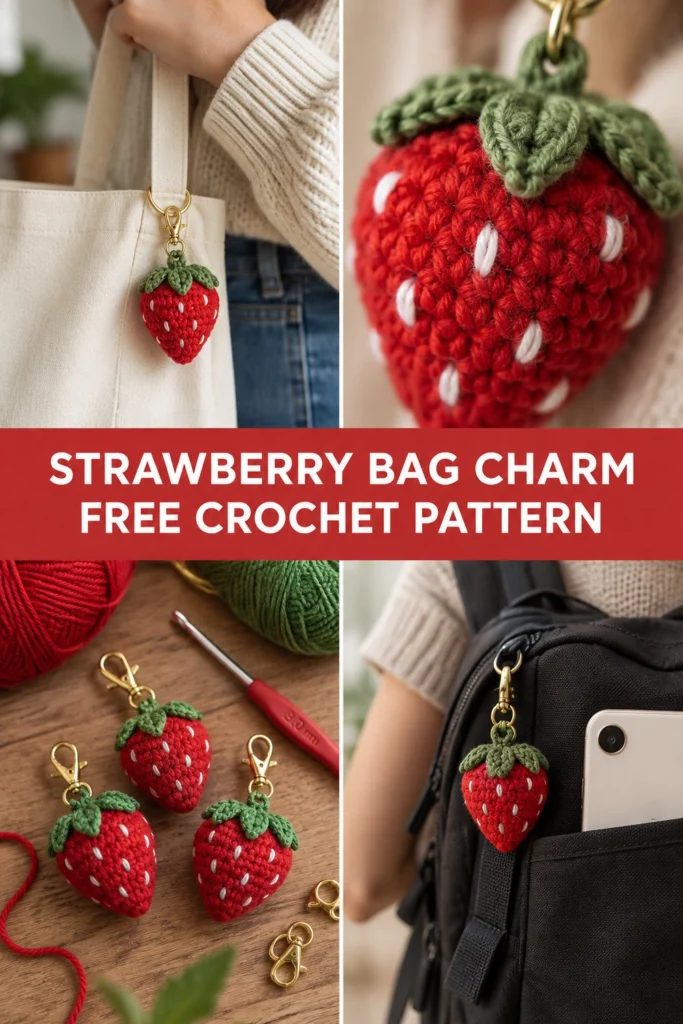
Add a little sweetness to any bag, set of keys, or zipper with a handmade crochet strawberry charm. This quick and rewarding project works up in about thirty minutes using simple single crochet stitches, making it a fantastic gift for friends.
Quick Facts
| Category | Detail |
|---|---|
| Skill level | Beginner / Easy |
| Finished size | Approx. 2.5 in / 6.5 cm tall, 2 in / 5 cm wide (excluding cap and hardware) |
| Yarn | Fingering or Sport weight cotton yarn in Red, Green, and White |
| Hook | 3.0 mm (US C/2 or D/3) |
| Stitches used | ch, sc, inc, dec, sl st |
| Time to make | 30 minutes |
Size customization tips are included further down in the article.
What Makes This Crochet Strawberry Bag Charm Special
This charming accessory combines continuous amigurumi rounds with simple embroidery and secure hardware. Working the body in a classic 6-stitch start and increasing evenly ensures a smooth, symmetrical cone shape. The pointed green cap is worked directly over the top opening to frame the metal clasp neatly, while embroidered stitches scattered across the berry create the classic strawberry seed look without any loose ends inside.
Skill Level
- Basic amigurumi construction in continuous spiral rounds
- Working magic rings and increases/decreases
- Simple surface embroidery (French knots or straight stitches)
- Attaching split rings and swivel clasps
- Reassurance: If you know how to single crochet in the round, you can easily finish this project today.
Finished Measurements
| Dimension | Inches | Centimeters |
| — | — |
| Height (Berry + Cap) | 2.5 in | 6.5 cm |
| Width (Widest point) | 2.0 in | 5 cm |
Materials You Will Need
| Material / Color | Yarn Weight / Details | Quantity |
|---|---|---|
| Red (Main Body) | Sport weight mercerized cotton | 15 yards / 14 meters |
| Green (Cap & Loop) | Sport weight mercerized cotton | 8 yards / 7 meters |
| White (Seeds) | Embroidery floss or sport cotton | 2 yards / 2 meters |
| Crochet Hook | 3.0 mm (US C/2 or D/3) | 1 hook |
| Hardware | Gold or bronze swivel snap hook with split ring | 1 set |
| Notions | Polyester fiberfill stuffing, yarn needle, stitch marker, scissors | – |
Yarn Suggestions
| Yarn Line | Weight | Notes |
|---|---|---|
| Schachenmayr Catania | Sport (Fine) | Excellent stitch definition, mercerized sheen for amigurumi |
| Hobbii Rainbow Cotton 8/4 | Fingering / Sport | Wide color range, highly durable 100% cotton |
| DMC Natura Just Cotton | Sport (Fine) | Soft matte finish, perfect for small accessories |
⚠️ Note: Avoid fuzzy acrylic yarns for this project, as they obscure the crisp stitch definition needed for a neat amigurumi fruit shape.
Gauge
| Measurement | Stitch / Area |
|---|---|
| Gauge | 22 sts x 24 rounds = 4 in / 10 cm in single crochet |
| Circle Check | Rnds 1 to 4 of the berry base = 1.25 in / 3.2 cm across |
Abbreviations
| Abbreviation | Meaning |
|---|---|
| ch | chain |
| sc | single crochet |
| inc | single crochet increase (2 sc in the same stitch) |
| dec | invisible single crochet decrease (sc next 2 sts together through front loops) |
| sl st | slip stitch |
| st(s) | stitch(es) |
| rnd(s) | round(s) |
| rep | repeat |
| FO | fasten off |
UK: sc = dc, hdc = htr, dc = tr.
Special Stitches Explained
- Magic Ring: Wrap yarn around your index finger twice to form a ring, insert hook under strands, pull up a loop, ch 1, and work the first round of stitches into the center of the ring. Pull the tail to close securely.
- Invisible Decrease (dec): Insert hook into the front loop only of the next stitch, then immediately insert hook into the front loop only of the following stitch. Yarn over and pull through both front loops, yarn over and pull through remaining 2 loops on hook.
Pattern Instructions
Pattern Notes: The strawberry body is worked in continuous spiral rounds without joining. Use a stitch marker to keep track of the first stitch of each round. Do not turn your work.
Section 1: Strawberry Body (Red, make 1)
Rnd 1: Start 6 sc in a magic ring (6 sc)
Rnd 2: (sc in next st, inc) x 3 (9 sc)
Rnd 3: (sc in next 2 sts, inc) x 3 (12 sc)
Rnd 4: (sc in next st, inc) x 6 (18 sc)
Rnds 5 to 6: sc in each st around (18 sc)
Rnd 7: (sc in next 2 sts, inc) x 6 (24 sc)
Rnds 8 to 11: sc in each st around (24 sc)
Rnd 12: (sc in next 2 sts, dec) x 6 (18 sc)
✅ Checkpoint: At Rnd 12, pause to embroider your white seed stitches across Rnds 4 through 11 using straight stitches or French knots with your white yarn or embroidery floss. Weave in ends securely on the inside.
Rnd 13: (sc in next st, dec) x 6 (12 sc)
Firmly stuff the strawberry with fiberfill now, shaping the pointy tip.
Rnd 14: dec x 6 (6 sc)
FO, leaving a 6 in / 15 cm tail. Thread tail through front loops of remaining 6 stitches and pull tight to close the hole completely. Hide the tail inside the body.
Section 2: Green Cap & Hanging Loop (Green, make 1)
The cap is worked in joined rounds directly over the top of the strawberry.
Rnd 1: Join green yarn with a sl st to any exposed loop around the top opening of the strawberry body (near Rnd 13/14). Ch 1, work 12 sc evenly around the top opening, join with a sl st to the first sc (12 sc)
Rnd 2: *[Ch 5, working down the chain: sl st in 2nd ch from hook, sc in next ch, hdc in next ch, dc in last ch; skip 1 st on base ring, sl st in next st] rep from * to * 6 times total to create 6 pointy leaves radiating outward, join with a sl st to the base of the first leaf.
Rnd 3: Ch 8 to form the hanging loop. Sl st into the same base stitch where the chain started to secure the loop ring. FO, weaving in all starting and ending tails neatly inside the cap.
Assembly & Finishing
- Open the gold swivel clasp and attach the split ring.
- Thread the green crocheted hanging loop through the metal split ring and secure it by reinforcing a few stitches at the base of the loop if necessary, or simply let it hang freely through the ring.
- Check all embroidered seed placements and trim any remaining ends.
Size Customization Tips
- To make a larger strawberry bag charm, start with 8 sc in the magic ring and increase by 8 stitches per round until you reach your desired width, then mirror the decrease rounds accordingly.
- To make a smaller charm, use fingering weight yarn with a 2.0 mm or 2.5 mm hook and keep the same pattern count.
Care Instructions
Spot clean gently with a damp cloth and mild soap. Do not submerge fully in water if fiberfill stuffing is dense, or air dry thoroughly in a well-ventilated area.
FAQ
Can I use acrylic yarn instead of cotton?
Yes, you can use acrylic yarn, but mercerized cotton gives amigurumi a much cleaner, smoother finish with less fuzz over time.
How do I attach the bag charm securely to a backpack?
The included swivel snap hook clips directly onto any zipper pull, D-ring, or strap loop on your bag.
Is this project safe for toddlers?
For children under 3 years old, omit small metal hardware parts and securely embroider facial features or use safe stitching alternatives instead of detachable metal clips.
Happy Crocheting!
I hope you enjoyed making this sweet strawberry bag charm! Be sure to save this pin on Pinterest and leave a comment below sharing what color combination you decided to use for your berries. Happy crafting!
📄 Your free PDF pattern