











6. Polar Bear Coaster
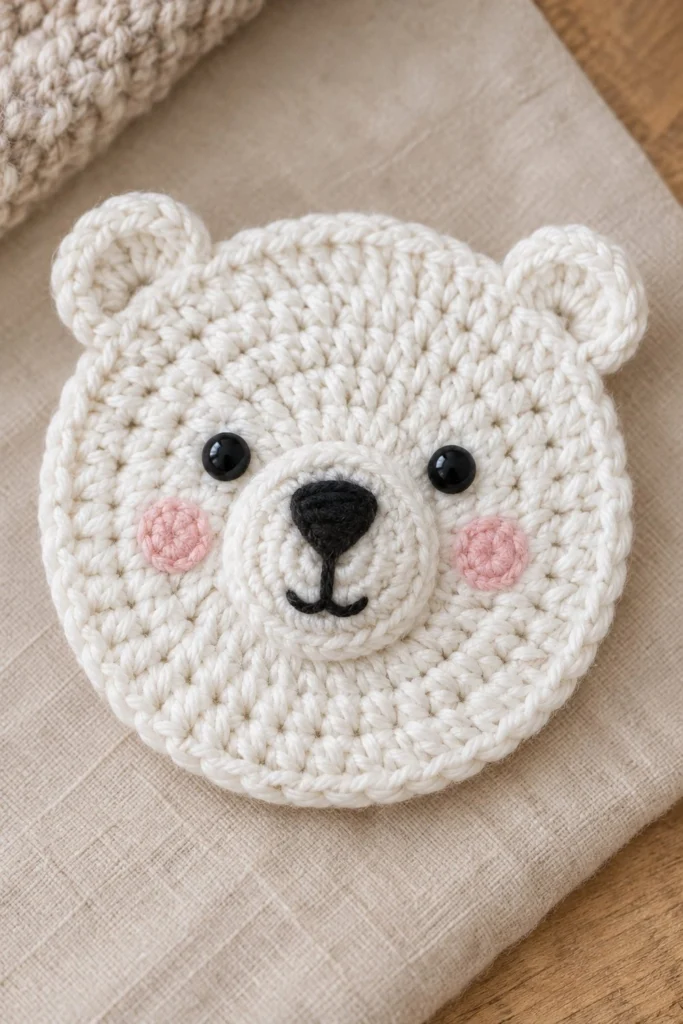
Bring a touch of cozy charm to your coffee table with this adorable crochet polar bear coaster. Featuring sweet pink cheeks, a friendly embroidered snout, and tiny round ears, this quick project works up in under an hour and makes a delightful handmade gift. Finished size is 4 inches (10 cm) across.
Quick Facts
| Skill level | Finished size | Yarn | Hook | Time |
|---|---|---|---|---|
| Easy | 4 in / 10 cm across | DK cotton (Cat. 3) | 3.5 mm (US E/4) | 45 minutes |
Materials You Will Need
- DK weight 100% cotton yarn: 20g white, small scrap of black for the nose and mouth, small scrap of light pink for the cheeks
- 3.5 mm (US E/4) crochet hook
- Two 6 mm black safety eyes
- Yarn needle for weaving in ends and embroidery
- Scissors
- Stitch marker
Gauge
The first 3 rounds of the main head piece measure approximately 2 inches (5 cm) across. Working with even tension matters more than exact gauge for this coaster.
Abbreviations (US Terms)
- ch – chain
- sc – single crochet
- hdc – half double crochet
- inc – single crochet increase (2 sc in the same stitch)
- sl st – slip stitch
- BLO – back loop only
- st(s) – stitch(es)
- Rnd(s) – round(s)
UK terms: sc = dc, hdc = htr, dc = tr.
Pattern Notes
- The main head and snout are worked in continuous spiral rounds without joining, unless otherwise stated. Use a stitch marker to keep track of the first stitch of each round.
- The stitch count at the end of each round is shown in brackets.
- Cheeks and ears are made separately and sewn on during assembly.
Instructions
Main Head – White, make 1
Rnd 1: 6 sc in a magic ring (6)
Rnd 2: inc x 6 (12)
Rnd 3: (sc, inc) x 6 (18)
Rnd 4: (2 sc, inc) x 6 (24)
Rnd 5: (3 sc, inc) x 6 (30)
Rnd 6: (4 sc, inc) x 6 (36)
Rnd 7: (5 sc, inc) x 6 (42)
Rnd 8: (6 sc, inc) x 6 (48)
Rnd 9: (7 sc, inc) x 6 (54)
Rnd 10: sc in each st around (54)
Fasten off, weave in ends neatly.
Snout – White, make 1
Rnd 1: 6 sc in a magic ring (6)
Rnd 2: inc x 6 (12)
Rnd 3: (sc, inc) x 6 (18)
Rnd 4: sc in each st around (18)
Sl st to first st. Fasten off, leaving a 25 cm tail for sewing.
Ears – White, make 2
Rnd 1: 6 sc in a magic ring (6)
Rnd 2: inc x 6 (12)
Rnd 3: (sc, inc) x 6 (18)
Sl st to first st. Fasten off, leaving a 20 cm tail for sewing.
Cheeks – Light Pink, make 2
Rnd 1: 6 sc in a magic ring (6)
Rnd 2: inc x 6 (12)
Sl st to first st. Fasten off, leaving a 20 cm tail for sewing.
Assembly
1. Insert the two 6 mm safety eyes into the main head between Rounds 6 and 7, spaced about 7 stitches apart. Secure the backs.
2. Embroider the triangular nose and mouth onto the center of the snout using black yarn.
3. Position the snout centrally between the eyes over Rounds 5 to 9 of the head. Sew it in place using the yarn tail.
4. Sew a pink cheek onto each side of the face, directly below the eyes and flanking the snout.
5. Fold the bottom edge of each ear slightly flat and sew them securely to the top edge of the head, aligned above the eyes.
Finishing
Weave in all remaining loose yarn ends on the back of the coaster. Gently block the finished piece with steam or a damp cloth to ensure it lies flat.
Tip: Keep your stitches on the main coaster firm and consistent so it lays flat and protects surfaces effectively from warm mugs.
Tips and Common Mistakes
- Crowning or cupping: If your coaster starts to curl into a bowl shape, your stitches are too tight. Try going up a hook size or relaxing your tension.
- Wavy edges: If the outer edge ripples, you have too many stitches in your increases. Check your round counts carefully.
- Safety eyes for kids: If you are making this coaster for a young child, skip the plastic safety eyes and embroider the eyes with black yarn instead.
- Securing ends: Make sure all embroidery tails on the back are knotted and woven in securely so they don’t catch on table surfaces.
Frequently Asked Questions
Can I wash this coaster in the washing machine?
Yes, because it is made from 100% cotton yarn, you can hand wash it or machine wash it on a gentle, cool cycle. Reshape while damp and lay flat to dry.
What can I do if my stitch count is off on the final round?
If you are off by one or two stitches on the final round of the head, simply add or skip a single crochet evenly across the round so your final count reaches 54 before fastening off.
Can I use acrylic yarn instead of cotton?
Cotton is recommended because it absorbs condensation and handles heat better than acrylic, but acrylic can work if you prefer a softer, fuzzier texture.
How do I keep the snout from puckering when I sew it on?
Pin the snout securely to the head in at least four places before sewing, and take small, neat bites through both the back loops of the snout and the front loops of the head.
📄 Your free PDF pattern