












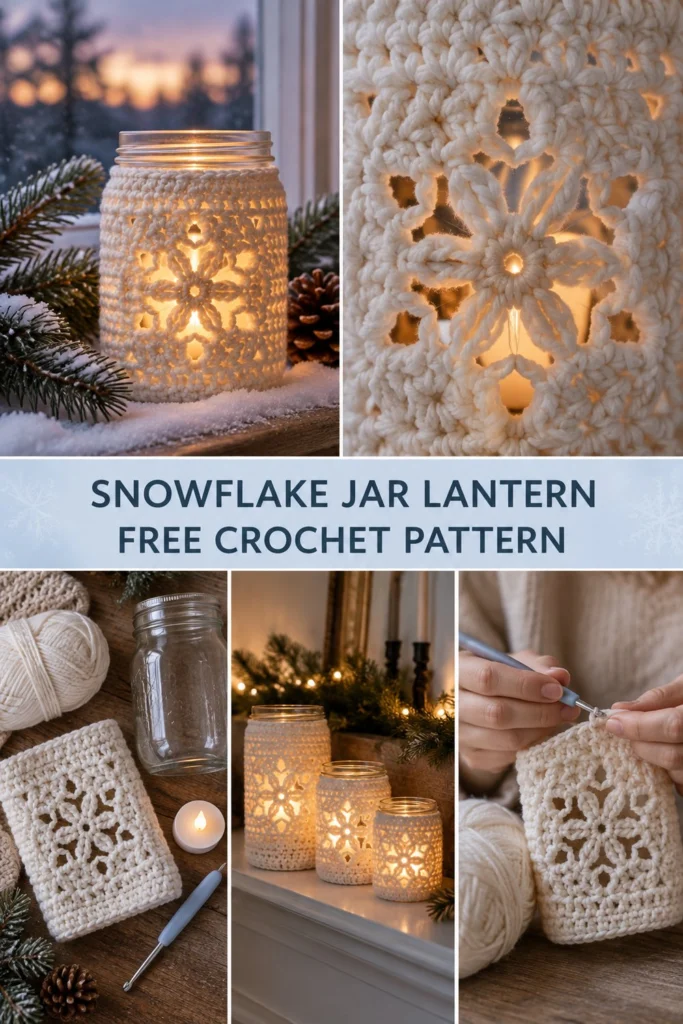
Picture a quiet winter window with a soft snowflake glowing warmly against the evening chill. This crochet snowflake jar lantern wraps a simple mason jar in textured white single crochet featuring a six-point snowflake opening made from clever chain spaces so an LED candle can light it from inside.
Quick Facts
- Skill level: Intermediate
- Finished size: Fits a standard 16 oz (pint) mason jar — approx. 3.25 in (8.5 cm) diameter and 5 in (13 cm) height
- Yarn: Worsted weight (Category 4) cotton yarn, approx. 80 yards (73 meters)
- Hook: US G/6 (4.0 mm) crochet hook
- Stitches used: US terms (ch, sc, sl st, sk, dec)
- Time to make: 2 to 3 hours
Detailed size tips and gauge adjustments are included further down the page to help you fit other jar shapes.
What Makes This Crochet Snowflake Jar Lantern Special
This design relies on a snug single crochet tube constructed with balanced, symmetrical chain-space rows that form an open-work six-point snowflake motif. When slipped over a glass mason jar containing a battery-operated LED tealight candle, the light filters brilliantly through the crochet gaps. We will link to the similar glowing jack-o-lantern jar cozy free crochet pattern for another fun seasonal decor idea!
Skill Level
- Required Skills: Working in joined rounds, maintaining even tension, foundation magic ring, reading a row-by-row crochet pattern.
- Don’t worry if you are new to lace-style chain spacing; the repetition makes it easy to master after the first motif repeat!
Finished Measurements
| Dimension | Inches | Centimeters |
|---|---|---|
| Diameter (Cozy) | 3.25 in | 8.5 cm |
| Height (Cozy) | 5.0 in | 13.0 cm |
| Fits Jar Size | 16 oz Mason Jar | 473 ml Mason Jar |
Materials You Will Need
| Item | Description | Quantity / Amount |
|---|---|---|
| Yarn | Worsted weight white cotton (e.g., Lily Sugar’n Cream) | 80 yards / 73 meters |
| Crochet Hook | US G/6 (4.0 mm) hook | 1 hook |
| Notions | 16 oz glass mason jar (pint size) | 1 jar |
| Notions | Battery-operated LED tealight candle | 1 candle |
| Notions | Yarn needle for weaving ends | 1 needle |
| Notions | Stitch markers | 2 markers |
Yarn Suggestions
| Yarn Line | Weight | Skein Yardage | Notes |
|---|---|---|---|
| Lily Sugar’n Cream | Worsted (4) | 120 yds / 109 m | Excellent crisp stitch definition |
| Knit Picks Dishie | Worsted (4) | 190 yds / 174 m | Smooth finish, highly durable |
| Lion Brand 24/7 Cotton | Worsted (4) | 186 yds / 170 m | Mercerized sheen, holds shape well |
⚠️ Note: Avoid stretchy acrylic yarns for this christmas jar cozy. Cotton yarn holds its shape firmly around glass and resists sagging when handling the lantern.
Gauge
- Gauge: 16 sts x 18 rows = 4 in (10 cm) in single crochet using a 4.0 mm hook.
- Achieving exact gauge helps ensure the mason jar crochet cover slips snugly onto your jar without sliding down.
Abbreviations (US Terms)
| Abbreviation | Meaning |
|---|---|
| ch | chain |
| sc | single crochet |
| sl st | slip stitch |
| sk | skip |
| st(s) | stitch(es) |
| rnd(s) | round(s) |
| rep | repeat |
| dec | single crochet 2 together (decrease) |
| BLO | back loop only |
| RS | right side |
UK: sc = dc, hdc = htr, dc = tr.
Special Stitches Explained
- Magic Ring: A movable starting loop used for working rounds in the round without a center hole.
- Ch-space Mesh: Skipping designated stitches and working chains over the skipped area to create decorative open windows for the crochet luminary effect.
- Invisible Join: Fastening off cleanly by threading the tail through a tapestry needle and mimicking the top loops of a joined round.
Pattern Instructions
Pattern Notes:
* The crochet luminary is worked in joined rounds from the bottom up to fit the jar base and body. Join each round with a sl st to the first st unless noted otherwise.
* The turning chain-1 at the start of a round does not count as a stitch.
Section 1: Base and Lower Body
Foundation: Ch 4, join with sl st to form a ring.
Rnd 1: Ch 1, work 8 sc into the ring, join with sl st to first sc (8 sc).
Rnd 2: Ch 1, 2 sc in each st around, join (16 sc).
Rnd 3: Ch 1, *1 sc in next st, 2 sc in next st; rep from * around, join (24 sc).
Rnd 4: Ch 1, *1 sc in each of next 2 sts, 2 sc in next st; rep from * around, join (32 sc).
Rnd 5: Ch 1, *1 sc in each of next 3 sts, 2 sc in next st; rep from * around, join (40 sc).
Rnd 6: Ch 1, *1 sc in each of next 4 sts, 2 sc in next st; rep from * around, join (48 sc).
Rnd 7: Ch 1, working in BLO (Back Loop Only) for this round to create a sharp base edge, 1 sc in each st around, join (48 sc).
✅ Checkpoint: Measure the flat circle base across; it should match the bottom diameter of your 16 oz mason jar (approx. 2.75 in / 7 cm).
Section 2: Snowflake Body Panels
Rnds 8 to 9: Ch 1, 1 sc in each st around, join (48 sc).
Rnd 10 (Snowflake Base): Rnd 10 (Snowflake Base): Ch 1, *sc in next 4 sts, ch 3, sk 3 sts, sc in next 2 sts, ch 3, sk 3 sts, sc in next 4 sts; rep from * around 3 times, join (36 sc and 6 ch-3 spaces).
Rnd 11: Rnd 11: Ch 1, *sc in next 3 sts, ch 5, sk next 5 sts, sc in next 2 sts, ch 5, sk next 5 sts, sc in next 3 sts; rep from * around 3 times, join (24 sc and 6 ch-5 spaces).
Rnd 12: Rnd 12: Ch 1, *sc in next 2 sts, ch 5, sk next 7 sts, sc in next 4 sts, ch 5, sk next 7 sts, sc in next 2 sts; rep from * around 3 times, join (24 sc and 6 ch-5 spaces).
Rnd 13 (Widest Point): Rnd 13 (Widest Point): Ch 1, *sc in next st, ch 5, sk next 7 sts, sc in next 6 sts, ch 5, sk next 7 sts, sc in next st; rep from * around 3 times, join (24 sc and 6 ch-5 spaces).
Rnd 14: Rnd 14: Ch 1, *sc in next 2 sts, ch 5, sk next 7 sts, sc in next 4 sts, ch 5, sk next 7 sts, sc in next 2 sts; rep from * around 3 times, join (24 sc and 6 ch-5 spaces).
Rnd 15: Rnd 15: Ch 1, *sc in next 3 sts, ch 3, sk next 7 sts, sc in next 2 sts, ch 3, sk next 7 sts, sc in next 3 sts; rep from * around 3 times, join (30 sc and 6 ch-3 spaces).
Rnd 16: Rnd 16: Ch 1, *sc in next 4 sts, ch 3, sk next 5 sts, sc in next 2 sts, ch 3, sk next 5 sts, sc in next 4 sts; rep from * around 3 times, join (36 sc and 6 ch-3 spaces).
Section 3: Upper Collar and Neck
Rnds 17 to 19: Ch 1, 1 sc in each st and work 2 sc in each ch-3 space around, join (48 sc).
Rnd 20: Ch 1, *sc in next 6 sts, dec (sc2tog); rep from * around, join (42 sc).
Rnd 21: Ch 1, *sc in next 5 sts, dec; rep from * around, join (36 sc).
Rnd 22: Ch 1, 1 sc in each st around, join (36 sc).
Fasten off, leaving a 6 in (15 cm) yarn tail.
Assembly and Finishing
- Weaving Ends: Thread your yarn needle and weave in all loose ends securely on the inside of the jar cover.
- Fitting: Slip the finished crochet cover over the bottom of your clean 16 oz mason jar, pulling it up snugly until the base sits flat against the glass bottom and the collar hugs right under the jar lip.
- Lighting: Place your LED tealight candle inside the jar before lighting. Do not use real open-flame wax candles with cotton covers.
Size Customization Tips
- For smaller 8 oz jars: Reduce the base circle increases until you reach 36 sts on Rnd 5, then work snowflake panels adapted to a multiple of 36 stitches.
- For wider jars: Add one more increase round to the base and adjust your stitch repeats accordingly.
Care Instructions
- Remove the crochet cozy from the glass jar before cleaning.
- Hand wash gently in lukewarm water using mild detergent.
- Lay flat on a clean towel to dry in its original cylinder shape. Do not tumble dry.
FAQ
Can I use real candles inside my crochet jar lantern?
No, always use a battery-operated LED tealight candle. Real flames pose a significant fire hazard when placed directly against yarn fibers.
What is the best yarn type for a mason jar cozy?
100% cotton yarn is recommended because it is durable, non-stretchy, heat-resistant, and maintains crisp stitch definition around glass surfaces.
How do I adjust this pattern for a different jar height?
You can easily make the lantern taller by repeating Rnds 8 and 9 an extra time before beginning the snowflake motif section, or shorter by skipping one set of plain single crochet rounds.
Happy Crocheting!
I hope you enjoy crafting this glowing holiday home decor piece. Be sure to save your favorite project photos on Pinterest and leave a comment below sharing what color combination you decided to use for your winter mantel!
📄 Your free PDF pattern