
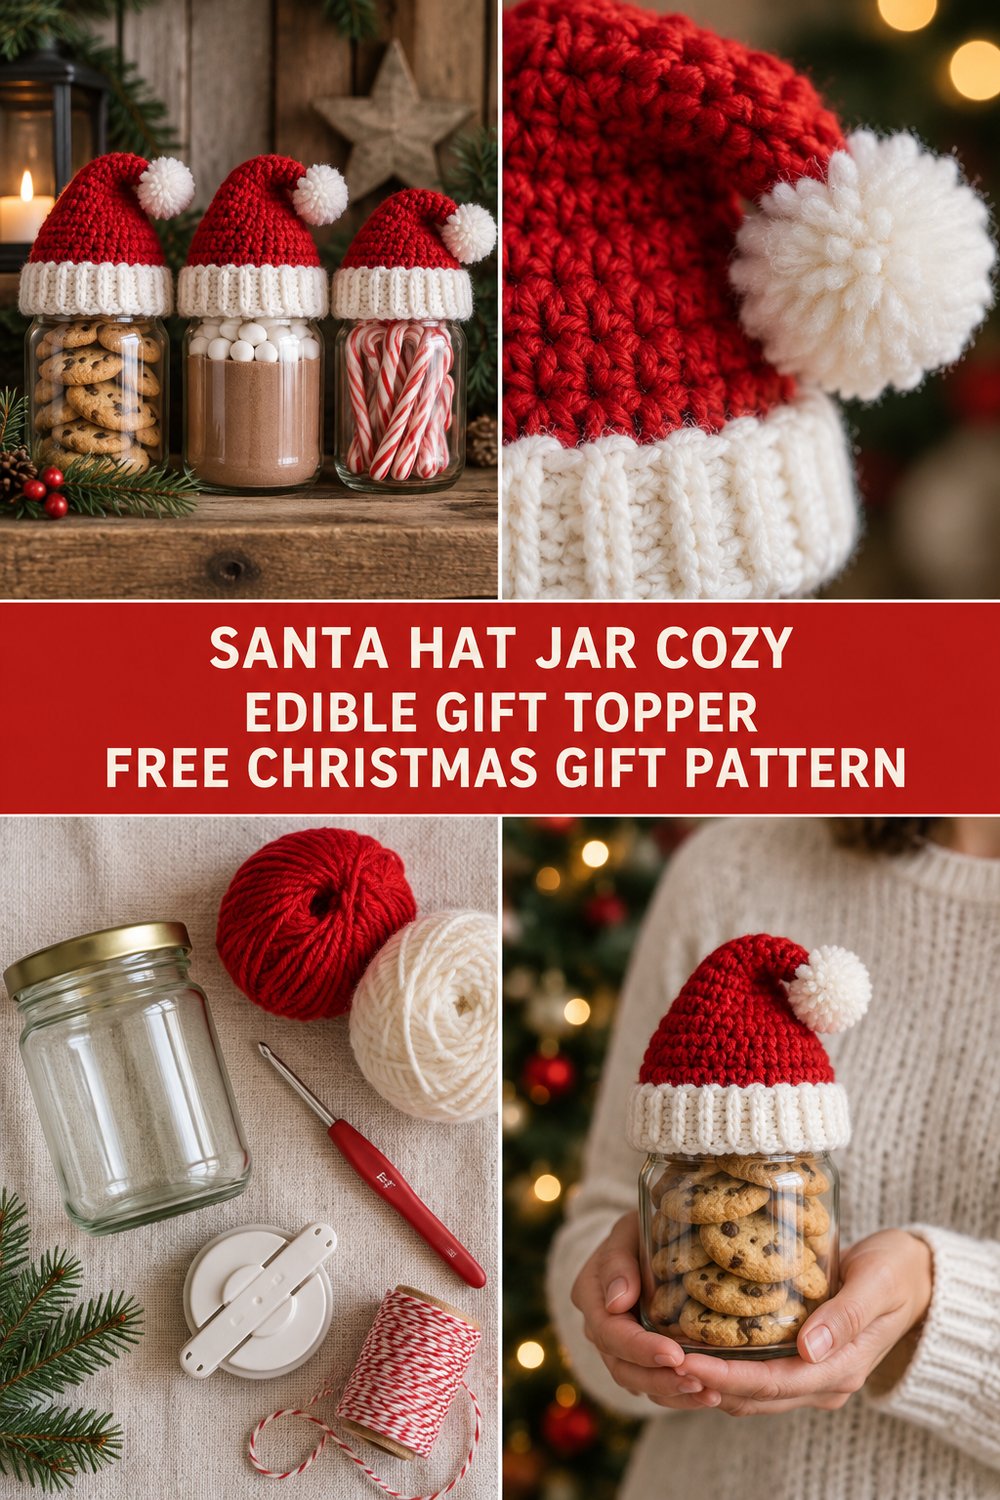
There is a quiet, rustic magic in dressing up a simple glass jar filled with homemade cookies, velvety hot chocolate mix, or bright candy canes with a tiny, handmade touch of holiday cheer. When you slip a miniature Santa hat cozy over the lid, an ordinary pantry staple instantly transforms into a thoughtful, handcrafted edible gift wrapping that feels straight out of a cozy winter cabin. Designed with tight, structured single crochet stitches, a stretchy ribbed brim, and a playful pom-pom tip, this quick and satisfying project turns your yarn scraps into a cherished holiday tradition.
Crochet Santa Hat Jar Cozy — Free Christmas Gift Pattern
Quick Facts
- Stitches Used: ch, sl st, sc, hdc, BLO (back loop only), Fpdc, Bpdc
- Size Fit: Standard 16 oz Mason jar / standard jam jar lid (approx. 2.75 inches / 7 cm diameter)
- Estimated Time to Complete: 15–20 minutes per cozy
- Gift-Appeal Framing: The ultimate stash-busting edible gift topper for holiday baking exchanges, teacher appreciation gifts, and stocking stuffers.
💡 Designer Tip: Keep a few of these pre-made in your holiday basket so you can instantly dress up last-minute hostess gifts or neighbour drop-offs!
Sizing customization tips are included later in this article so you can easily adapt this pattern for smaller spice jars or wider apothecary containers.
What Makes This Crochet Santa Hat Jar Cozy Special
This charm-packed design relies on a clever combination of construction techniques that give it a clean, professional finish without the fuss. The white ribbed brim is worked flat in rows using back-loop-only half double crochets to create a stretchy, tactile band that hugs standard jar lids snugly. From there, stitches are picked up along the long edge of the brim, transitioning seamlessly into the bright red crown worked in continuous spirals of tight single crochet. The crown tapers smoothly via rhythmic decreases, culminating in a fluffy faux-fur or yarn pom-pom that nods playfully as the jar is carried.
Skill Level
- Beginner-Friendly / Advanced Beginner
- Required skills: Working in rows and rounds, working into the back loop only, basic single crochet decreases (inv-dec or sc2tog).
✅ Checkpoint: If you know how to make a slip knot, chain, and work basic single crochet stitches, you have all the foundational skills needed to master this pattern on your very first try!
Finished Measurements
| Measurement | Inches | Centimeters |
|---|---|---|
| Brim Circumference (unstretched) | 8.5 in | 21.5 cm |
| Brim Circumference (stretched to fit lid) | 10.5 in | 26.5 cm |
| Total Height (Brim to Pom-Pom) | 4.5 in | 11.5 cm |
Materials You Will Need
| Material / Color | Yarn Weight / Fiber | Exact Yardage Needed |
|---|---|---|
| White (Brim & Pom-Pom) | Worsted Weight (4) / 100% Acrylic | 15 yards (14 meters) |
| Bright Red (Crown) | Worsted Weight (4) / 100% Acrylic | 20 yards (18 meters) |
| Crochet Hook | US G/6 (4.0 mm) | — |
| Notions | Tapestry needle, locking stitch marker, 1.5-inch pom-pom maker (optional), scissors | — |
Yarn Suggestions
| Yarn Brand & Line | Weight | Yardage per Skein | Notes |
|---|---|---|---|
| Caron Simply Soft | Worsted (4) | 315 yds / 288 m per 170g | Offers a gentle sheen and vibrant holiday red and pure white shades. |
| Red Heart Super Saver | Worsted (4) | 364 yds / 333 m per 198g | Highly durable, widely available, and holds a crisp stitch definition for tight crowns. |
| Lion Brand Vanna’s Choice | Worsted (4) | 170 yds / 156 m per 100g | A premium acrylic that provides wonderful structure for the ribbed brim. |
⚠️ Note: Avoid novelty eyelash yarn for the main red crown; it obscures your single crochet stitches and makes counting rounds extremely difficult. Stick to smooth worsted-weight acrylic or cotton blends.
Gauge
| Metric | Measurement | Stitch / Row Count |
|---|---|---|
| Brim Gauge (Ribbing) | 4 inches / 10 cm | 18 sts x 14 rows in BLO hdc |
| Crown Gauge (Single Crochet) | 4 inches / 10 cm | 16 sc x 18 rounds |
💡 Designer Tip: Always swatch before starting if you are unsure of your tension. Because this cozy relies on a snug fit around the jar lid, maintaining an even, slightly firm tension is key.
Abbreviations
| Abbreviation | Full Term |
|---|---|
| approx | Approximately |
| BLO | Back Loop Only |
| ch | Chain |
| hdc | Half Double Crochet |
| rep | Repeat |
| rnd(s) | Round(s) |
| sc | Single Crochet |
| sc2tog | Single Crochet 2 Stitches Together (Decrease) |
| sl st | Slip Stitch |
| st(s) | Stitch(es) |
| [ ] | Work instructions inside brackets as directed |
Special Stitches Explained
- BLO hdc (Back Loop Only Half Double Crochet): Yarn over, insert hook under the back loop only of the indicated stitch, yarn over, pull up a loop, yarn over, pull through all three loops on the hook.
- sc2tog (Single Crochet Decrease): Insert hook in next stitch, yarn over, pull up a loop (2 loops on hook), insert hook in following stitch, yarn over, pull up a loop (3 loops on hook), yarn over, pull through all 3 loops.
Pattern Instructions
Section 1: The White Ribbed Brim
Using White, ch 7.
– Row 1: Working in the back bumps of the chain, hdc in 3rd ch from hook (skipped chs do not count as a st) and in each ch across, turn. (5 hdc)
– Row 2: Ch 2 (does not count as st here and throughout), working in BLO, hdc in each st across, turn. (5 hdc)
– Rows 3–32: Rep Row 2.
– Do not fasten off. Bring the short ends of the ribbing together to form a ring, and working through both thicknesses, sl st across the ends to join into a continuous band. Turn the band right-side out so the seam is on the inside. (32 rows completed)
✅ Checkpoint: You should now have a stretchy white ribbed cylinder measuring approximately 8.5 inches in circumference.
Section 2: The Red Santa Hat Crown
Switch to Bright Red. Working along the long edge of the ribbed brim:
– Rnd 1: Ch 1, evenly work 32 sc around the top edge of the brim. Join with a sl st to the first sc (or work in continuous spirals using a stitch marker to track the start of rounds). (32 sc)
– Rnds 2–4: Sc in each st around. (32 sc)
– Rnd 5: [Sc in next 6 sts, sc2tog] rep around. (28 sc)
– Rnd 6: Sc in each st around. (28 sc)
– Rnd 7: [Sc in next 5 sts, sc2tog] rep around. (24 sc)
– Rnd 8: Sc in each st around. (24 sc)
✅ Checkpoint: At the end of Rnd 8, your hat is narrowing nicely. Verify you have exactly (24 sc) before proceeding.
- Rnd 9: [Sc in next 4 sts, sc2tog] rep around. (20 sc)
- Rnd 10: Sc in each st around. (20 sc)
- Rnd 11: [Sc in next 3 sts, sc2tog] rep around. (16 sc)
- Rnd 12: Sc in each st around. (16 sc)
- Rnd 13: [Sc in next 2 sts, sc2tog] rep around. (12 sc)
- Rnd 14: [Sc in next st, sc2tog] rep around. (8 sc)
- Rnd 15: Sc2tog 4 times. (4 sc)
Fasten off, leaving a 6-inch tail. Thread tail through the remaining 4 front loops, pull tight to close the tip of the hat, and secure firmly.
Section 3: Pom-Pom & Assembly
- Pom-Pom: Using White, wrap yarn around a 1.5-inch pom-pom maker (or fork/cardboard cutout) until thick and fluffy. Tie securely around the middle with a sturdy strand of yarn, cut the loops, and trim evenly into a tidy sphere.
- Attaching: Using the long yarn tails from the pom-pom, securely sew the pom-pom to the closed tip of the red crown.
- Finishing: Weave in all loose ends using your tapestry needle. Slip your finished cozy over the lid of a standard jam jar filled with your favorite holiday treats.
Size Customization Tips
- For Smaller Spice Jars (approx. 2-inch lid): Work fewer rows for the ribbed brim (e.g., 24 rows instead of 32), and adjust your starting base round to match your new stitch count, decreasing slightly faster toward the crown.
- For Wider Apothecary Jars (approx. 3.5-inch lid): Add 4 to 8 more rows to the initial ribbed brim so the band stretches comfortably around the wider diameter, then add an extra foundation round of single crochets before beginning the crown decreases.
Care Instructions
Remove the cozy from the jar before washing. Hand wash gently in cool water with mild wool detergent. Lay flat to dry on a clean towel, reshaping gently while damp. Do not tumble dry or iron the acrylic yarn.
Closing
There is truly nothing quite like the joy of gifting something handmade during the festive season. I hope this crochet santa hat jar cozy brings warmth and smiles to your holiday gifting!
If you make one (or a whole shelf full!), please share your creations with our crafting community. Tag your photos on social media with #SantaHatJar and #FreeCrochetPattern, save this project to your holiday boards on Pinterest, and leave a comment below letting me know what goodies you plan to fill your jars with this year! Happy crocheting and happy holidays!