
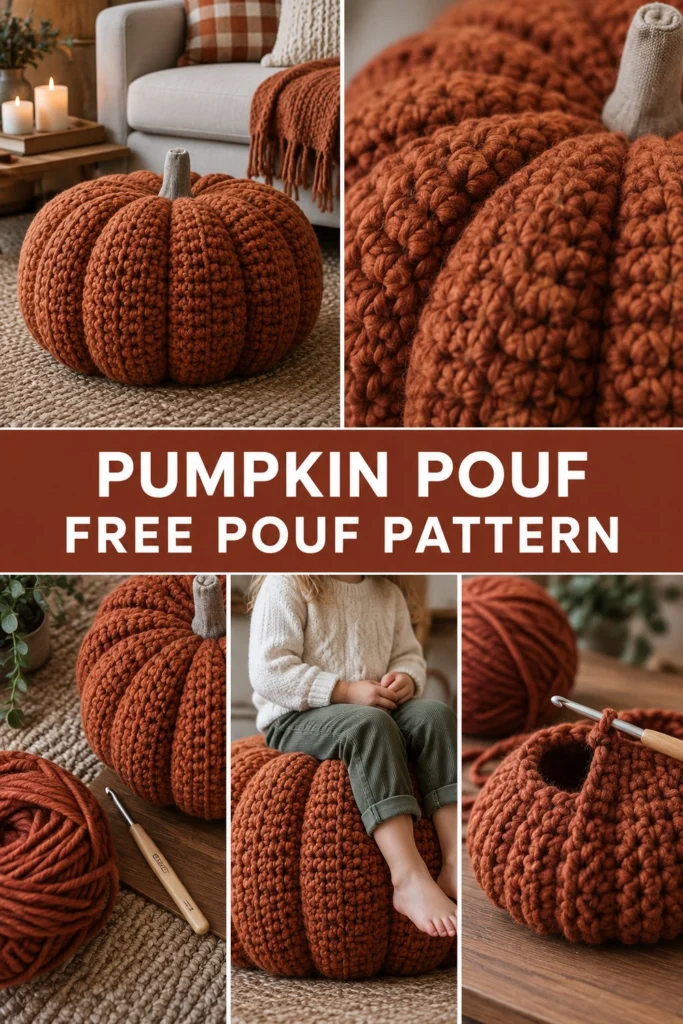
Add a touch of autumn warmth to your living room with this chunky, textured floor pouf. Worked sideways in short-row wedges and stuffed firm, it makes a gorgeous footrest or an extra seat for Thanksgiving gatherings.
Cozy Crochet Pumpkin Floor Pouf Free Thanksgiving Pattern
Quick Facts
- Skill level: Intermediate
- Finished size: 20 inches wide by 12 inches high
- Yarn: Super bulky weight (Category 6) acrylic or wool blend
- Hook: 10.0 mm (US N/15) crochet hook
- Stitches used: ch, sc, sl st, BLO (back loop only)
- Time to make: 6 to 8 hours
What Makes This Crochet Pumpkin Pouf Special
This design relies on a clever sideways construction using half-double crochet or single crochet worked in the back loops only, creating deep vertical ribs that mimic a real pumpkin. Working in short-row wedges lets you shape the curve without complicated shaping math. Once seamed into a cylinder, you cinch the center tightly with a strong cord to give it that authentic pumpkin indent. A simple crocheted stem tops it off.
Skill Level
- Working in rows and short rows
- Working in the back loop only (BLO)
- Seaming ribbed panels
- Stuffing and cinching a 3D object
Don’t worry if you haven’t made a pouf before—the large hook and chunky yarn make your stitches easy to see and work up fast.
Finished Measurements
| Dimension | Inches | Centimeters |
|---|---|---|
| Diameter | 20 in | 51 cm |
| Height | 12 in | 30 cm |
Materials You Will Need
| Material | Color / Detail | Amount |
|---|---|---|
| Super Bulky Yarn (Cat 6) | Rust / Pumpkin Orange | 600 yards (548 meters) |
| Super Bulky Yarn (Cat 6) | Taupe / Beige (Stem) | 40 yards (37 meters) |
| Crochet Hook | 10.0 mm (US N/15) | 1 hook |
| Stitch Markers | Assorted | 4 markers |
| Tapestry Needle | Large eye for chunky yarn | 1 needle |
| Stuffing | Poly-fill, fabric scraps, or old duvet | Approx. 3 to 4 lbs |
| Strong Cinching Cord | Nylon twine or strong yarn | 3 feet (1 meter) |
Yarn Suggestions
| Yarn Line | Skein Yardage | Notes |
|---|---|---|
| Lion Brand Wool-Ease Thick & Quick | 106 yds (97 m) per skein | Best overall for stitch definition and warmth |
| Bernat Blanket | 220 yds (201 m) per skein | Softer feel, but check gauge carefully |
| Premier Yarns Basix Chunky | 165 yds (151 m) per skein | Budget-friendly acrylic option |
Gauge
- 7 sts x 7 rows = 4 in / 10 cm in BLO single crochet using a 10.0 mm hook.
Abbreviations
| Abbreviation | Meaning |
|---|---|
| ch | chain |
| sc | single crochet |
| sl st | slip stitch |
| BLO | back loop only |
| st(s) | stitch(es) |
| rep | repeat |
| RS | right side |
| WS | wrong side |
UK terms equivalent: sc = dc.
Special Stitches Explained
- BLO (Back Loop Only): Insert hook under the back loop only of the designated stitch, leaving the front loop free to create the ridge.
- Short-Row Wedges: Working across a specified number of stitches, leaving remaining stitches unworked on certain rows to create a tapered wedge shape.
Pattern Instructions
Pattern Notes
- The pouf is made by working 8 identical wedge panels sideways, then seaming them together into a ring.
- Do not count turning chains unless specified.
Section 1: Pumpkin Wedges (Rust, make 8)
Row 1: Ch 22, working in the back bumps of the foundation chain, sc in 2nd ch from hook and in next 18 ch, leave remaining 2 ch unworked, turn (19 sc).
Row 2: Ch 1, working in BLO, sc in each st across to end, turn (19 sc).
Row 3: Ch 1, working in BLO, sc in first 18 sts, leave last st unworked, turn (18 sc).
Row 4: Ch 1, working in BLO, sc in each st across to end, turn (18 sc).
Rows 5 to 40: Repeat Rows 3 and 4 alternating the row length to form the wedge taper, ending with a full-length row of 19 sc. Fasten off leaving a long tail for seaming.
Section 2: Assembly and Cinching
- Using the mattress stitch and your tapestry needle, seam the 8 vertical wedge panels together along their straight side edges to form a closed cylinder.
- Weave a strong strand of nylon cord or double-stranded yarn through the inner edge stitches around the top center opening. Pull tightly to cinch the top completely closed, secure with a firm knot, and hide the ends inside.
- Stuff the pouf firmly with poly-fill, fabric scraps, or an old duvet until it holds its rounded, plump shape.
- Weave a second cord through the bottom center opening, pull tight to cinch closed, knot securely, and hide the tails.
Section 3: Stem (Taupe, make 1)
Rnd 1: Magic ring, work 6 sc in ring, join with sl st to first sc (6 sc).
Rnds 2 to 6: Ch 1, sc in each st around, join with sl st to first sc (6 sc).
Fasten off leaving a 12-inch tail. Stuff lightly and sew the stem securely to the top center cinched opening of the pumpkin pouf.
Finishing
Weave in all remaining loose yarn ends. Press the sides gently to shape the deep ribbed segments of your new crochet floor pouf.
Size Customization Tips
- To make a larger pouf, start your wedge foundation chain with more stitches and add more wedge panels to the circle. Each wedge panel adds about 2.5 inches to the overall diameter.
Care Instructions
Spot clean with a damp cloth and mild detergent. Do not submerge in water if stuffed with poly-fill or fabric scraps. Air dry flat.
FAQ
Can I use regular worsted weight yarn instead of super bulky?
You can hold 3 strands of worsted weight yarn together to match the gauge and texture of super bulky yarn, but it requires winding multiple skeins.
How do I stop the pouf from sagging when someone sits on it?
Stuff it very firmly with dense materials like an old rolled-up duvet or heavy fabric scraps before adding poly-fill to give it a solid core.
Is this pouf safe for young children?
Yes! Since there are no hard plastic parts, buttons, or wire frames, it is completely safe for toddlers to sit and play on.