











9. Penguin Coaster
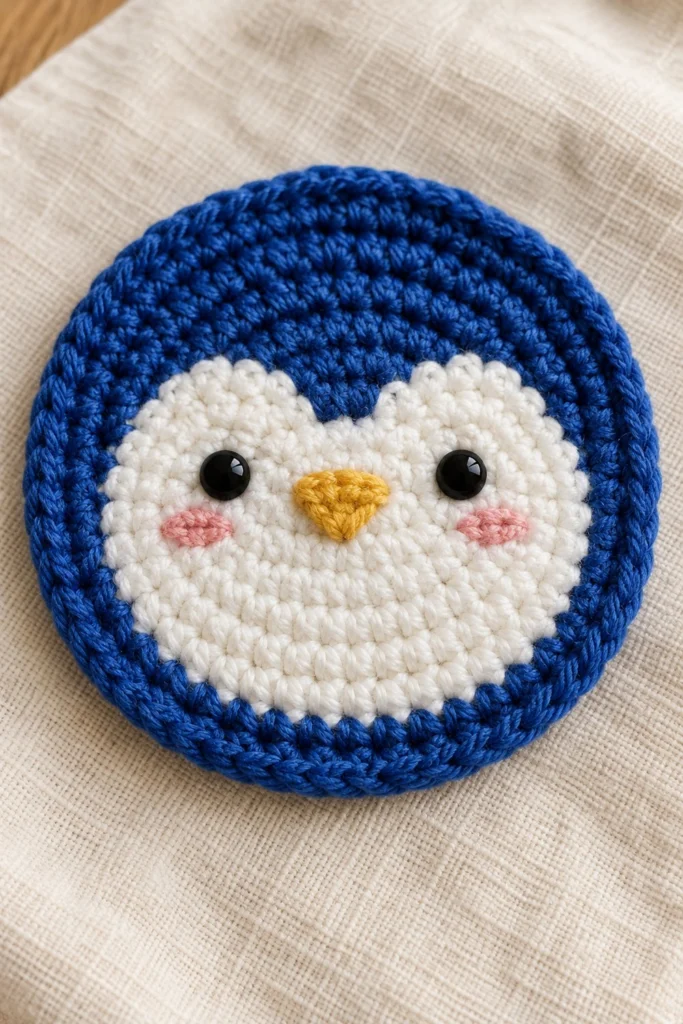
Bring a touch of icy charm to your coffee table with this adorable crochet penguin coaster! Featuring a bright royal blue outer ring, a snowy white face, tiny pink blush accents, and a neat embroidered beak, this quick project works up flat to protect your surfaces in style. Finished size is 4 inches (10 cm) in diameter, and it takes just 40 minutes to make.
Quick Facts
| Skill level | Finished size | Yarn | Hook | Time |
|---|---|---|---|---|
| Easy | 4 in / 10 cm diameter | DK cotton (Cat. 3) | 3.5 mm (US E/4) | 40 minutes |
Materials You Will Need
- DK weight cotton yarn (Category 3): Royal Blue (approx. 10 grams, 25 metres), White (approx. 8 grams, 20 metres), and small scraps of Golden-Yellow and Pink
- 3.5 mm (US E/4) crochet hook
- Two 6 mm black safety eyes
- Pink embroidery floss or light pink yarn for blush embroidery
- Yarn needle
- Scissors
- Stitch marker
Gauge
The first 3 rounds of the coaster base measure approximately 3.8 cm (1.5 inches) across. Exact gauge is not critical for this decorative item, but maintaining a firm, even tension ensures your coaster sits flat and provides a stable base for mugs.
Abbreviations (US Terms)
- ch: chain
- sc: single crochet
- inc: single crochet increase (work 2 sc in the same stitch)
- sl st: slip stitch
- st(s): stitch(es)
- rnd(s): round(s)
- BLO: back loop only
- FO: fasten off
UK terms: sc = dc, hdc = htr, dc = tr.
Pattern Notes
- The coaster body is worked in continuous spiral rounds without joining, unless specified. Use a stitch marker to keep track of the first stitch of each round.
- Stitch counts are shown in parentheses at the end of each round.
- Color changes are made during the final pull-through of the last stitch of the previous color.
Instructions
Coaster Body – Royal Blue, White, make 1
Rnd 1: With Royal Blue, 6 sc in a magic ring (6)
Rnd 2: inc x 6 (12)
Rnd 3: (sc in next st, inc) x 6 (18)
Rnd 4: (sc in next 2 st, inc) x 6 (24)
Rnd 5: (sc in next 3 st, inc) x 6 (30)
Rnd 6: (sc in next 4 st, inc) x 6 (36)
Rnd 7: (sc in next 5 st, inc) x 6 (42)
Rnd 8: (sc in next 6 st, inc) x 6 (48)
Rnd 9: Switch to White, working in BLO for this round only, sc in next 12 st, leave remaining stitches unworked for now. FO White leaving a short tail to weave in later. Re-attach Royal Blue in the next unworked stitch of Rnd 8, sc in remaining 36 st around (48)
Rnd 10: With Royal Blue, (sc in next 7 st, inc) x 6 (54)
Rnd 11: sc in each st around (54)
FO, weave in all ends securely.
White Face Panel (Applique) – White, make 1
Rnd 1: 6 sc in a magic ring (6)
Rnd 2: inc x 6 (12)
Rnd 3: (sc in next st, inc) x 6 (18)
Rnd 4: (sc in next 2 st, inc) x 6 (24)
Rnd 5: (sc in next 3 st, inc) x 6 (30)
FO, leaving a 30 cm tail for sewing.
Assembly
Position the White Face Panel centrally onto the white semicircular section created by Rnd 9 of the Coaster Body. Pin in place. Using the long yarn tail, sew the face panel securely to the coaster body with a neat whip stitch.
Insert the two 6 mm black safety eyes through the white face panel, positioned symmetrically about 4 stitches apart near the upper middle section of the white face. Secure the backs.
Using Golden-Yellow yarn, embroider a small triangular beak centered directly below and between the two safety eyes.
Using pink yarn or embroidery floss, add small horizontal straight stitches for blush directly beneath each safety eye.
Finishing
Weave in all remaining yarn tails on the back of the coaster. Use your fingers to gently block and smooth the edges so the circular shape lies completely flat.
Tip: Keep your stitches relatively tight when working the outer blue rounds so that the coaster stays firm and doesn’t warp under warm mugs.
Tips and Common Mistakes
- Cupping coaster: If your coaster starts curving like a bowl, your stitches are too tight or you have too few increases. Ensure you follow the standard circle formula (+6 stitches per round).
- Ruffled edges: If the edges wave and refuse to lie flat, you are adding too many increases per round. Check your count against the pattern instructions.
- Color change step: Always switch to the new yarn color on the final loop-over of the stitch right before the specified color change for a clean transition.
- Eye placement: Double-check the symmetry of your safety eyes before attaching the backing washers to ensure your penguin looks straight and friendly.
Frequently Asked Questions
Can I use acrylic yarn instead of cotton?
Cotton yarn is strongly recommended because it absorbs moisture from condensation and resists heat better than acrylic, making it ideal for drink coasters.
How do I wash these coasters?
Spot clean gently with mild soap and warm water, reshape while damp, and lay flat to dry. Avoid machine washing to preserve the shape and embroidery.
Can I make this safe for a baby or toddler?
Yes! If making this item for a child under three years old, omit the plastic safety eyes and instead embroider the eyes using black embroidery floss with French knots or satin stitches.
What hook size should I use if my tension is very loose?
If your stitches are naturally loose, drop down a hook size to 3.25 mm (US D/3) to keep the fabric dense and sturdy for a coaster.
📄 Your free PDF pattern