











6. Deer Coaster
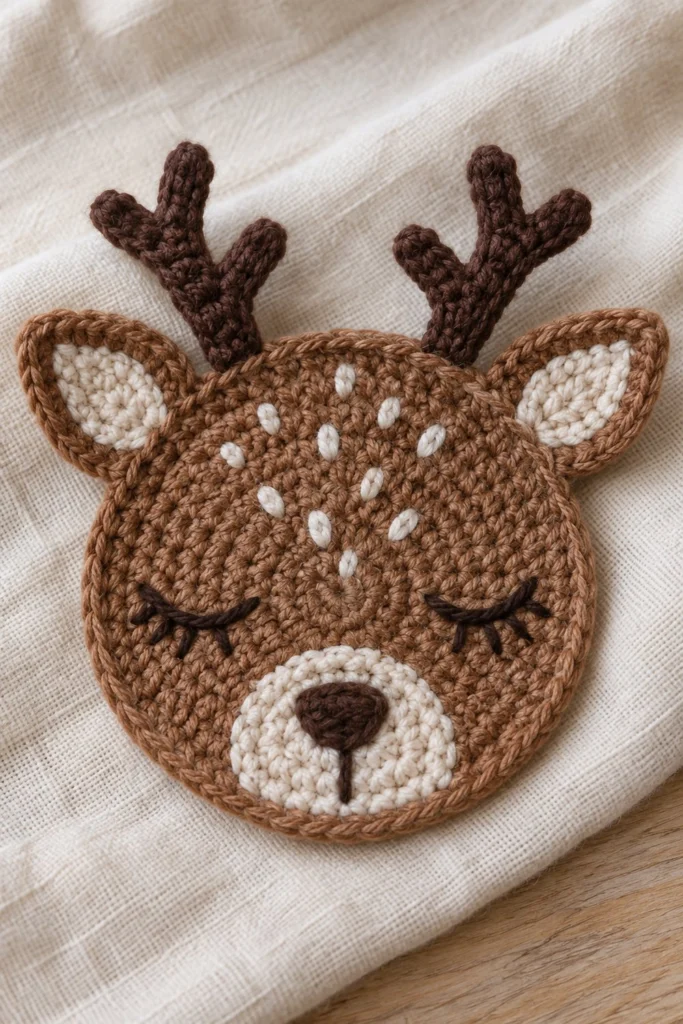
Welcome to this delightful crochet deer coaster pattern, featuring a rich brown circular base, charming pointed ears, and intricate branched antlers. Delicate embroidered sleeping eyes and white speckled spots across the forehead give this woodland creature its sweet expression, making it a wonderful addition to your home or a thoughtful handmade gift.
Quick Facts
| Skill level | Finished size | Yarn | Hook | Time |
|---|---|---|---|---|
| Easy-Intermediate | 4 in / 10 cm diameter | DK cotton (Cat. 3) | 3.5 mm (US E/4) | 50 minutes |
Materials You Will Need
- DK weight cotton yarn in Dark Brown (approx. 15 grams, 35 metres)
- DK weight cotton yarn in Warm Brown (approx. 15 grams, 35 metres)
- DK weight cotton yarn in White (approx. 2 grams, 5 metres)
- DK weight cotton yarn in Black (scrap amount for embroidery)
- 3.5 mm (US E/4) crochet hook
- Tapestry needle
- Scissors
- Stitch marker
Gauge
The first two rounds of the base measure 2.5 cm across. Working with even tension matters more than exact gauge for this coaster, ensuring a flat surface for cups.
Abbreviations (US Terms)
- ch = chain
- sl st = slip stitch
- sc = single crochet
- hdc = half double crochet
- dc = double crochet
- inc = increase (work 2 sc in the same stitch)
- dec = decrease (insert hook into front loops of next 2 stitches, yarn over, pull through both loops, yarn over, pull through remaining 2 loops)
- st(s) = stitch(es)
- BLO = back loop only
- FO = fasten off
UK terms: sc = dc, hdc = htr, dc = tr.
Pattern Notes
- Work in continuous spiral rounds unless otherwise stated. Do not join with a slip stitch at the end of rounds unless specified.
- Use a stitch marker at the beginning of each round to keep track of your count.
- Stitch counts are given in brackets at the end of each round or row.
- Ensure your tension remains consistent so the coaster lies completely flat.
Instructions
Coaster Base – Warm Brown, make 1
Rnd 1: 6 sc in a magic ring (6)
Rnd 2: inc x 6 (12)
Rnd 3: (sc in next st, inc) x 6 (18)
Rnd 4: (sc in next 2 sts, inc) x 6 (24)
Rnd 5: (sc in next 3 sts, inc) x 6 (30)
Rnd 6: (sc in next 4 sts, inc) x 6 (36)
Rnd 7: (sc in next 5 sts, inc) x 6 (42)
Rnd 8: (sc in next 6 sts, inc) x 6 (48)
Rnd 9: (sc in next 7 sts, inc) x 6 (54)
Rnd 10: sl st in next st. Fasten off invisibly, leave a 30 cm tail for weaving and securing.
Ears – Warm Brown, make 2
Rnd 1: 4 sc in a magic ring (4)
Rnd 2: inc, sc in next 3 sts (5)
Rnd 3: inc, sc in next 4 sts (6)
Rnd 4: (inc, sc in next st) x 3 (9)
Rnd 5: (inc, sc in next 2 sts) x 3 (12)
Rnd 6: sc in each st around (12)
Fasten off, leave a 20 cm tail for sewing.
Antlers – Dark Brown, make 2
Row 1: Ch 9, working in second ch from hook, sl st in next 3 chs, ch 4, working in second ch from hook, sl st in next 3 chs, sl st in remaining 5 chs of original chain.
Fasten off, leave a 20 cm tail for sewing.
Assembly
Position the two ears at the top of the coaster base, angled slightly outward between Rounds 8 and 10, about 6 stitches apart. Secure firmly with the yarn tails. Position the dark brown branched antlers just inside the ears on Round 10, pointing upwards and slightly outwards, and sew securely to the back of the coaster base. Using white yarn, embroider small French knots or tiny straight stitches across the forehead area between the ears and antlers to create speckled spots. Using black embroidery thread, stitch sleeping curved eyes with tiny upward lashes on rounds 6 and 7, centered between the ears, along with a small triangle nose and mouth.
Finishing
Weave in all remaining loose ends on the back of the coaster. Block lightly with a steam iron on a low setting or pin to measurements and mist with water to ensure the coaster lies completely flat.
Tip: Keep your stitches slightly firm when working the flat circle base to prevent cups from tipping when placed on the finished coaster.
Tips and Common Mistakes
- If your circle starts to cup or bow, your tension is too tight; loosen your stitches slightly or go up a hook size.
- If your circle ruffles or waves, your tension is too loose or you have worked too many increases; check your stitch counts per round.
- Always use a stitch marker at the start of rounds to avoid losing your place in spiral crocheting.
- Secure all embroidery tightly on the reverse side so the coaster holds up well during daily use.
Frequently Asked Questions
Can I use acrylic yarn instead of cotton?
Cotton yarn is strongly recommended because it absorbs moisture better and withstands heat from hot mugs much better than acrylic.
Are safety eyes suitable for this coaster?
This pattern uses embroidered sleeping eyes instead of plastic safety eyes to ensure the coaster remains flat and safe for placing mugs directly on top.
How do I wash my crochet coaster?
Hand wash gently in cool water with mild soap, reshape while damp, and lay flat to dry. Do not tumble dry.
Can I use a different hook size?
You can use a different hook size to slightly alter the finished size, but ensure your tension remains tight and even so the coaster remains functional.
📄 Your free PDF pattern