
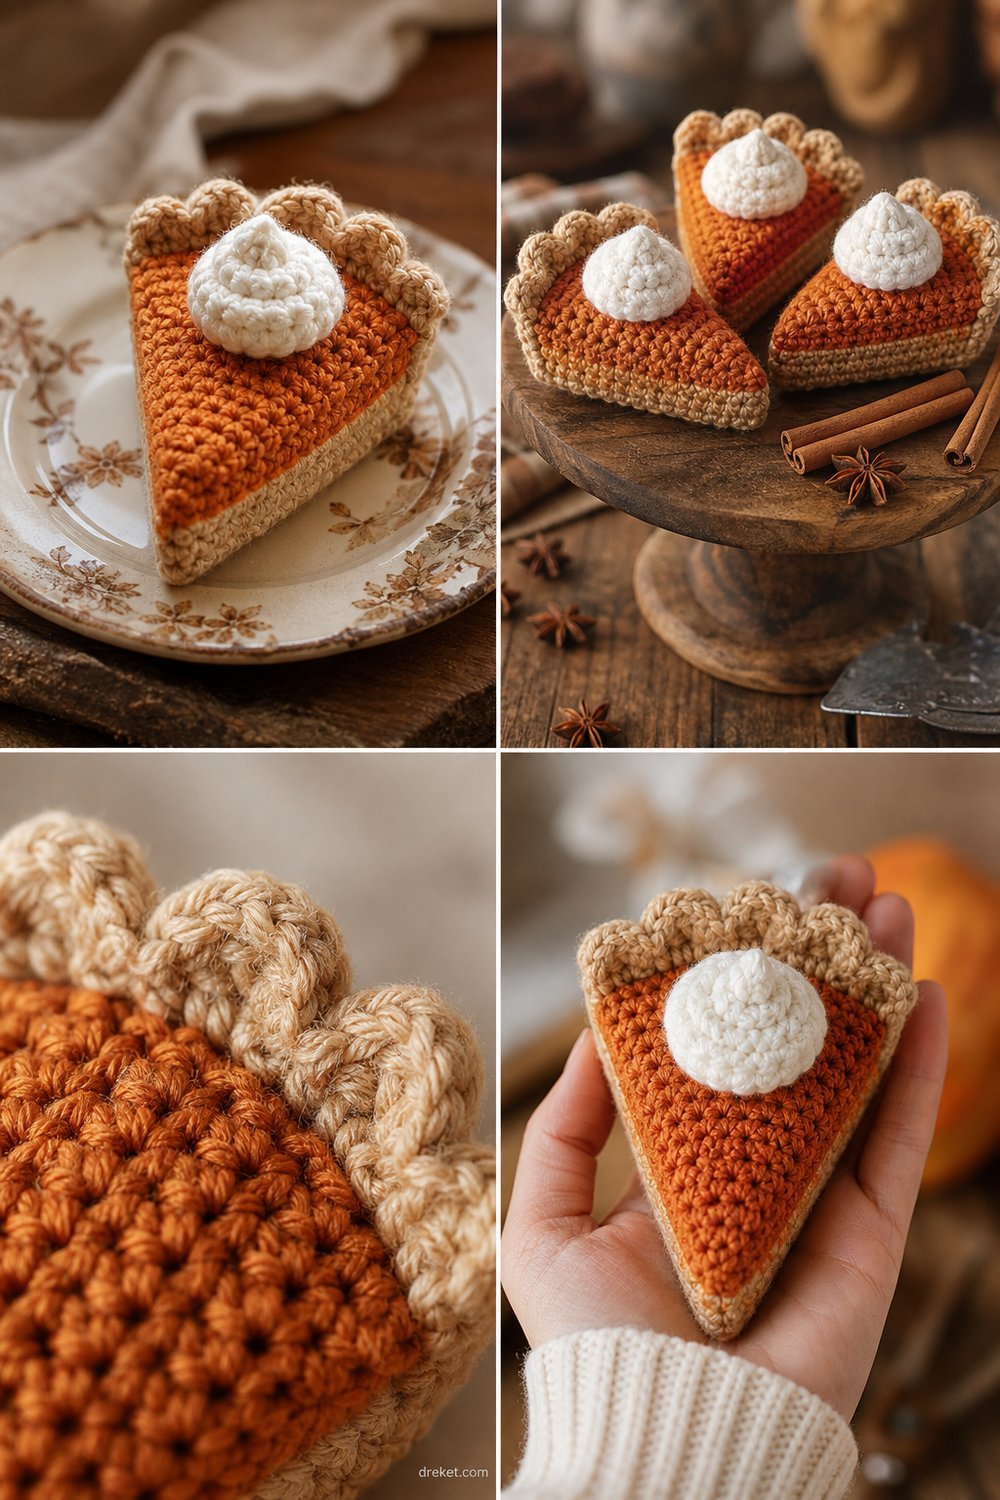
Nothing captures the cozy magic of autumn quite like the rich, spiced scent of freshly baked pie and the warm glow of afternoon light filtering through the kitchen window. This delightful amigurumi project brings that exact rustic charm straight to your hook, resulting in a charming palm-sized treat that requires zero baking. Whether you are staging a farmhouse dessert tier or stitching up a thoughtful autumn gift, this little slice of comfort is guaranteed to sweeten your space.
Sweet Cinnamon Pumpkin Pie Slice Free Amigurumi Pattern
Quick Facts
- Stitches Used: Single crochet, half double crochet, double crochet, slip stitch, front post single crochet, back loop only.
- Size Fit: Palm-sized amigurumi decor piece.
- Estimated Hours to Complete: 2–3 hours.
- Gift-Appeal Framing: Ideal for autumn decor, Thanksgiving table settings, market prep, or as a charming keepsake for pie lovers.
Sizing customization tips are included later in this article to help you adapt your pie slice for larger or smaller yarn scales.
What Makes This Sweet Cinnamon Pumpkin Pie Slice Special
The visual magic of this design lies in the clever structural shaping that mimics a real wedge of pie without the need for complex sewing. We begin by working the wedge body in tight single crochet rows using continuous rounds and strategic decreases, creating a firm wedge shape that holds its geometric integrity without collapsing. The ruffled crust is achieved by working a textured shell pattern into the back loops along the curved back edge, while the signature whipped cream dollop is worked separately in the round and securely cinched into a fluffy, dimensional swirl. Tight tension and dense stitch definition ensure your polyester stuffing never peeks through the gaps.
Skill Level
- Beginner-Friendly Intermediate: Requires comfort with working in the round, shaping through decreases, and basic shaping techniques.
- Required Skills:
- Working in the round and back/front loops only
- Basic amigurumi increases and invisible decreases
- Simple whip stitching and assembly
💡 Designer Tip: Do not overstuff the pointed toe of the wedge; keeping it slightly softer allows the pie slice to sit flat and stable on any surface.
Finished Measurements
| Dimension | Inches | Centimeters |
|---|---|---|
| Length (Front Point to Crust Edge) | 4.5 inches | 11.5 cm |
| Width at Crust Edge | 3.5 inches | 9.0 cm |
| Height (Including Whipped Cream) | 3.0 inches | 7.5 cm |
Materials You Will Need
| Material / Color | Yarn Weight / Type | Yardage / Meters Needed |
|---|---|---|
| Cinnamon-Orange (Body) | Worsted Weight (Aran) / 100% Acrylic | 35 yds / 32 m |
| Tan (Crust) | Worsted Weight (Aran) / 100% Acrylic | 20 yds / 18 m |
| Fluffy White (Whipped Cream) | Worsted Weight / Brushed or Smooth Acrylic | 15 yds / 14 m |
| Hook | US Size E/4 (3.5 mm) crochet hook | — |
| Notions | Polyfill fiber stuffing, yarn needle, stitch markers, scissors | — |
Yarn Suggestions
| Brand & Line Name | Yarn Weight | Yardage per Skein | Notes |
|---|---|---|---|
| Lion Brand Vanna’s Choice | Worsted (4) | 145 yds / 133 m | Excellent stitch definition, firm structure for amigurumi. |
| Caron Simply Soft | Worsted (4) | 315 yds / 288 m | Beautiful sheen, though slightly drapier (use a smaller hook). |
| Red Heart Super Saver | Worsted (4) | 236 yds / 215 m | Budget-friendly, stiff enough to hold crisp wedge edges. |
⚠️ Note: Avoid novelty eyelash or ladder yarns for the main pie body, as they obscure stitch definition and make counting rounds nearly impossible.
Gauge
| Measurement Type | Stitches & Rows |
|---|---|
| Single Crochet Gauge | 18 sts and 20 rows = 4 inches (10 cm) using a 3.5 mm hook |
⚠️ Note: Gauge is not strictly critical for amigurumi, but maintaining a tight, even tension is essential to prevent stuffing from showing through. Swatch before starting if you tend to crochet loosely.
Abbreviations
| Abbreviation | Full Meaning |
|---|---|
| ch | Chain |
| sc | Single crochet |
| hdc | Half double crochet |
| dc | Double crochet |
| sl st | Slip stitch |
| inc | Increase (2 sc in same stitch) |
| inv-dec | Invisible decrease (sc 2 stitches together through front loops) |
| blo | Back loop only |
| flo | Front loop only |
| st(s) | Stitch(es) |
| rep | Repeat |
| FO | Fasten off |
Special Stitches Explained
- Invisible Decrease (inv-dec): Insert hook into the front loop of the first stitch, then immediately insert hook into the front loop of the next stitch (3 loops on hook). Yarn over and pull through the first 2 loops, yarn over and pull through remaining 2 loops.
- Ruffled Shell Crust Stitch: Work
(1 hdc, 2 dc, 1 hdc)all into the exact same designated stitch or space, then skip the next stitch and sl st into the following stitch to anchor the ruffle.
Pattern Instructions
Section 1: Pie Slice Body (Cinnamon-Orange)
Working from the pointed tip backward toward the wide crust edge.
- Round 1: Make a magic ring, work 4 sc into the ring. Pull closed. (4 sc)
- Round 2: [sc in next st, inc in next st] 2 times. (6 sc)
- Round 3: [sc in next 2 sts, inc in next st] 2 times. (8 sc)
- Round 4: [sc in next 3 sts, inc in next st] 2 times. (10 sc)
- Round 5: [sc in next 4 sts, inc in next st] 2 times. (12 sc)
- Round 6: [sc in next 5 sts, inc in next st] 2 times. (14 sc)
- Round 7: [sc in next 6 sts, inc in next st] 2 times. (16 sc)
- Round 8: [sc in next 7 sts, inc in next st] 2 times. (18 sc)
- Round 9: [sc in next 8 sts, inc in next st] 2 times. (20 sc)
- Round 10: [sc in next 9 sts, inc in next st] 2 times. (22 sc)
- Round 11: [sc in next 10 sts, inc in next st] 2 times. (24 sc)
- Round 12: [sc in next 11 sts, inc in next st] 2 times. (26 sc)
- Round 13: [sc in next 12 sts, inc in next st] 2 times. (28 sc)
- Round 14: [sc in next 13 sts, inc in next st] 2 times. (30 sc)
✅ Checkpoint: At the end of Round 14, you should have a flat triangular wedge tube measuring approximately 4.5 inches long. Stuff the front tip lightly with polyfill.
Section 2: Crust Edge (Tan)
- Round 15: Join Tan yarn at the wide back opening in blo. Working in blo around the 30 open stitches: sc in each st around. (30 sc)
- Round 16: [sc in next 3 sts, inv-dec] 6 times. (24 sc)
- Round 17: sc in each st around. (24 sc)
- Stuff the body firmly with polyfill, ensuring the side walls stay flat and wedge-shaped.
- Round 18: [Ruffled Shell Crust Stitch in next st, skip 1 st, sl st in next st] rep around the remaining opening. FO, leaving a long tail to sew the back opening completely closed. Weave in ends securely.
Section 3: Whipped Cream Swirl (Fluffy White)
- Round 1: Make a magic ring, work 6 sc into the ring. (6 sc)
- Round 2: inc in each st around. (12 sc)
- Round 3: [sc in next st, inc in next st] 6 times. (18 sc)
- Round 4: sc in each st around. (18 sc)
- Round 5: [sc in next st, inv-dec] 6 times. (12 sc)
- Stuff lightly with polyfill.
- Round 6: [inv-dec] 6 times. (6 sc)
- FO, leaving a tail. Thread the tail through the front loops of Round 6 and pull tight to close. Sculpt the dollop into a slight peak and sew it securely onto the top wide corner of the pie slice.
Size Customization Tips
- To scale down: Use a Sport or Fingering weight yarn with a 2.75 mm hook, stopping increases at Round 10 for a miniature 2-inch tartlet charm.
- To scale up: Use a bulky chenille blanket yarn with a 5.5 mm or 6.0 mm hook, doubling your starting magic ring count to 6 sc and increasing every round accordingly for a jumbo plush throw pillow.
Care Instructions
Spot clean gently with a damp cloth and mild soap. Do not submerge completely in water or machine wash to protect the internal polyfill structure and prevent shape distortion. Air dry flat away from direct sunlight.
Closing
Thank you so much for stitching along with me on this Sweet Cinnamon Pumpkin Pie Slice Free Amigurumi Pattern! I hope your hook brought a little extra warmth and joy to your crafting corner today. I would love to see your handmade autumn creations! Please share your finished pie slices on Instagram tagging me, save this project to your Pinterest boards for your next seasonal crafting marathon, and leave a comment below to let me know how your baking—er, crocheting—turned out! Happy stitching!