
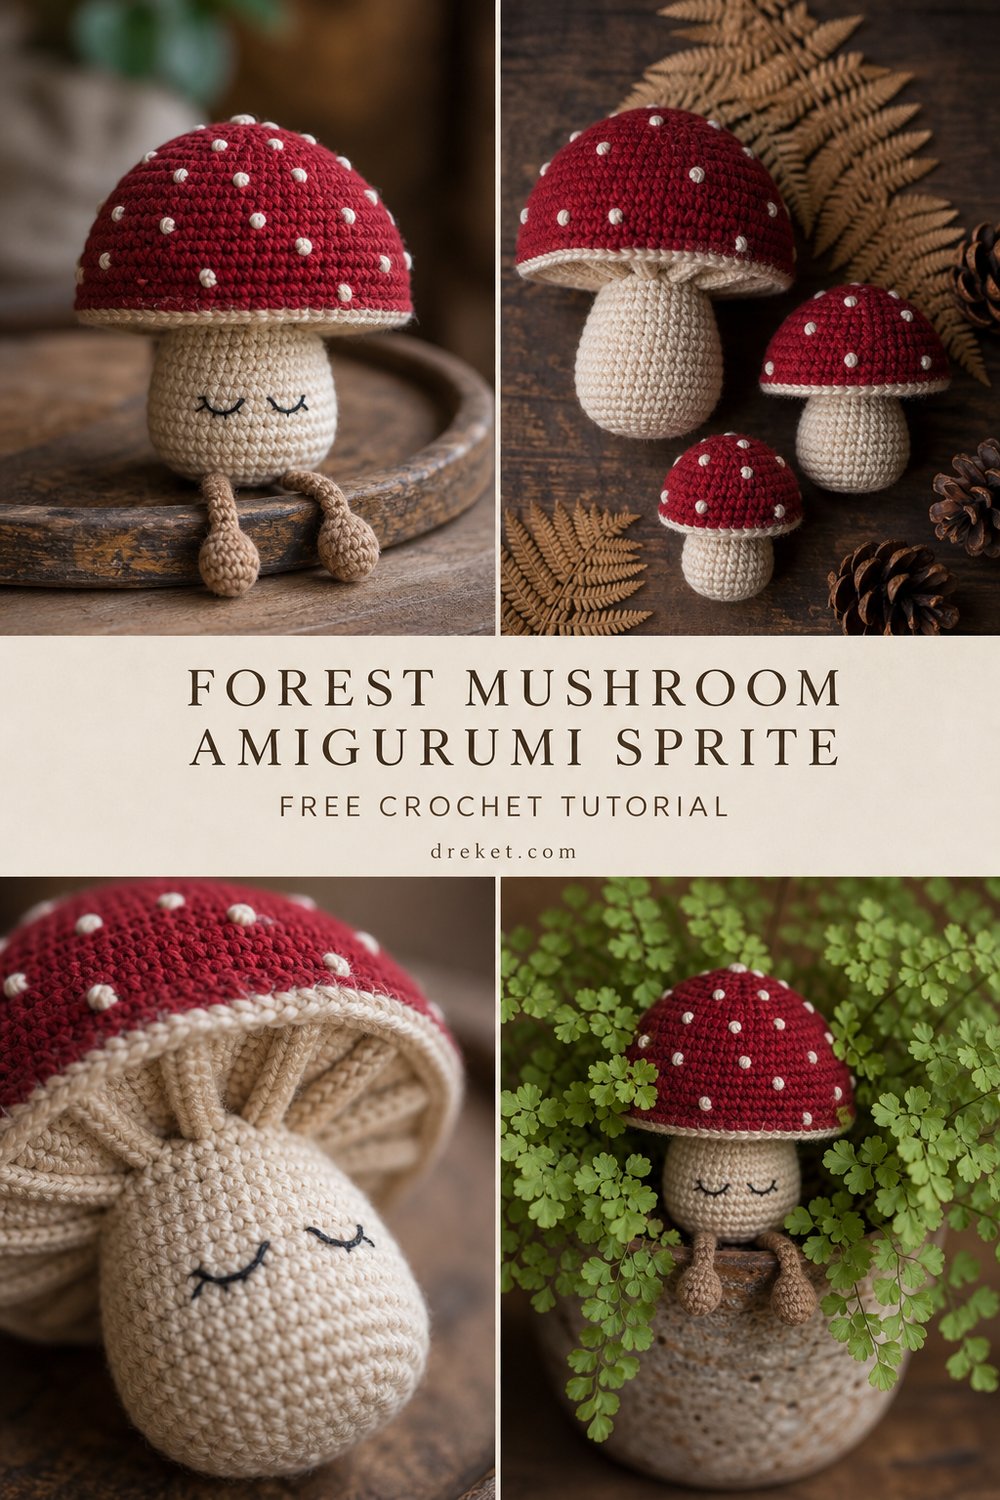
Step into a world of rustic woodland magic by bringing to life a whimsical little character that looks right at home nestled inside a potted maidenhair fern or resting on a vintage wooden tray. This charming little sprite combines earthy textures with delicate embroidered details to capture the pure essence of a cozy forest floor.
Cozy Little Forest Mushroom Sprite Free Amigurumi Tutorial
Quick Facts
- Stitches Used: Single crochet, increase, invisible decrease, back loops only, surface slip stitch, French knots, straight stitch
- Size Fit: One size amigurumi art toy (approx. 5 inches / 13 cm tall)
- Estimated Hours to Complete: 3–4 hours
- Gift-Appeal: An ideal, quick-to-make heirloom token for nature lovers, cottagecore enthusiasts, and fantasy doll collectors.
Sizing customization tips are included later in the post to help you scale your sprite up or down effortlessly.
What Makes This Forest Mushroom Sprite Special
The visual charm of this amigurumi sprite comes down to a careful balance of structured shaping and rich, tactile details. Working in tight single crochet using a slightly smaller hook than recommended creates a dense, sturdy fabric that completely hides the stuffing and holds its unique mushroom silhouette without slumping. The gills underneath the cap are formed by working into the back loops only and adding a textural surface flourish, while the facial expression relies on simple, minimalist embroidery—closed, peaceful eyes stitched with fine black embroidery floss that give the sprite its gentle, sleepy demeanor.
Skill Level
- Intermediate: Comfortable working in continuous spirals, joining amigurumi pieces, and basic surface embroidery.
- Required Skills: Magic ring, working in the round, invisible decreases, changing yarn colors seamlessly, and basic French knots.
💡 Designer Tip: Even confident beginners can easily tackle this project by taking time to practice the invisible decrease and keeping a steady, firm tension throughout.
Finished Measurements
| Measurement | Inches | Centimeters |
|---|---|---|
| Total Height | 5.0 in | 13.0 cm |
| Cap Diameter | 3.5 in | 9.0 cm |
| Body Width (Base) | 2.0 in | 5.0 cm |
Materials You Will Need
- Yarn Weight: Sport or light worsted weight (#2 Fine or #3 Light) cotton/acrylic blend yarn
- Crochet Hook: 2.25 mm (US B/1) or size needed to obtain tight gauge
- Notions: Polyester fiberfill stuffing, tapestry needle, stitch markers, embroidery floss in black, pins for assembly
| Color | Yarn Type | Yardage Needed |
|---|---|---|
| Red (Cap) | Sport weight cotton | 35 yds (32 m) |
| White (Spots & Accents) | Sport weight cotton | 5 yds (5 m) |
| Cream (Stem & Body) | Sport weight cotton | 40 yds (37 m) |
| Dark Brown (Gills & Feet) | Sport weight cotton | 15 yds (14 m) |
Yarn Suggestions
| Yarn Brand & Line | Weight | Yardage per Skein | Notes |
|---|---|---|---|
| Schachenmayr Catania | Sport (#2) | 137 yds (125 m) per 50g | 100% mercerized cotton; yields crisp, clear stitch definition. |
| Hobbii Friends Cotton 8/4 | Fingering (#1) | 179 yds (164 m) per 50g | Wonderful color palette for earthy mushroom tones. |
| Knit Picks CotLin | DK (#3) | 123 yds (112 m) per 50g | Linen-cotton blend with a wonderful matte, organic texture. |
⚠️ Note: Avoid fuzzy or brushed novelty yarns (like mohair or chenille) for this specific pattern, as they will obscure the tight single-crochet texture and swallow the delicate embroidered details.
Gauge
| Gauge Type | Stitches / Rows | Measurement |
|---|---|---|
| Single Crochet | 24 sts x 26 rows | 4 x 4 inches (10 x 10 cm) |
💡 Designer Tip: Gauge is not strictly critical for amigurumi, but maintaining an unyielding, tight tension is vital to ensure the fiberfill stuffing does not peek through the stitches. Swatch first if you tend to crochet loosely.
Abbreviations
| Abbreviation | Full Term |
|---|---|
| ch | chain |
| sc | single crochet |
| inc | single crochet increase (2 sc in same stitch) |
| inv-dec | invisible single crochet decrease (sc 2 together through front loops only) |
| blo | back loops only |
| flo | front loops only |
| sl st | slip stitch |
| st(s) | stitch(es) |
| Rnd(s) | Round(s) |
| FO | fasten off |
Special Stitches Explained
- Invisible Decrease (inv-dec): Insert hook into the flo of the next stitch, then immediately insert hook into the flo of the following stitch (3 loops on hook). Yarn over and pull through the first 2 loops, yarn over and pull through remaining 2 loops.
- French Knot (Embroidery): Bring the needle up from the back of the work. Wrap the thread around the needle 2–3 times, then insert the needle back down very close to where it emerged, holding the working thread taut as you pull the needle through to the back.
Pattern Instructions
Section 1: Stem and Body (Cream)
Working from the bottom base up to the neck. Stuff firmly as you go.
– Rnd 1: Magic ring, work 6 sc in ring. (6 sc)
– Rnd 2: inc in each st around. (12 sc)
– Rnd 3: (1 sc, inc) 6 times. (18 sc)
– Rnd 4: (2 sc, inc) 6 times. (24 sc)
– Rnd 5: Working in blo, sc in each st around. (24 sc)
– Rnd 6-9: sc in each st around (4 rounds total). (24 sc)
– Rnd 10: (2 sc, inv-dec) 6 times. (18 sc)
– Rnd 11-13: sc in each st around (3 rounds total). (18 sc)
– Rnd 14: (1 sc, inv-dec) 6 times. (12 sc)
– Rnd 15: sc in each st around. (12 sc)
– FO, leaving a long tail for sewing. Stuff the body firmly, shaping the gentle bulbous base.
Section 2: Mushroom Cap (Red)
Working from the top center outward.
– Rnd 1: Magic ring, work 6 sc in ring. (6 sc)
– Rnd 2: inc in each st around. (12 sc)
– Rnd 3: (1 sc, inc) 6 times. (18 sc)
– Rnd 4: sc in each st around. (18 sc)
– Rnd 5: (2 sc, inc) 6 times. (24 sc)
– Rnd 6: sc in each st around. (24 sc)
– Rnd 7: (3 sc, inc) 6 times. (30 sc)
– Rnd 8: (4 sc, inc) 6 times. (36 sc)
– Rnd 9: (5 sc, inc) 6 times. (42 sc)
– Rnd 10-12: sc in each st around (3 rounds total). (42 sc)
– Rnd 13: (6 sc, inc) 6 times. (48 sc)
– Rnd 14-15: sc in each st around (2 rounds total). (48 sc)
– FO Red yarn, weave in ends.
✅ Checkpoint: At this stage, your mushroom cap should measure approximately 3.5 inches across and form a smooth, rounded dome.
Section 3: Gills (Dark Brown)
- Rnd 1: Join Dark Brown yarn to the unworked front loops left on the underside rim of the cap (around Rnd 15). Working in flo, work (2 sc, inc) around. (64 sc)
- Rnd 2: sc in each st around. (64 sc)
- FO, weave in all ends securely.
Section 4: Dangling Feet (Make 2 – Dark Brown & Cream)
- Rnd 1 (Dark Brown): Magic ring, work 6 sc in ring. (6 sc)
- Rnd 2: sc in each st around. (6 sc)
- Rnd 3 (Switch to Cream): sc in each st around. (6 sc)
- Rnd 4-6: sc in each st around (3 rounds total). (6 sc)
- FO, leaving a short tail. Lightly stuff the foot base and flatten the open top edge, sewing closed across the opening.
Section 5: Assembly and Embellishments
- Facial Details: Using black embroidery floss, stitch closed, peaceful eyes with tiny upward curved lashes onto the upper portion of the Cream stem (around Rnd 11-12), spacing them about 3 stitches apart. Add a single minimalist French knot for rosy cheeks just below the outer edges of the eyes using pink or light peach thread.
- Cap Spots: Using White yarn and a tapestry needle, scatter multiple French knots across the Red mushroom cap, varying spacing for a natural, organic look.
- Cap Attachment: Place the stuffed Stem securely inside the underside of the Mushroom Cap, tucking the neck tightly against the gills. Whipstitch the cap rim securely to the upper body rounds.
- Feet Attachment: Sew the dangling feet firmly to the bottom underside of the body base so they peek out playfully when the sprite is seated.
Size Customization Tips
- Scaling Up: To create a larger sprite, switch to a DK or worsted weight yarn with a 3.5 mm hook. This will increase your finished height to roughly 7–8 inches.
- Scaling Down: Use a lace-weight embroidery thread with a 1.25 mm hook to craft a miniature pocket-sized sprite measuring under 2 inches tall.
Care Instructions
Spot clean gently with a damp cloth and mild soap. Do not submerge in water or machine wash, as vigorous agitation can distort the fiberfill stuffing and warp the amigurumi shaping. Air dry completely on a flat surface away from direct sunlight.
Cozy Little Forest Mushroom Sprite Free Amigurumi Tutorial
Thank you so much for joining me in stitching up this little piece of woodland magic! I would love to see your handmade sprites finding cozy homes in your space. Please share your finished photos on social media, tag me, and use the hashtag #ForestMushroomSprite. Don’t forget to save this tutorial to your Pinterest boards for later, and leave a comment below to let me know how your little sprite turned out!