












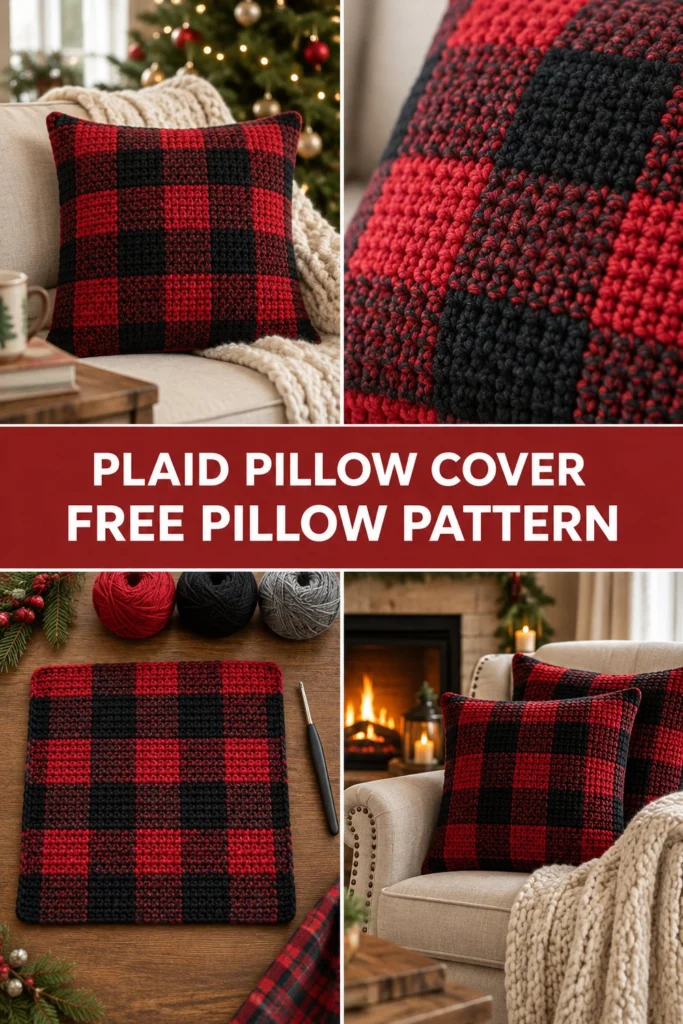
Bring that cozy cabin lodge feeling right into your living room with a classic buffalo plaid crochet Christmas pillow cover. Using simple single crochet color blocks worked in rich red, deep black, and dark grey, you can create a striking plaid design that instantly transforms your sofa for the holidays.
Quick Facts
- Skill level: Intermediate
- Finished size: To fit a 16 x 16 in / 40.6 x 40.6 cm pillow insert
- Yarn: Worsted weight (Medium #4) yarn in Red and Black
- Hook: 5.0 mm (US H/8) crochet hook
- Stitches used: Chain (ch), single crochet (sc), slip stitch (sl st)
- Time to make: Weekend project (approx. 8–10 hours)
Size customization tips and gauge adjustments are included further down in this guide.
What Makes This Buffalo Plaid Crochet Pillow Special
The magic of this buffalo plaid crochet pillow lies in the intarsia colorwork technique, where you carry and swap your yarn colors across the rows to form crisp, clean blocks. Working entirely in sturdy single crochet creates a dense, durable fabric that neatly hugs a standard pillow insert without showing the stuffing underneath. The front and back panels are worked separately as flat pieces, then single crocheted together around four sides to enclose the pillow form securely.
Skill Level
- Intermediate
- Required skills:
- Working flat rows in single crochet
- Changing colors cleanly mid-row
- Carrying unused yarn strands neatly along the wrong side of your work
- Joining panels with a single crochet seam around the edges
- Reassurance line: If you have basic single crochet down and a little patience for managing your yarn bobbins, you will master this colorwork project in no time!
Finished Measurements
| Dimension | Inches | Centimeters |
|---|---|---|
| Width | 16.0 in | 40.6 cm |
| Height | 16.0 in | 40.6 cm |
| Depth (when stuffed) | Approx. 4.5 to 5.0 in | 11.4 to 12.7 cm |
Materials You Will Need
| Material / Color | Yarn Weight / Type | Yardage | Meters |
|---|---|---|---|
| Red | Worsted / Acrylic (#4) | 350 yds | 320 m |
| Black | Worsted / Acrylic (#4) | 300 yds | 274 m |
| Dark Grey | Worsted / Acrylic (#4) | 150 yds | 137 m |
- Hook: 5.0 mm (US H/8) crochet hook
- Notions: Tapestry needle for weaving in ends, locking stitch markers, scissors, 16 x 16 in / 40.6 x 40.6 cm square pillow insert
Yarn Suggestions
| Yarn Line | Skein Yardage | Notes |
|---|---|---|
| Lion Brand Vanna’s Choice | 170 yds / 156 m | Great stitch definition, excellent color range for rich holiday reds and deep blacks. |
| Caron One Pound | 812 yds / 742 m | Budget-friendly, durable, and comes in large skeins so you won’t run out mid-project. |
| Red Heart Super Saver | 364 yds / 333 m | Sturdy and widely available in true holiday red and jet black. |
⚠️ Note: Avoid novelty, eyelash, or heavily textured fuzzy yarns for this project. Smooth acrylic or wool-blend worsted weight yarns are essential so your color blocks remain sharp and well-defined.
Gauge
- 14 sts x 16 rows = 4 x 4 in / 10 x 10 cm in single crochet using a 5.0 mm hook.
- Check your gauge before starting! If your stitches are too loose, the pillow insert will peek through; if they are too tight, your finished cover will measure smaller than 16 inches.
Abbreviations
| Abbreviation | Meaning |
|---|---|
| ch | chain |
| sc | single crochet |
| sl st | slip stitch |
| st(s) | stitch(es) |
| sk | skip |
| rep | repeat |
| RS | right side |
| WS | wrong side |
| Rnd(s) | round(s) |
| Row(s) | row(s) |
UK terms equivalent: UK sc = US sc, UK dc = US sc (this pattern uses standard US terminology).
Special Stitches Explained
- Color Change in Single Crochet: Insert hook into the st, yarn over, pull up a loop (2 loops on hook), drop current color, pick up new color, yarn over with new color and pull through both loops on hook to complete the stitch. Carry the unused yarn loosely along the top of the previous row, crocheting over it to hide it inside the stitches.
Pattern Instructions
Pattern Notes
- Working rows: Turn at the end of each row. Ch 1 at the beginning of a row does not count as a stitch. Always place your first sc in the very first stitch (the same stitch as the turning chain base, unless specified otherwise).
- Managing yarn: To keep your yarn from tangling when working buffalo plaid, wind small bobbins of red and black, or keep separate balls of yarn on hand for each color block across the row.
Section 1: Front Panel (Plaid Colorwork, make 1)
Using Red, ch 59.
* Row 1 (RS): Working in back bumps of foundation chain, sc in 2nd ch from hook and in each ch across, turn (58 sc).
* Rows 2 to 5: Ch 1, working in buffalo plaid chart order (Block pattern: 29 sts Red, 29 sts Black across the row), sc in each st across, turn (58 sc).
* Rows 6 to 10: Ch 1, following chart (Block pattern: 29 sts Black, 29 sts Red across), sc in each st across, turn (58 sc).
* Rows 11 to 15: Ch 1, following chart (Block pattern: 29 sts Red, 29 sts Black across), sc in each st across, turn (58 sc).
* Rows 16 to 20: Ch 1, following chart (Block pattern: 29 sts Black, 29 sts Red across), sc in each st across, turn (58 sc).
* Reps: Repeat Rows 1 to 20 two more times (a total of 60 rows), ending with a final row matching Row 20. Fasten off and weave in ends.
✅ Checkpoint: Measure your front panel. It should measure approximately 16 x 16 inches flat.
Section 2: Back Panel (Solid or Plaid, make 1)
- Option A (Solid Red Back): Using Red, ch 59.
- Row 1: Sc in 2nd ch from hook and in each ch across, turn (58 sc).
- Rows 2 to 60: Ch 1, sc in each st across, turn (58 sc). Fasten off.
- Option B (Matching Plaid Back): Repeat all instructions from Section 1 for the front panel so both sides feature the buffalo plaid look. Fasten off.
Section 3: Assembly & Joining
Place the Front Panel and Back Panel together with wrong sides facing each other and right sides facing out. Insert your 16 x 16 in pillow form between the two panels.
* Rnd 1 (Border & Join): Join Red yarn at the top left corner through both thicknesses. Working through both front and back loops of both panels simultaneously, work 1 sc in each st/row-end around all four sides of the square (58 sc across top, 58 sc across bottom, 60 sc down right side, 60 sc up left side), placing 3 sc in each of the 4 corners to maintain a flat edge for a total of (248 sc). Join with a sl st to the first sc. Fasten off and weave in all remaining yarn tails securely inside the pillow.
💡 Designer Tip: When joining the final edges around a bulky pillow insert, compress the cushion slightly and use locking stitch markers every few inches to keep the front and back panels aligned as you work.
Size Customization Tips
To adjust your pillow cover for a larger 18 x 18 in or 20 x 20 in insert, adjust your starting chain and row counts in multiples of the plaid block repeat (each color block measures 14 to 15 stitches wide at standard gauge). Always swatch first to calculate your personal stitch and row counts per inch!
Care Instructions
Remove the pillow insert before washing. Hand wash or machine wash gentle in cold water with mild detergent. Lay flat to shape and air dry completely. Do not bleach, iron, or tumble dry.
FAQ
Can I use a different yarn weight?
Stick to a standard Worsted Weight (#4) yarn for the best results. Lighter weights (DK or sport) will make your pillow cover too small, while bulky yarns will make the plaid blocks oversized and stiff.
How do I prevent my yarn from tangling while working plaid?
Wind your yarn into smaller bobbins or small yarn cakes before you begin. Drop the active yarn color to the back when switching, and pick up the next color from underneath to twist the yarns slightly and prevent holes between color blocks.
Is this pillow cover removable?
As written, this pattern permanently encloses the pillow insert for a neat, tailored farmhouse look. If you prefer a removable cover, stop the final joining seam three-quarters of the way around, add a row of buttonholes or a zipper, or simply overlap the back panel flaps.
Happy Crocheting!
I hope you love bringing this cozy buffalo plaid crochet pillow into your home for the holidays. If you enjoyed this free pattern, be sure to save the pin on Pinterest and leave a comment below sharing what colors you used for your holiday decor!
📄 Your free PDF pattern