
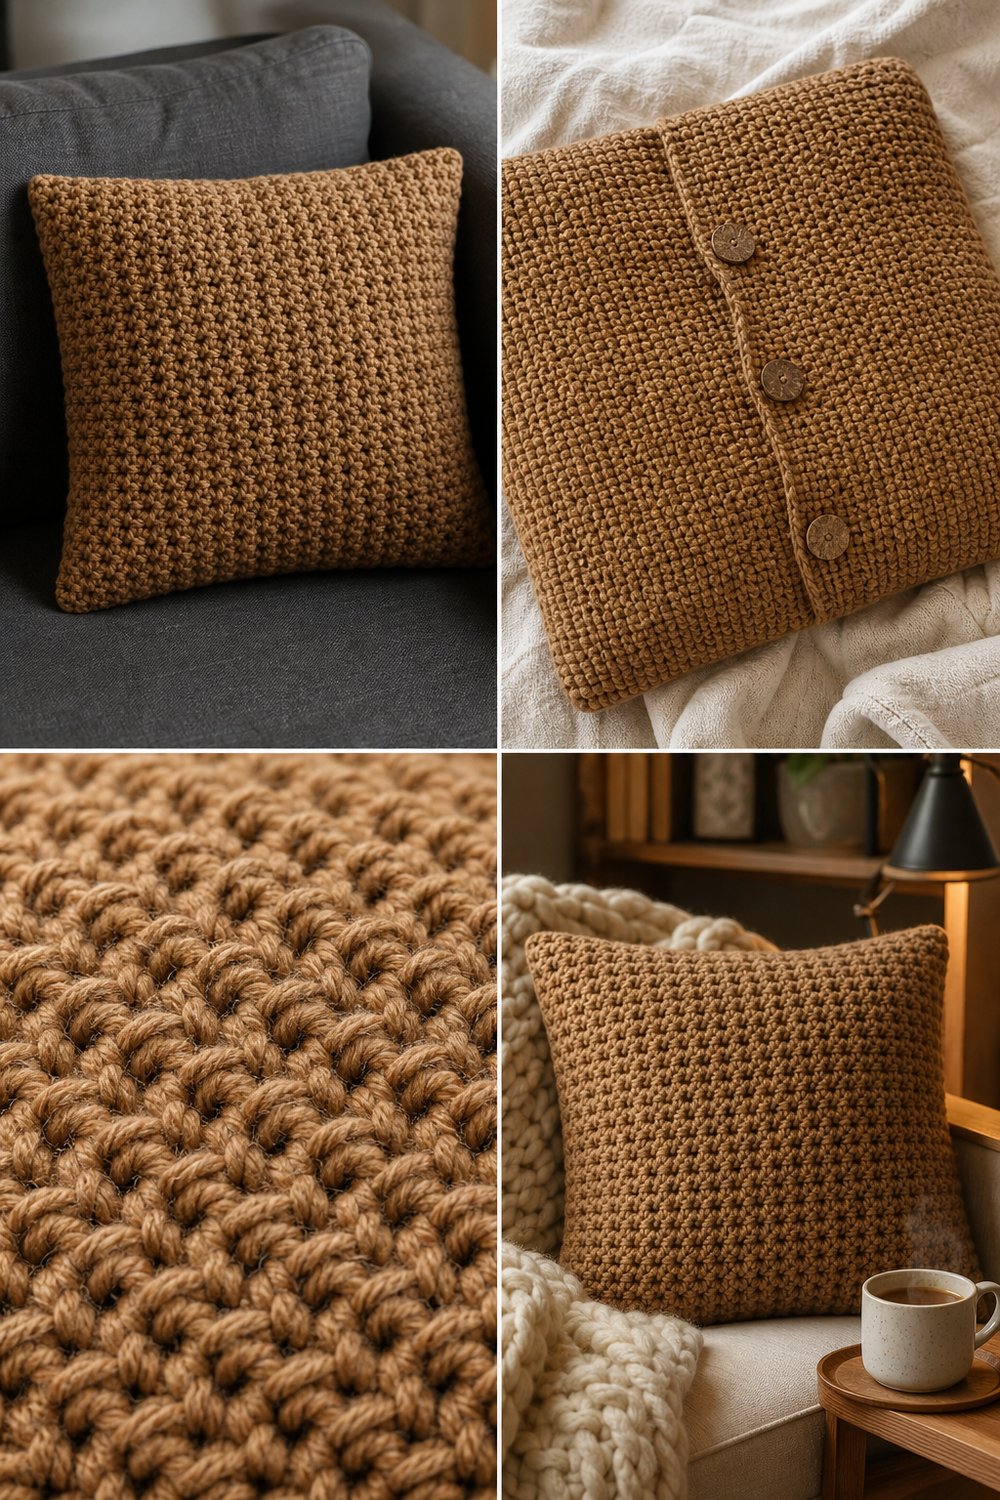
Transform your living space into a warm, inviting sanctuary with a project that brings tactile elegance right to your favorite reading nook. Nestled against a charcoal linen sofa or layered beside a chunky knit throw, this handcrafted pillow cover introduces rich, organic texture to your home decor.
Cozy Chunky Moss Stitch Pillow Cover Free Easy Pattern
Quick Facts
- Stitches Used: Chain (ch), Single Crochet (sc)
- Size Fit: Fits a standard 18-inch (45.7 cm) square throw pillow insert
- Estimated Hours to Complete: 4 to 5 hours
- Gift-Appeal Framing: A quick-to-whip-up, thoughtful handmade housewarming or holiday gift that looks like high-end boutique decor.
Sizing customization tips are included later in this post if you need to adapt this design for larger or smaller pillow inserts.
What Makes This Cozy Chunky Moss Stitch Pillow Cover Special
This design relies on the classic moss stitch (also known as the granite or linen stitch), which alternates single crochets and chains in a staggered rhythm. Working with a heavy wool-blend chunky yarn allows this dense, interlocking texture to truly pop, creating crisp structural ridges that resemble woven textiles rather than standard crochet. The back features a clean envelope closure secured by large coconut buttons, marrying rustic charm with seamless functionality.
Skill Level
- Beginner-Friendly Intermediate
- Required skills:
- Basic chaining and single crochet
- Working evenly into chain spaces rather than tops of stitches
- Simple buttonhole creation
- Basic seaming or slip-stitch joining
💡 Designer Tip: If you can work a chain and a single crochet, you have all the technical skills needed to master this stunning textured project.
Finished Measurements
| Dimension | Inches | Centimeters |
|---|---|---|
| Width | 18.0 in | 45.7 cm |
| Height | 18.0 in | 45.7 cm |
| Fits Insert | 18 x 18 in | 45.7 x 45.7 cm |
Materials You Will Need
- Yarn Weight: Super Bulky / #6
- Hook Size: US M/13 (9.0 mm) crochet hook
- Additional Tools: Tapestry needle, locking stitch markers, measuring tape, and three 1.5-inch (3.8 cm) coconut buttons.
| Color Name / Shade | Yarn Weight | Yardage Needed | Meters Needed |
|---|---|---|---|
| Warm Camel | Super Bulky (6) | 320 yds | 293 m |
Yarn Suggestions
| Brand & Line Name | Yarn Weight | Yardage per Skein | Notes |
|---|---|---|---|
| Lion Brand Wool-Ease Thick & Quick | Super Bulky (6) | 106 yds / 97 m per skein | Excellent stitch definition and rich camel colorway. (Requires 3 skeins) |
| Bernat Softee Chunky | Super Bulky (6) | 108 yds / 99 m per skein | Soft acrylic with a beautiful natural wool look. (Requires 3 skeins) |
| Malabrigo Rasta | Super Bulky (6) | 90 yds / 82 m per skein | Luxury Merino option for an artisanal finish. (Requires 4 skeins) |
⚠️ Note: Avoid novelty novelty furs, eyelash yarns, or dark, highly textured novelty yarns that obscure the moss stitch definition. Stick to smooth, plied super bulky yarns to achieve the crisp ridges shown in the photos.
Gauge
- Stitch Gauge: 10 sts and 9 rows = 4 inches (10 cm) in moss stitch pattern using a 9.0 mm hook.
| Measurement Type | Stitches / Rows | Over Distance |
|---|---|---|
| Moss Stitch Gauge | 10 sts & 9 rows | 4 x 4 inches (10 x 10 cm) |
💡 Designer Tip: Always make a gauge swatch before starting. Chunky yarns vary greatly by brand, and getting the exact row-to-inch ratio ensures your pillow cover fits your insert snugly without gaping.
Abbreviations
| Abbreviation | Full Term |
|---|---|
| ch | Chain |
| sc | Single crochet |
| st(s) | Stitch(es) |
| sp(s) | Space(s) |
| sk | Skip |
| rep | Repeat |
| RS | Right side |
| WS | Wrong side |
Special Stitches Explained
- Moss Stitch (Granite Stitch): A pattern consisting of alternating single crochet stitches and chain-1 spaces. When working into the following row, the single crochet is placed directly into the chain-1 space of the previous row, and a chain-1 is worked over the single crochet of the previous row.
Pattern Instructions
Section 1: Front Panel
Using US M/13 (9.0 mm) hook, ch 46.
– Row 1 (RS): Sc in 4th ch from hook (skipped 3 chs count as first sc and ch-1 sp), ch 1, sk 1 ch, sc in next ch; rep from * across, turn. (22 sc, 21 ch-1 sps)
– Row 2: Ch 2 (counts as sc and ch-1 sp), sk first sc, sc in next ch-1 sp, ch 1, sk next sc; rep from * across, ending with sc in turning chain space, turn. (22 sc, 21 ch-1 sps)
– Rows 3–40: Rep Row 2. Fasten off, leaving a long tail for assembly.
✅ Checkpoint: Measure your front panel. It should measure roughly 18 inches wide by 18 inches tall unstretched.
Section 2: Back Panel (Envelope Flap)
The back panel is worked in two separate overlapping flaps to create the envelope closure.
Top Flap:
Using US M/13 (9.0 mm) hook, ch 46.
– Rows 1–22: Rep Rows 1–2 of Front Panel.
– Row 23 (Buttonhole Row): Ch 2, sk first sc, [sc in next ch-1 sp, ch 1, sk next sc] 3 times, ch 3, sk next 3 sts (creates first buttonhole), [sc in next ch-1 sp, ch 1, sk next sc] 6 times, ch 3, sk next 3 sts (second buttonhole), [sc in next ch-1 sp, ch 1, sk next sc] 6 times, ch 3, sk next 3 sts (third buttonhole), sc in turning chain space, turn. (13 sc, 3 ch-3 sps, 15 ch-1 sps)
– Rows 24–26: Rep Row 2, working sc stitches and ch-1 spaces evenly across the ch-3 buttonhole spaces. Fasten off.
Bottom Flap:
Using US M/13 (9.0 mm) hook, ch 46.
– Rows 1–20: Rep Rows 1–2 of Front Panel. Fasten off.
Section 3: Assembly & Finishing
- Lay the Front Panel flat with the RS facing up.
- Lay the Bottom Back Panel flat over the bottom half of the Front Panel, matching raw outer edges.
- Lay the Top Back Panel (with buttonholes) over the top half, overlapping the bottom flap by approximately 3 inches.
- Pin all four layers securely around the outer perimeter.
- Using your tapestry needle and matching yarn tail, whipstitch or mattress stitch around all four outer edges, catching all layers securely.
- Sew the 3 large coconut buttons onto the bottom flap, aligning them carefully with the buttonholes on the top flap.
- Insert your 18-inch square pillow form inside the envelope closure and button securely.
Size Customization Tips
- To adjust for a 20-inch (50.8 cm) pillow: Chain an additional 6 stitches to your starting foundation chain (must be an even number), and add 4 extra rows to each panel to maintain square proportions.
- To adjust for a 16-inch (40.6 cm) pillow: Reduce your starting foundation chain by 6 stitches, and subtract 4 rows from the height of your panels.
Care Instructions
- Remove the pillow insert before washing.
- Hand wash gently in cool water using a mild wool-safe detergent. Do not wring or twist.
- Press excess water out gently between clean towels.
- Lay flat to dry in the shade on a flat surface, reshaping gently to square dimensions while damp. Do not iron or tumble dry.
Cozy Chunky Moss Stitch Pillow Cover Free Easy Pattern
I hope you adore making and styling this cozy piece in your home as much as I loved designing it for you! If you stitch up your own pillow cover, please share your photos on Instagram and tag me, save this project to your favorite Pinterest boards for later, and leave a comment below to let me know how it went! Happy crocheting!