












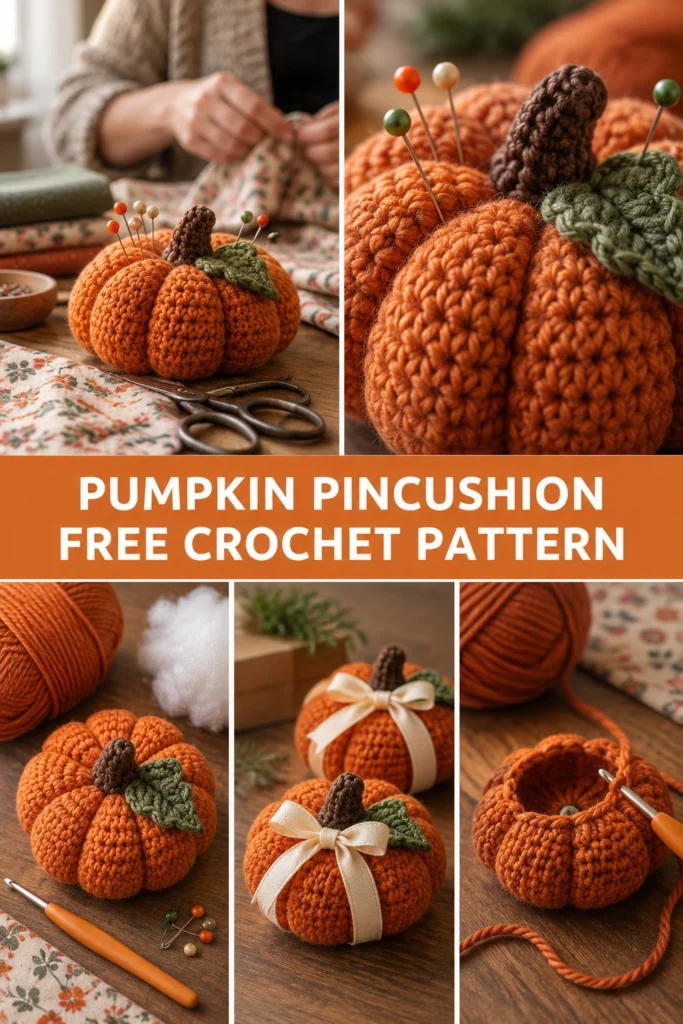
Welcome to your new favorite autumn project! There is nothing quite like cozying up with a quick crochet project as the leaves start to change, and this little pumpkin pincushion is as practical as it is charming. Working up in rich, textured orange yarn with a rustic brown stem and olive leaf, it adds an instant touch of fall to your sewing basket or holiday table.
Quick Facts
- Skill level: Easy / Advanced Beginner
- Finished size: 4.5 inches (11.5 cm) wide, 3.5 inches (9 cm) high including stem
- Yarn: Worsted weight (Medium #4) yarn in pumpkin orange, dark brown, and olive green
- Hook: US D/3 (3.25 mm) crochet hook
- Stitches used: Magic ring, single crochet (sc), increase (inc), invisible decrease (inv-dec), slip stitch (sl st)
- Time to make: 2 to 3 hours (a quick one-evening project)
Size customization tips are included further down in the article.
What Makes This Crochet Pumpkin Pincushion Special
This design relies on continuous spiral rounds of tight single crochet stitches to create a firm, smooth amigurumi ball that holds its stuffing without gaps. Once the stuffed sphere is closed, a simple yarn-wrapping technique pulled tightly through the exact center creates six deep, realistic pumpkin segments. The ridged brown stem is worked in small rounds to give it authentic texture, and the flat leaf is sewn neatly to the base of the stem to complete your handmade thanksgiving crochet gift.
Skill Level
- Working in the round (spiral without joining)
- Basic increases and invisible decreases
- Simple yarn sculpting (pulling segments)
- Basic amigurumi assembly and sewing
💡 Designer Tip: Don’t worry if your initial crocheted ball looks slightly spherical before sculpting—the magic happens when you wrap and pull the yarn segments through the center!
Finished Measurements
| Dimension | Inches | Centimeters |
|---|---|---|
| Width (Diameter) | 4.5 in | 11.5 cm |
| Height (with stem) | 3.5 in | 9 cm |
Materials You Will Need
| Material | Color / Description | Details |
|---|---|---|
| Main Yarn (A) | Pumpkin Orange | Worsted weight (approx. 50 yards / 46 meters) |
| Stem Yarn (B) | Dark Brown | Worsted weight (approx. 10 yards / 9 meters) |
| Leaf Yarn (C) | Olive Green | Worsted weight (approx. 8 yards / 7 meters) |
| Crochet Hook | US D/3 (3.25 mm) | Smaller than yarn label recommendation for tight stitches |
| Notions | Polyfill Stuffing | For firm filling |
| Notions | Tapestry Needle | For weaving ends and sculpting segments |
| Notions | Stitch Markers | To track the beginning of rounds |
| Optional | Straight Pins with colorful heads | For decoration and pin testing |
Yarn Suggestions
| Yarn Line | Weight | Skein Yardage | Notes |
|---|---|---|---|
| Lion Brand Vanna’s Choice | Worsted (4) | 145 yds (133 m) | Great stitch definition and firmness |
| Caron Simply Soft | Worsted (4) | 315 yds (288 m) | Soft sheen, very smooth |
| Red Heart Super Saver | Worsted (4) | 364 yds (333 m) | Durable, holds shape well for amigurumi |
⚠️ Note: Avoid novelty, eyelash, or extremely fuzzy yarns for this project. They obscure stitch definition and make it difficult to see where to place your hook.
Gauge
- Main Gauge: 20 sc x 22 rounds = 4 in / 10 cm using a 3.25 mm hook.
- Amigurumi Check: Rnds 1 to 6 of the pumpkin body = 1.5 inches (3.8 cm) across.
Abbreviations (US Terminology)
- ch: chain
- sc: single crochet
- inc: single crochet increase (work 2 sc in the same st)
- inv-dec: invisible decrease (insert hook into front loops of next 2 sts, yarn over, pull through both loops, yarn over, pull through remaining 2 loops)
- sl st: slip stitch
- st(s): stitch(es)
- Rnd(s): round(s)
- FO: fasten off
- ( … ): repeat instructions between parentheses the given number of times
UK/Australia translation note: UK sc = US dc, UK dc = US sc. This pattern uses US terms.
Special Stitches Explained
- Magic Ring: Wrap yarn around your index finger twice to form a loop. Insert hook into the center of the ring, yarn over, and pull up a loop. Ch 1 to secure, then work your starting stitches directly into the ring. Pull the tail end to close tightly.
- Invisible Decrease (inv-dec): Essential for amigurumi. Insert your hook only into the front loop of the first stitch, then immediately insert your hook into the front loop of the second stitch. Yarn over and pull through both front loops (2 loops on hook). Yarn over and pull through remaining 2 loops.
Pattern Instructions
Section 1: Pumpkin Body (Orange, Make 1)
Working in continuous spiral rounds without joining. Use a stitch marker to track the first stitch of each round.
* Rnd 1: Start 6 sc in a magic ring (6 sc)
* Rnd 2: (inc) x 6 (12 sc)
* Rnd 3: (1 sc, inc) x 6 (18 sc)
* Rnd 4: (2 sc, inc) x 6 (24 sc)
* Rnd 5: (3 sc, inc) x 6 (30 sc)
* Rnd 6: (4 sc, inc) x 6 (36 sc)
* Rnd 7: (5 sc, inc) x 6 (42 sc)
* Rnd 8: (6 sc, inc) x 6 (48 sc)
* Rnd 9: (7 sc, inc) x 6 (54 sc)
* Rnds 10 to 18: sc in each st around (9 rounds total) (54 sc)
* Rnd 19: (7 sc, inv-dec) x 6 (48 sc)
* Rnd 20: (6 sc, inv-dec) x 6 (42 sc)
* Rnd 21: (5 sc, inv-dec) x 6 (36 sc)
* Rnd 22: (4 sc, inv-dec) x 6 (30 sc)
* Rnd 23: (3 sc, inv-dec) x 6 (24 sc)
✅ Checkpoint: Stuff the pumpkin body firmly with polyfill now before the opening gets too small. Ensure it is nicely rounded.
* Rnd 24: (2 sc, inv-dec) x 6 (18 sc)
* Rnd 25: (1 sc, inv-dec) x 6 (12 sc)
* Rnd 26: (inv-dec) x 6 (6 sc)
FO, leaving a long 24-inch tail for sculpting the pumpkin segments. Thread the tail onto your tapestry needle and weave through the front loops of the remaining 6 stitches, pulling tight to close the hole completely.
Section 2: Stem (Dark Brown, Make 1)
Working in continuous rounds.
* Rnd 1: Start 6 sc in a magic ring (6 sc)
* Rnds 2 to 4: sc in each st around (3 rounds total) (6 sc)
* Rnd 5: (1 sc, inc) x 3 (9 sc)
* Rnd 6: sc in each st around (9 sc)
FO, leaving a 10-inch tail for sewing. Stuff the stem lightly.
Section 3: Leaf (Olive Green, Make 1)
Worked in rows.
* Row 1: Ch 7, working in the 2nd ch from hook: 1 sc, 1 hdc, 2 dc, 1 hdc, (1 sc, ch 2, 1 sc) all in the last ch. Now working along the opposite side of the foundation chain: 1 hdc, 2 dc, 1 hdc, 1 sc. Join with a sl st to the first sc (12 sts total around)
FO, leaving an 8-inch tail for sewing.
Assembly and Shaping
- Sculpting the Pumpkin Segments: Take the long orange tail left from the body. Insert your needle down through the center of the bottom hole and out through the center of the top hole. Pull firmly to create a slight indentation. Bring the yarn around the outside of the pumpkin to the bottom, insert through the bottom center to the top center again, pulling firmly to create your first deep groove. Repeat this 6 times evenly around the circumference of the ball to create 6 distinct pumpkin lobes. Securely knot the yarn and weave the remaining end inside the pumpkin.
- Attaching the Stem: Center the stuffed brown stem over the top center hole of the pumpkin. Using the brown yarn tail and tapestry needle, whipstitch the base of the stem securely to Rnds 1 and 2 of the pumpkin top.
- Attaching the Leaf: Position the olive green leaf slightly to one side of the stem base. Whipstitch the narrow end of the leaf firmly to the pumpkin body.
Size Customization Tips
- Making it smaller: Omit Rnds 8 and 9 of the body (stopping at 42 sc), work 7 straight rounds instead of 9, and decrease accordingly.
- Making it larger: Add another increase round to the body (Rnd 10: [8 sc, inc] x 6 = 60 sc), add 2 more straight rounds, and adjust your segment wrapping to accommodate the wider body.
Care Instructions
Spot clean gently with a damp cloth and mild soap. Do not submerge completely in water if stuffed with standard polyfill, as it may take a long time to dry internally. Reshape while damp.
FAQ
Can I use cotton yarn instead of acrylic?
Yes! Cotton yarn (like Lily Sugar’n Cream) works wonderfully for this crochet pumpkin pincushion. It provides a stiffer, very durable finish that holds pins securely, though it has slightly less stretch when pulling the segments.
How do I make sure the pins don’t slip out?
The secret is stuffing the pumpkin very firmly before closing the top. Tight packing creates internal resistance that grips straight pins securely when you push them into the pincushion.
Is this project safe to give as a toy for small children?
While the pumpkin shape is toy-like, this item is designed specifically as a pincushion and home decor piece. If modifying it into a baby toy, ensure all parts are securely sewn, omit metal pins entirely, and embroider any facial features rather than using buttons or beads.
Happy Crocheting!
I hope you enjoy making your very own crochet pumpkin pincushion! Be sure to save this pin on Pinterest to your favorite holiday crochet boards, and leave a comment below letting me know what colors you chose for your autumn decor. Happy crafting!
📄 Your free PDF pattern