
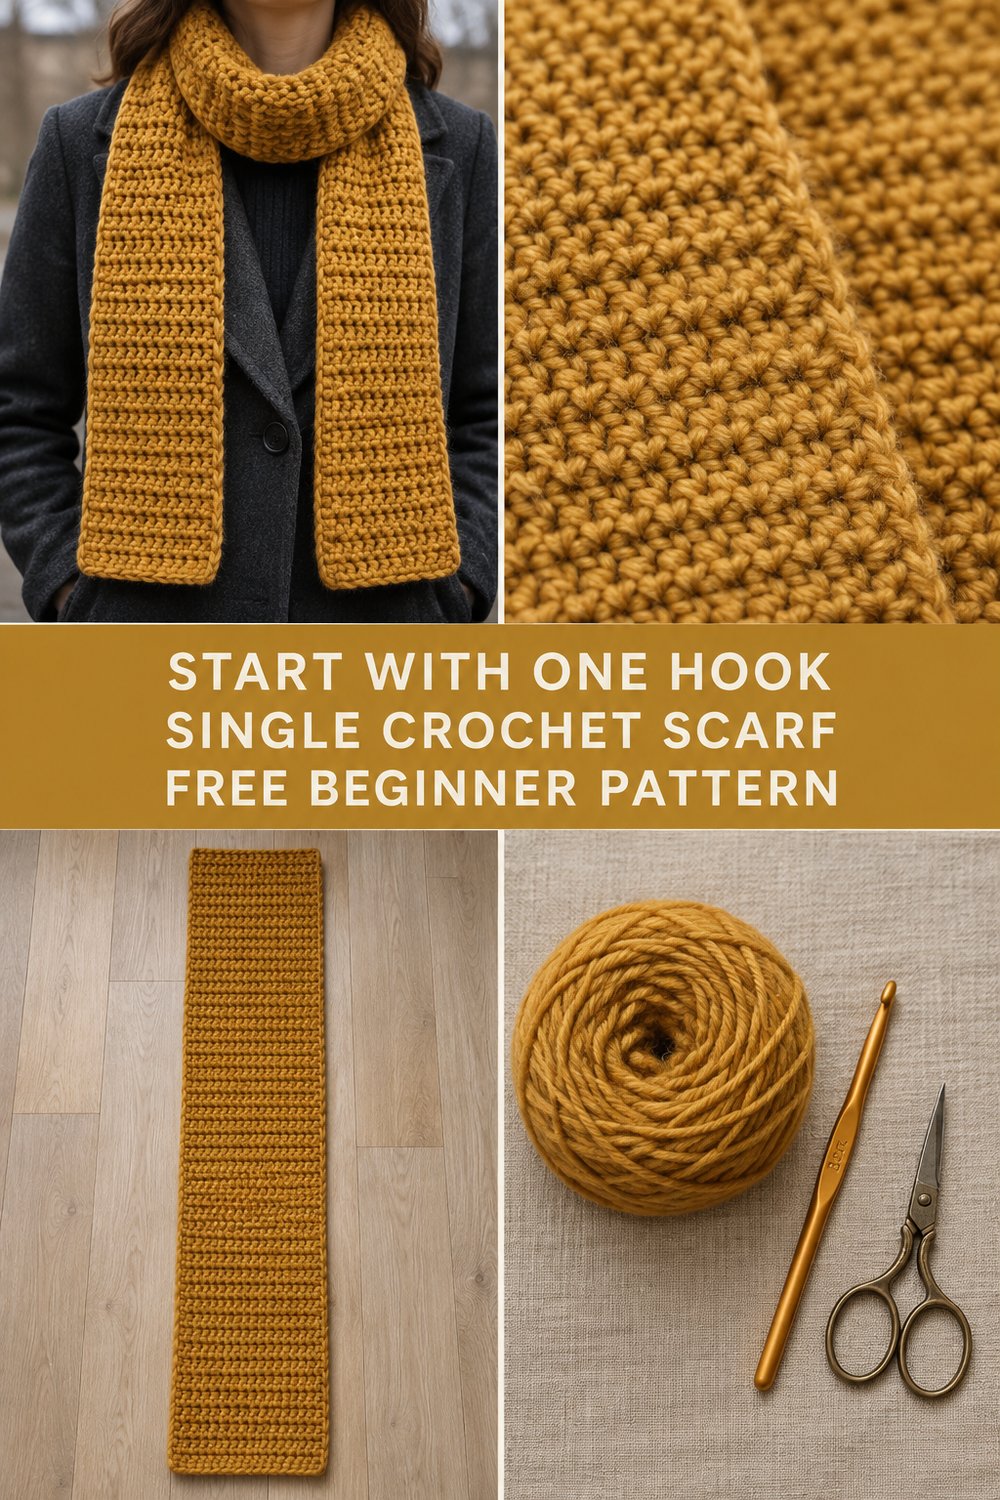
Wrap yourself in the comforting warmth of soft, golden yarn with a classic single crochet scarf that requires nothing more than a single hook, one ball of yarn, and a little quiet time. Perfect for draped styling over a dark wool coat or wrapped snugly against a cool autumn breeze, this beginner-friendly rectangular scarf brings modern, minimal charm to your handmade wardrobe. If you have been searching for the ideal first crochet project to kickstart your creative journey, this elegant, straight-edged pattern is your ultimate invitation to learn to crochet.
Absolute Beginner Crochet Project — Start With Just One Hook
Quick Facts
- Stitches Used: Slip knot, chain (ch), single crochet (sc)
- Size & Fit: One size rectangle scarf (6″ wide x 60″ long)
- Estimated Time: 6 to 8 hours
- Gift Appeal: A timeless, cozy winter accessory that makes a deeply thoughtful, high-end handmade gift for friends and family.
Looking to adjust the width or length to create an oversized wrap or a child’s scarf? Scroll down to our Size Customization Tips section later in the post!
What Makes This Absolute Beginner Scarf Special
The beauty of this project lies in its pure simplicity. Worked entirely in fundamental single crochet stitches, this design highlights clean lines, dense tactile warmth, and exceptionally neat edge alignment. By focusing on a single, uniform stitch throughout the entire fabric, you allow your hands to build comfortable muscle memory without the stress of counting complex pattern repeats or executing intricate shaping.
By omitting complicated color changes, decorative lace holes, or fringe, the rich texture of the warm mustard yarn takes center stage. The resulting piece features a balanced weight, flexible drape, and structured straight borders that rival boutique knitwear. It is the ultimate easy crochet scarf—delivering maximum visual elegance with minimum friction.
💡 Designer Tip: The key to achieving perfectly straight side edges on a single crochet project is maintaining even tension and ensuring you place your final stitch of every row into the very last stitch of the row below—never skipping it or adding extra turning chains!
Skill Level
- Project Rating: Absolute Beginner
- Required Skills:
- Tying a slip knot
- Holding yarn and maintaining basic tension
- Working a foundation chain
- Executing single crochet stitches
- Turning your work at the end of a row
- Fastening off and weaving in yarn ends with a tapestry needle
If you have never held a crochet hook in your life, this beginner crochet tutorial was written specifically with you in mind—no prior crafting experience required!
Finished Measurements
| Measurement | Inches | Centimeters |
|---|---|---|
| Width | 6.0 in | 15.0 cm |
| Length | 60.0 in | 152.0 cm |
Materials You Will Need
| Color Name | Yarn Weight / Fiber | Yardage Required | Meters Required |
|---|---|---|---|
| Warm Mustard | Worsted / Medium (Category 4) | 320 yds | 293 m |
- Crochet Hook: 5.0 mm (US Size H/8) aluminum crochet hook
- Tapestry Needle: Steel yarn needle with a blunt tip for weaving in yarn ends
- Scissors: Small craft or embroidery scissors
Yarn Suggestions
| Yarn Brand & Line | Weight Category | Skein Yardage | Notes |
|---|---|---|---|
| Lion Brand Wool-Ease | Worsted (#4) | 197 yds (180 m) / 85g | Excellent stitch definition, durable wool/acrylic blend (Requires 2 skeins) |
| Paintbox Yarns Simply Aran | Worsted (#4) | 201 yds (184 m) / 100g | Ultra-soft 100% acrylic, budget-friendly with vibrant mustard shades (Requires 2 skeins) |
| Plymouth Yarn Encore Worsted | Worsted (#4) | 200 yds (183 m) / 100g | Easy-care wool/acrylic mix with a gentle sheen and sturdy twist (Requires 2 skeins) |
⚠️ Note: Avoid dark novelty yarns, fluffy mohair, or textured velvet yarns when working on your absolute beginner crochet project. Fluffy or dark fibers hide stitch loops, making it difficult to see where to insert your hook. A smooth, medium-weight yarn in a bright warm mustard allows you to read your stitches effortlessly.
Gauge
| Stitch Count | Row Count | Measured Area |
|---|---|---|
| 14 single crochets | 16 rows | 4 x 4 in (10 x 10 cm) |
💡 Designer Tip: Always take ten minutes to crochet a small test swatch before starting your scarf! If your gauge sample measures wider than 4 inches, switch to a smaller hook (e.g., 4.5 mm). If it measures narrower, switch to a larger hook (e.g., 5.5 mm).
Abbreviations
| Abbreviation | Definition |
|---|---|
| ch | chain |
| sc | single crochet |
| st(s) | stitch(es) |
| tch | turning chain |
Special Stitches Explained
1. Chain Stitch (ch)
Make a slip knot on your hook. Yarn over from back to front, and pull the hook through the loop on your hook. Each chain forms a small “V” shape on the front.
2. Single Crochet Stitch (sc)
Insert your hook into the designated stitch under both top loops. Yarn over and pull up a loop (you now have two loops on your hook). Yarn over again and pull through both loops on the hook. One single crochet completed!
Pattern Instructions
Section 1: The Foundation & Base Row
Begin by pulling yarn from your mustard skein and creating a slip knot. Place the knot onto your 5.0 mm hook and adjust until snug (not tight).
Foundation Chain: Ch 22 loosely.
Row 1: Insert hook into the second chain loop from your hook (do not count the loop on the hook). Work 1 sc into this chain loop, and work 1 sc into each remaining chain across to the end of the chain length. (21 sc)
✅ Checkpoint: Count your completed stitches after Row 1. You should have exactly 21 single crochet stitches. If you count 20 or 22 stitches, unravel Row 1 carefully and recount your initial chain loops before proceeding.
Section 2: Building the Scarf Body
Row 2: Ch 1 (this serves as your turning chain), turn your work so the back of the work faces you. Work 1 sc into the very first stitch (the last stitch made in Row 1, right at the base of the ch 1). Work 1 sc into each stitch across the entire row, taking care to insert the hook under both top loops of each stitch. (21 sc)
Row 3: Ch 1, turn. Work 1 sc in the first st and in each st across. (21 sc)
✅ Checkpoint: Measure the width of your project across Row 3. It should measure precisely 6 inches (15 cm) wide. If it is significantly wider or narrower, your stitch tension may need adjustment.
- Rows 4–240: Repeat Row 2 continuously. Ensure you work 1 sc in every stitch across, ending each row with a single crochet in the final stitch before turning. (21 sc per row)
💡 Designer Tip: Count your stitches every 5–10 rows! Beginners often accidentally drop the very last stitch of a row, causing the scarf to narrow, or add an extra stitch at the start, causing the sides to flare outward.
Continue repeating Row 2 until your scarf measures approximately 60 inches (152 cm) from the foundation edge, or until you reach your desired custom length.
Section 3: Finishing & Fastening Off
- Final Row: At the end of Row 240 (or your final row repeat), work your last stitch. Cut your working yarn, leaving a tail of about 6 inches (15 cm).
- Pull the yarn tail directly through the remaining loop on your hook and pull tight to create a secure knot.
- Thread the yarn tail through your blunt tapestry needle. Weave the needle back and forth through the thick center loops of the final row for about 2 to 3 inches, reversing direction once to lock the yarn securely in place.
- Repeat this weaving-in process for the tail tail left at the foundation chain. Trim any excess thread flush with the stitches.
Size Customization Tips
Because this design uses basic single crochet stitches worked in flat rows, customizing the dimensions of your scarf is fast and predictable!
- To Adjust Width: Single crochet does not require an odd or even stitch multiple. Simply chain as many stitches as needed to reach your preferred width, adding 1 extra chain for your turning chain. At this pattern’s gauge, 3.5 stitches equal 1 inch (2.5 cm).
- Skinny Scarf (4.5 in / 11.5 cm wide): Start with Ch 17. You will work 16 sc across every row.
- Wide Wrap / Blanket Scarf (12 in / 30 cm wide): Start with Ch 43. You will work 42 sc across every row.
- To Adjust Length: Simply add or subtract row repeats until you achieve your preferred scarf drape. Adding 16 rows increases length by 4 inches (10 cm).
Care Instructions
To keep your handmade scarf looking neat and pristine over years of seasonal wear, follow these simple maintenance steps:
- Washing: Hand wash in cool or lukewarm water using a mild wool-wash or gentle detergent. Do not wring, twist, or scrub the fabric aggressively, as this can cause friction fuzzing or stretching.
- Drying: Gently squeeze excess water out by rolling the scarf inside a clean dry bath towel. Unroll and lay the scarf flat on a fresh towel or blocking board. Gently shape the scarf into a straight 6″ x 60″ rectangle with your fingers and allow it to dry completely away from direct heat or harsh sunlight.
Closing
Thank you for choosing the Absolute Beginner Crochet Project — Start With Just One Hook as your entry into the world of creative yarn crafting! Making your very first accessory with your own hands is an incredible milestone, and this cozy golden scarf is a piece you will feel proud to wear all season long.
If you enjoyed this free crochet pattern, please share your progress! Tag your social media photos with #AbsoluteBeginnerCrochet so our community can cheer you on, save this guide directly to your Pinterest crochet boards for easy reference, and drop a comment below to let me know how your scarf turned out! Happy stitching!