
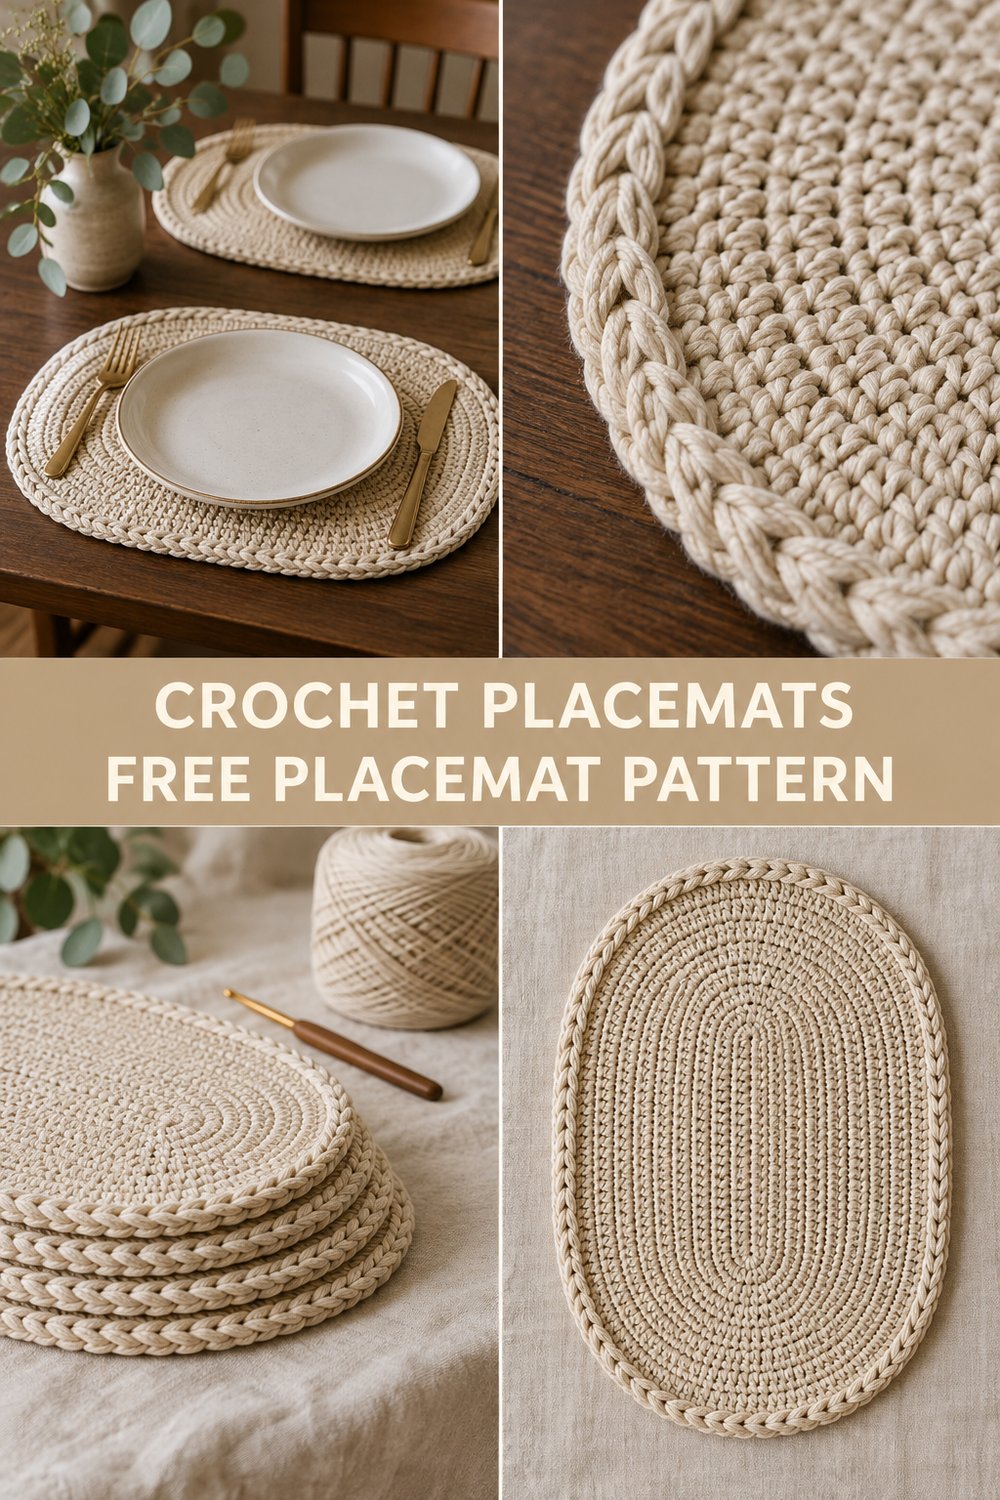
Transform your dining space with the timeless elegance of handmade crochet. This Crochet Placemat Set brings a touch of warmth and natural texture to any meal, crafted in sturdy, undyed cotton for durability and effortless style. Designed to lay perfectly flat, these placemats are as functional as they are beautiful.
Crochet Placemat Set for the Dining Table — Free Pattern
These easy crochet placemats are designed for both beauty and utility, making them the perfect addition to your home decor or a thoughtful gift. Using simple stitches and firm cotton yarn, each placemat works up quickly, estimated at 2-3 hours per placemat. Their classic oval shape and neutral color ensure they complement any dining setting, making them a fantastic housewarming or holiday present.
I’ve included tips for customizing the size of your placemats later in the pattern!
What Makes This Crochet Placemat Set Special
I designed this crochet placemat pattern with practicality and aesthetics in mind. The use of firm, dense stitches — primarily half double crochets worked into the third loop and back loop — creates a fabric that is thick, sturdy, and resistant to curling, ensuring your placemats lie perfectly flat on the table. The oval shape is achieved through strategic increases that maintain a smooth curve without creating unsightly bulges or points. The defining feature is the simple braided border, which adds a refined, finished look and further enhances the placemat’s structural integrity, preventing wavy edges. Crafted from natural, undyed cotton, these placemats offer an authentic, tactile feel and blend seamlessly with any decor.
Skill Level
This pattern is suitable for confident beginners and intermediate crocheters.
Required Skills:
- Magic Ring/Adjustable Ring
- Chain (ch)
- Slip Stitch (sl st)
- Single Crochet (sc)
- Half Double Crochet (hdc)
- Working in the round
- Working into the third loop
- Working into the back loop only
- Basic shaping with increases
- Following written instructions
If you’ve made a few projects and are comfortable with the basic stitches, you’ll find this a very satisfying make!
Finished Measurements
These placemats are designed to perfectly fit a standard dinner plate and cutlery.
| Measurement | Inches | Centimeters |
|---|---|---|
| Length | 18 | 46 |
| Width (at widest point) | 13 | 33 |
Materials You Will Need
To create one placemat, you’ll need the following:
| Item | Details | Quantity (per placemat) |
|---|---|---|
| Yarn | Worsted Weight (Category 4) 100% Cotton Yarn | Approx. 250 yds / 230 m |
| Crochet Hook | 4.5 mm (US G/7) | 1 |
| Scissors | 1 | |
| Yarn Needle | For weaving in ends | 1 |
| Stitch Markers | To mark beginning of rounds (optional, but helpful) | 2 |
💡 Designer Tip: Using 100% cotton yarn is crucial for placemats as it’s durable, absorbent, and can withstand frequent washing. Avoid acrylics as they can melt or warp with heat.
Yarn Suggestions
Choosing the right yarn is key to the placemat’s structure and durability. Here are a few reliable options:
| Brand/Line | Weight | Yardage/Skein | Notes |
|---|---|---|---|
| Lily Sugar’n Cream | Worsted (4) | 120 yds | Sturdy, widely available, excellent stitch definition |
| Dishie by Knit Picks | Worsted (4) | 190 yds | Soft yet durable, great color range (look for undyed options) |
| Bernat Handicrafter Cotton | Worsted (4) | 137 yds | Strong, economical, holds up well to washing |
⚠️ Note: Avoid “super soft” cottons or cotton blends with significant acrylic content. You need a sturdy, somewhat rigid cotton to ensure the placemat lies flat and holds its shape.
Gauge
Achieving the correct gauge is essential for the placemat to be the right size and lay flat.
| Stitch Count (over 4 inches / 10 cm) | Row Count (over 4 inches / 10 cm) |
|---|---|
| 14 hdc | 10 rows hdc |
💡 Designer Tip: Always make a gauge swatch! If your swatch is too small, go up a hook size. If it’s too large, go down a hook size. Your time spent swatching will save you frustration later.
Abbreviations
| Abbreviation | Meaning |
|---|---|
| ch | chain |
| sl st | slip stitch |
| sc | single crochet |
| hdc | half double crochet |
| dc | double crochet |
| st(s) | stitch(es) |
| yo | yarn over |
| rep | repeat |
| BLO | back loop only |
| 3rd LO | third loop only (behind the front and back loops) |
| FO | fasten off |
| beg | beginning |
| R | Round |
Special Stitches Explained
This pattern uses common stitches, but two techniques are critical for achieving the desired firm, flat fabric and braided border.
1. Half Double Crochet into the 3rd Loop (hdc 3rd LO):
When you look at the top of a half double crochet stitch, you’ll see a V-shape (the front and back loops). Behind the back loop, there’s another horizontal bar – this is the 3rd loop.
* How to: Yo, insert hook into the 3rd loop (the horizontal bar behind the ‘V’ of the previous hdc), yo and pull up a loop, yo and pull through all 3 loops on hook.
* Effect: This pushes the regular top loops forward, creating a visible horizontal ridge on the fabric and adding extra firmness.
2. Half Double Crochet into the Back Loop Only (hdc BLO):
* How to: Yo, insert hook into the back loop of the designated stitch (the loop furthest from you), yo and pull up a loop, yo and pull through all 3 loops on hook.
* Effect: This creates a ribbed texture and is used specifically for the braided border to define it.
Pattern Instructions
We will be working in continuous rounds for the main body of the placemat, joining with a slip stitch at the end of some rounds for the border. Use a stitch marker to mark the first stitch of each round if working continuously.
Section 1: Placemat Body (Continuous Rounds)
R1: Ch 46. Sc in 2nd ch from hook and in next 43 ch. 3 sc in last ch. Turn to work along the opposite side of the starting chain. Sc in next 43 ch. 2 sc in last ch. Do not join.
(92 sc)
R2: 2 hdc in first sc, hdc in next 43 sc, 2 hdc in next 3 sc, hdc in next 43 sc, 2 hdc in next 2 sc. Do not join.
(100 hdc)
R3: (Hdc in 3rd LO in next st, 2 hdc in 3rd LO in next st) rep 2 times, hdc in 3rd LO in next 43 sts, (2 hdc in 3rd LO in next st, hdc in 3rd LO in next st) rep 3 times, hdc in 3rd LO in next 43 sts, (2 hdc in 3rd LO in next st, hdc in 3rd LO in next st) rep 2 times. Do not join.
(108 hdc)
R4: (Hdc in 3rd LO in next 2 sts, 2 hdc in 3rd LO in next st) rep 2 times, hdc in 3rd LO in next 43 sts, (hdc in 3rd LO in next st, 2 hdc in 3rd LO in next st, hdc in 3rd LO in next st) rep 3 times, hdc in 3rd LO in next 43 sts, (hdc in 3rd LO in next st, 2 hdc in 3rd LO in next st, hdc in 3rd LO in next st) rep 2 times. Do not join.
(116 hdc)
R5: (Hdc in 3rd LO in next 3 sts, 2 hdc in 3rd LO in next st) rep 2 times, hdc in 3rd LO in next 43 sts, (hdc in 3rd LO in next 2 sts, 2 hdc in 3rd LO in next st, hdc in 3rd LO in next st) rep 3 times, hdc in 3rd LO in next 43 sts, (hdc in 3rd LO in next 2 sts, 2 hdc in 3rd LO in next st, hdc in 3rd LO in next st) rep 2 times. Do not join.
(124 hdc)
R6: (Hdc in 3rd LO in next 4 sts, 2 hdc in 3rd LO in next st) rep 2 times, hdc in 3rd LO in next 43 sts, (hdc in 3rd LO in next 3 sts, 2 hdc in 3rd LO in next st, hdc in 3rd LO in next st) rep 3 times, hdc in 3rd LO in next 43 sts, (hdc in 3rd LO in next 3 sts, 2 hdc in 3rd LO in next st, hdc in 3rd LO in next st) rep 2 times. Do not join.
(132 hdc)
R7: (Hdc in 3rd LO in next 5 sts, 2 hdc in 3rd LO in next st) rep 2 times, hdc in 3rd LO in next 43 sts, (hdc in 3rd LO in next 4 sts, 2 hdc in 3rd LO in next st, hdc in 3rd LO in next st) rep 3 times, hdc in 3rd LO in next 43 sts, (hdc in 3rd LO in next 4 sts, 2 hdc in 3rd LO in next st, hdc in 3rd LO in next st) rep 2 times. Do not join.
(140 hdc)
R8-12: Hdc in 3rd LO in each st around. Do not join.
(140 hdc)
✅ Checkpoint: After R12, your placemat body should feel firm and lay flat. Measure approximately 17 inches / 43 cm long and 12 inches / 30.5 cm wide.
Section 2: Braided Border (Joined Rounds)
Now we’ll create the distinctive braided border. We’ll join rounds with a sl st and ch 1 at the beginning of each border round.
R13: Sc in BLO in each st around. Join with sl st to first sc. Ch 1.
(140 sc)
R14: Sl st in BLO in each st around. Join with sl st to first sl st. Ch 1.
(140 sl st)
R15: Sc in BLO in each st around. Join with sl st to first sc. Ch 1.
(140 sc)
R16: Sl st in BLO in each st around. Join with sl st to first sl st. Ch 1.
(140 sl st)
FO and weave in all ends securely.
💡 Designer Tip: When working BLO stitches, make sure your tension is consistent. Too tight and the border will pucker; too loose and it will be floppy. The natural cotton should help maintain a good structure.
Size Customization Tips
You can easily adjust the size of your placemats by changing the starting chain length and the number of increase rounds.
To make a smaller placemat:
- Start with a shorter initial chain (e.g., ch 36 instead of 46). This will reduce the straight edges.
- Reduce the number of increase rounds in Section 1 (e.g., stop at R6 instead of R7). This will reduce the width of the placemat.
- Resulting Measurement Change: Each decrease of 10 chains in the starting chain will reduce the length by approximately 2 inches / 5 cm. Each reduction of one increase round will reduce the width by approximately 0.75 inches / 2 cm.
To make a larger placemat:
- Start with a longer initial chain (e.g., ch 56 instead of 46).
- Add more increase rounds in Section 1, following the established increase pattern. For example, to add an R8, you would continue the (hdc in 3rd LO in X sts, 2 hdc in 3rd LO in next st) pattern on the ends. You’ll need to calculate the increasing number of stitches carefully.
- Resulting Measurement Change: Each increase of 10 chains in the starting chain will add approximately 2 inches / 5 cm to the length. Each additional increase round will add approximately 0.75 inches / 2 cm to the width.
⚠️ Note: When customizing, ensure your increase rounds are evenly distributed across the curved ends to maintain a smooth oval shape without points or flat spots. Always ensure the number of straight stitches along the sides remains consistent.
Care Instructions
To keep your crochet table mats looking their best:
- Machine wash: Cold or warm water with like colors.
- Tumble dry: Low heat or lay flat to dry. Cotton can shrink slightly in hot water or high heat.
- Do not bleach.
- Iron (optional): If needed, iron on a cotton setting to remove any wrinkles.
Crochet Placemat Set for the Dining Table — Free Pattern
I hope you enjoyed making these beautiful and functional cotton crochet home decor pieces! They truly add a polished touch to any meal. Don’t forget to share your finished placemats with me on social media – I love seeing your creations! Tag me and save this free crochet pattern to your Pinterest boards so others can discover it too. Leave a comment below if you have any questions or just want to share your experience making this easy crochet placemats project. Happy crocheting!