
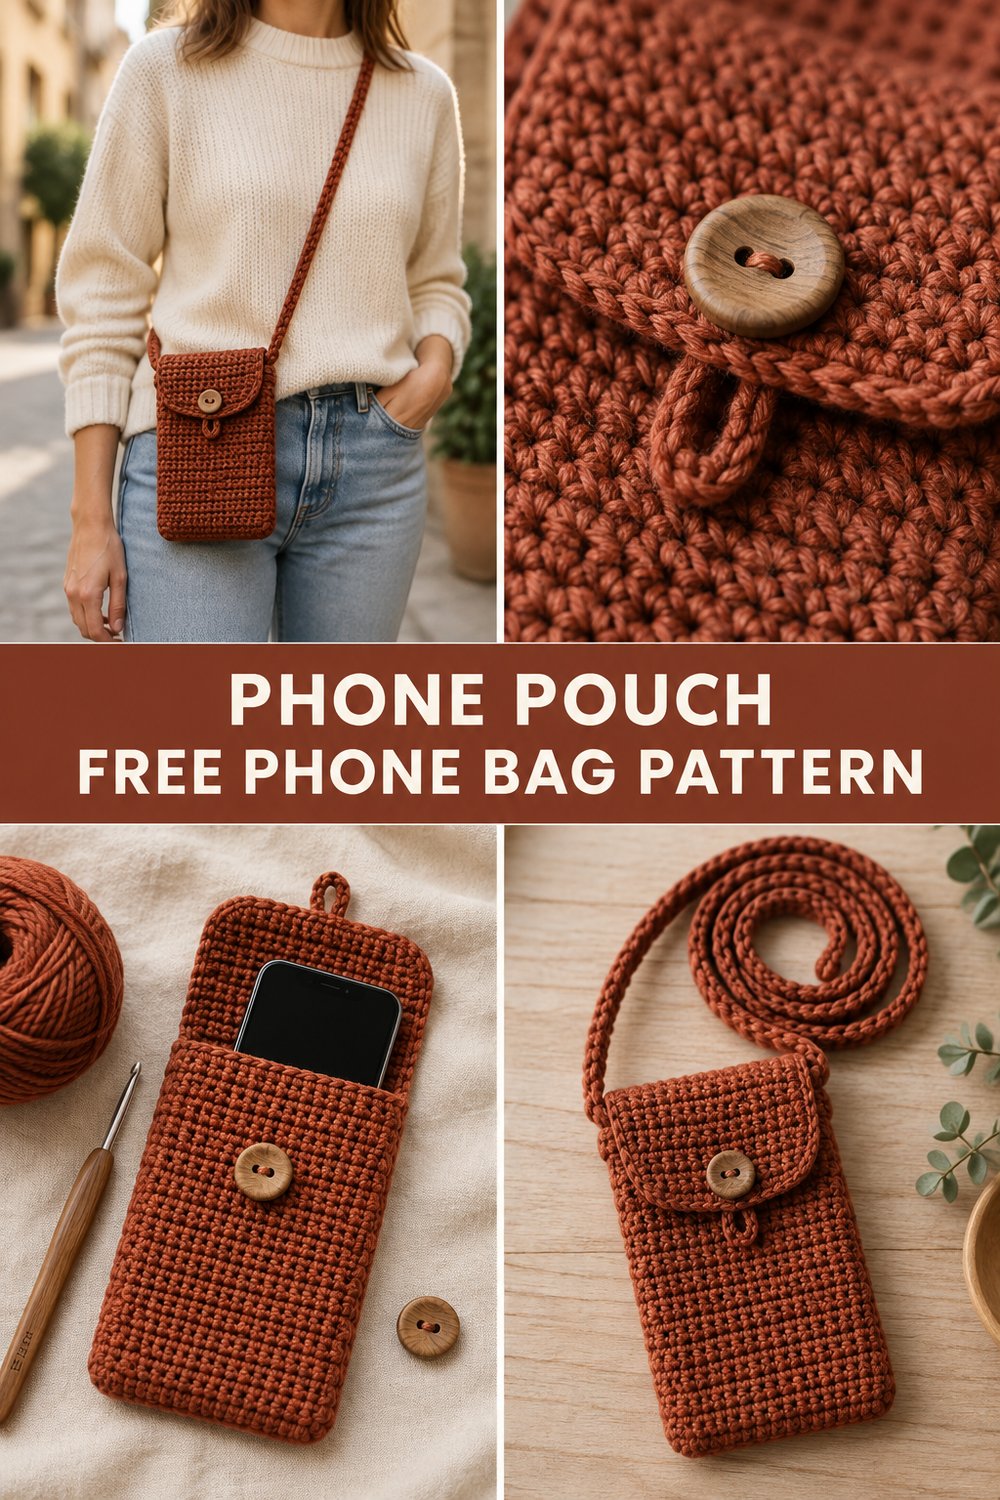
Imagine the freedom of keeping your phone close, secure, and easily accessible without bulky pockets or a large bag. This charming little crossbody phone pouch, worked in a beautiful rust cotton, offers a stylish and practical solution for everyday adventures, keeping your hands free and your essentials safe.
Crochet Phone Pouch With Long Strap — Free Beginner Pattern
This crochet phone pouch uses just a few basic stitches, making it a perfect beginner crochet bag. You’ll work primarily in tight single crochet, ensuring your phone stays snug and secure. Designed to fit most standard smartphones, this easy crochet purse can be completed in approximately 3-5 hours, making it a wonderful quick project or a thoughtful handmade gift.
💡 Designer Tip: Detailed instructions for customizing the size of your pouch are included later in the pattern!
What Makes This Phone Pouch Special
This crochet phone pouch features a dense single crochet fabric that provides excellent structure and prevents stretching, keeping your phone securely in place. The design incorporates a simple yet effective button flap closure, adding both security and a touch of rustic charm with a wooden button. The long, sturdy braided strap offers comfortable crossbody wear, distributing the weight evenly and allowing for hands-free convenience. We’ll be working in the round from the bottom up, creating a seamless, sturdy crochet phone case perfect for daily use.
Skill Level
This pattern is suitable for confident beginners.
- Slip knot
- Chain (ch)
- Single Crochet (sc)
- Slip Stitch (sl st)
- Working in the round
- Basic joining techniques
- Reading a simple crochet pattern
If you’re comfortable with these fundamental stitches and techniques, you’ll find this pattern a joy to make!
Finished Measurements
| Measurement | Inches | Centimeters |
|---|---|---|
| Pouch Width | 4.5 | 11.5 |
| Pouch Height | 7.5 | 19 |
| Strap Length | 48 | 122 |
| Strap Width (braid) | 0.5 | 1.3 |
Materials You Will Need
| Item | Type/Weight | Quantity |
|---|---|---|
| Yarn (Main Color) | Worsted Weight (4) Cotton | 120 yards / 110 meters |
| Crochet Hook | 3.5 mm (E-4) | 1 |
| Wooden Button | 1 inch (2.5 cm) | 1 |
| Yarn Needle | 1 | |
| Scissors | 1 | |
| Stitch Marker | 1 |
Yarn Suggestions
For this crochet phone pouch, I highly recommend using 100% cotton yarn. Cotton provides excellent stitch definition, durability, and minimal stretch, which is ideal for a sturdy phone holder.
⚠️ Note: Avoid using acrylic yarn for this project, as it tends to stretch significantly over time, which can compromise the security of your phone.
| Brand/Line | Weight | Yardage/Skein | Notes |
|---|---|---|---|
| Lion Brand 24/7 Cotton | Worsted (4) | 186 yards | Durable, mercerized cotton with a lovely sheen. |
| Lily Sugar’n Cream | Worsted (4) | 120 yards | Affordable, absorbent, classic cotton. |
| Knit Picks Dishie | Worsted (4) | 190 yards | Soft, mercerized cotton, great color range. |
Gauge
Work a swatch to ensure your pouch will be the correct size.
✅ Checkpoint: If your swatch is too small, go up a hook size. If it’s too large, go down a hook size.
| Stitch Count | Row Count |
|---|---|
| 18 sc | 20 rows |
| over 4″ (10 cm) |
Abbreviations
| Abbreviation | Full Term |
|---|---|
| ch | chain |
| sc | single crochet |
| sl st | slip stitch |
| st(s) | stitch(es) |
| rep | repeat |
| sk | skip |
| FO | fasten off |
Special Stitches Explained
No special stitches beyond basic single crochet are required for this pattern!
Pattern Instructions
Let’s begin crocheting your practical and stylish crochet phone pouch!
Section 1: The Pouch Body (Worked in the Round)
We’ll start by creating an oval base, then work up the sides of the pouch. Use your 3.5mm hook and worsted weight cotton yarn in rust.
Foundation Chain:
Ch 21.
Round 1: Sc in 2nd ch from hook, sc in next 18 ch, 3 sc in last ch. Working along the opposite side of the foundation chain: sc in next 18 ch, 2 sc in last ch. Join with sl st to first sc. (42 sc)
✅ Checkpoint: You should have 42 single crochet stitches at the end of Round 1.
Round 2: Ch 1 (does not count as a stitch here and throughout), 2 sc in first st, sc in next 18 sts, 2 sc in next 3 sts, sc in next 18 sts, 2 sc in last 2 sts. Join with sl st to first sc. (48 sc)
Round 3: Ch 1, sc in first st, sc in next 19 sts, (2 sc in next st, sc in next st) 3 times, sc in next 19 sts, (2 sc in next st, sc in next st) 2 times. Join with sl st to first sc. (54 sc)
Round 4: Ch 1, sc in first st, sc in next 20 sts, (2 sc in next st, sc in next 2 sts) 3 times, sc in next 20 sts, (2 sc in next st, sc in next 2 sts) 2 times. Join with sl st to first sc. (60 sc)
✅ Checkpoint: You should have 60 single crochet stitches at the end of Round 4. This completes the base of your pouch.
Rounds 5-30: Ch 1, sc in each st around. Join with sl st to first sc. (60 sc)
💡 Designer Tip: Work these rounds snugly to create a firm fabric that will hold its shape well. Use a stitch marker in the first stitch of each round to keep track.
✅ Checkpoint: After Round 30, your pouch body should measure approximately 6 inches (15 cm) tall from the base.
Section 2: The Flap
The flap is worked flat, in rows, extending from one side of the pouch opening.
Row 1: Ch 1, sc in first 24 sts. Turn. (24 sc)
⚠️ Note: The remaining 36 stitches of the pouch opening will remain unworked for this section.
Row 2: Ch 1, sc in each sc across. Turn. (24 sc)
Rows 3-10: Rep Row 2.
Row 11 (Buttonhole Row): Ch 1, sc in first 10 sc, ch 4 (this creates the buttonhole), sk 4 sc, sc in next 10 sc. Turn. (20 sc, 4 ch)
💡 Designer Tip: Adjust the number of skipped stitches and chain stitches to fit your button if it’s a different size.
Row 12: Ch 1, sc in first 10 sc, 4 sc in ch-4 space, sc in next 10 sc. Turn. (24 sc)
Rows 13-14: Ch 1, sc in each sc across. Turn. (24 sc)
FO, leaving a long tail for weaving in.
Section 3: The Strap
This braided strap is incredibly strong and simple to make! You will cut three long strands of yarn.
- Cut three separate lengths of yarn, each approximately 100 inches (254 cm) long.
- Hold all three strands together. Tie a knot at one end, leaving about a 6-inch (15 cm) tail for attaching.
- Braid the three strands tightly until the braid measures approximately 48 inches (122 cm), or your desired length.
- Tie another knot at the end of the braid, leaving another 6-inch (15 cm) tail.
💡 Designer Tip: You can also crochet an I-cord or a chain strap if you prefer, but the braided strap provides excellent durability and a rustic look.
Section 4: Assembly
- Attach the button: Using your yarn needle and a small piece of yarn, sew the wooden button onto the front of the pouch, centered below the flap. Position it so the flap’s buttonhole aligns perfectly when closed.
- Attach the strap: Locate the two side stitches at the top opening of the pouch, directly below where the flap begins. Thread one tail of the braided strap through a side stitch, then secure it firmly with a knot on the inside of the pouch. Weave in the excess tail. Repeat this on the opposite side of the pouch opening with the other end of the braided strap.
- Weave in all remaining ends securely using your yarn needle.
Your crochet phone pouch is now complete!
Size Customization Tips
This crochet phone pouch pattern is easily adaptable for different phone sizes.
- To adjust width: Start with a foundation chain that is approximately 1 inch (2.5 cm) shorter than your phone’s width. Each additional single crochet in the foundation chain (and subsequent base increases) will add approximately 0.25 inches (0.6 cm) to the pouch width.
- To adjust height: Add or subtract rounds in Section 1 (Rounds 5-30). Each additional round will add approximately 0.5 inches (1.3 cm) to the pouch height. Make sure the total height is about 1 inch (2.5 cm) taller than your phone to allow for the flap.
- To adjust flap length: Add or subtract rows in Section 2 (Rows 3-10). Each row adds approximately 0.5 inches (1.3 cm) to the flap length.
- To adjust strap length: Simply make your braided strap longer or shorter in Section 3 to suit your preference.
Care Instructions
For best results, hand wash your crochet phone pouch in cool water with a mild detergent. Gently squeeze out excess water (do not wring). Reshape the pouch and lay it flat to air dry. Do not machine wash or tumble dry, as this can cause shrinking or distort the fabric.
Crochet Phone Pouch With Long Strap — Free Beginner Pattern
I hope you enjoyed making this versatile and practical crochet phone pouch! It’s such a satisfying project, perfect for keeping your phone safe and your hands free. I’d love to see your finished creations – please share your photos on social media and tag me! Don’t forget to save this free crochet pattern to your Pinterest boards so you can easily find it again. Leave a comment below with your thoughts or any questions!