












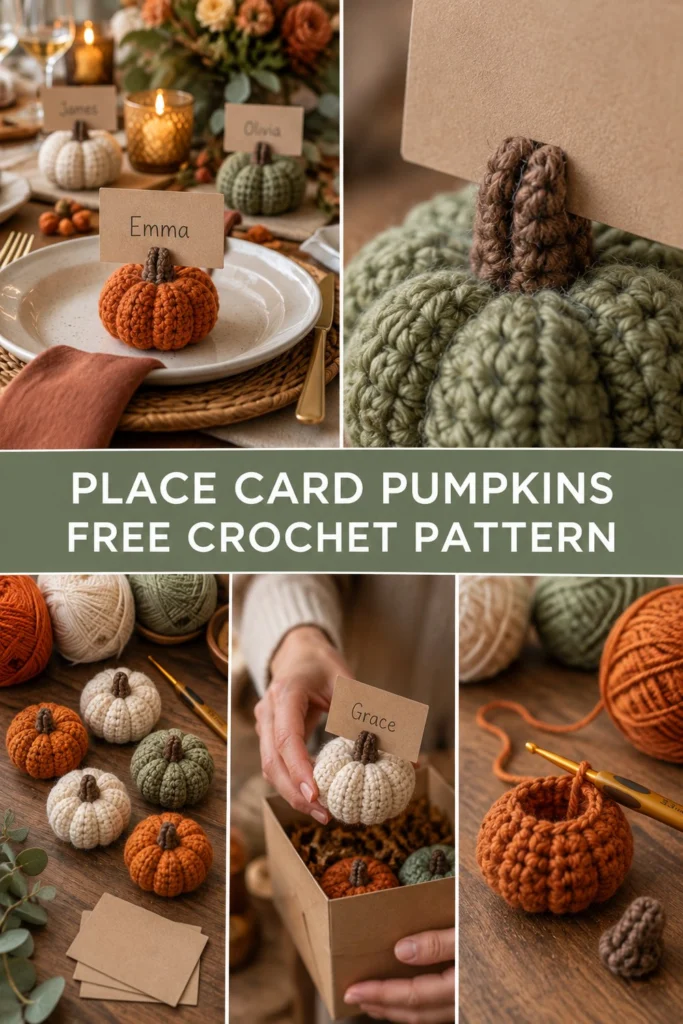
Welcome every guest by name with these charming mini pumpkin place card holders that add a handmade touch to your seasonal table. Each pumpkin is a small stuffed ball pulled into segments, topped with a cleverly designed stem that holds a kraft name card upright.
Quick Facts
- Skill level: Easy / Beginner-Friendly
- Finished size: Approx. 3.5 inches (9 cm) wide by 2.5 inches (6.5 cm) high (including stem)
- Yarn: Worsted weight (Category 4) in Pumpkin Orange, Olive Green, Cream, and Dark Brown
- Hook: 3.5 mm (US E/4) crochet hook
- Stitches used: Ch, sl st, sc, inc, dec
- Time to make: About 1 to 1.5 hours per pumpkin
Size customization tips are included further down the page.
What Makes This Crochet Pumpkin Place Card Holder Special
These mini pumpkins combine simple amigurumi ball techniques with smart shaping and finishing. Working in continuous rounds creates a tight, neat fabric that securely holds the stuffing without gaps. Wrapping a long strand of yarn tightly around the body after stuffing gives the pumpkin its classic segmented ridges, while the flat-worked stem features a built-in slit specifically sized to grip a sturdy paper place card.
Skill Level
- Working in the round (spiral)
- Basic increases and invisible decreases
- Simple yarn wrapping for shaping
- Basic sewing to attach the stem
Don’t worry if you are new to amigurumi—this pattern walks you through every step!
Finished Measurements
- Width: 3.5 inches (9 cm)
- Height: 2.5 inches (6.5 cm) including stem
Materials You Will Need
| Material | Description | Amount |
|---|---|---|
| Main Color (Body) | Worsted Weight yarn in Orange, Olive, or Cream | Approx. 30 yards (27 meters) |
| Stem Color | Worsted Weight yarn in Dark Brown | Approx. 5 yards (4.5 meters) |
| Crochet Hook | 3.5 mm (US E/4) | 1 hook |
| Notions | Polyester fiberfill stuffing, tapestry needle, stitch marker, scissors | As needed |
| Place Cards | Blank kraft paper cards cut to 2 x 1.5 inches | 1 per pumpkin |
Yarn Suggestions
| Yarn Line | Weight | Skein Yardage | Notes |
|---|---|---|---|
| Red Heart Super Saver | Worsted (4) | 364 yds / 333 m | Economical, holds crisp definition |
| Lion Brand Vanna’s Choice | Worsted (4) | 170 yds / 156 m | Soft acrylic with rich autumn shades |
| Caron Simply Soft | Worsted (4) | 315 yds / 288 m | Beautiful sheen for holiday decor |
⚠️ Note: Avoid novelty, eyelash, or extremely fuzzy yarns for this project, as they obscure the stitch definition and make it difficult to shape the pumpkin segments or insert the place card into the stem.
Gauge
- Rnds 1 to 6 of pumpkin base: 2 inches (5 cm) across using a 3.5 mm hook.
- Gauge is not overly critical for amigurumi, but ensure your stitches are tight enough so that fiberfill stuffing does not show through.
Abbreviations
- ch: chain
- sl st: slip stitch
- sc: single crochet
- inc: single crochet 2 in same stitch (increase)
- dec: invisible single crochet 2 together (decrease)
- st(s): stitch(es)
- Rnd(s): round(s)
- FO: fasten off
- BLO: back loop only
UK: sc = dc, hdc = htr, dc = tr.
Special Stitches Explained
- Magic Ring: A movable starting loop. Wrap yarn around your index finger, insert hook, pull up a loop, and work the first round of stitches directly into the ring. Pull the tail to close.
- Invisible Decrease (dec): Insert hook into the front loop only of the next two stitches, yarn over, pull through both front loops, yarn over, and pull through remaining two loops on hook.
Pattern Instructions
💡 Designer Tip: Use a stitch marker to keep track of the first stitch of each round, as work is worked in a continuous spiral without joining.
Section 1: Pumpkin Body (Make 1 in Orange, Olive, or Cream)
Rnd 1: 6 sc in a magic ring (6 sc)
Rnd 2: inc in each st around (12 sc)
Rnd 3: (1 sc, inc) x 6 (18 sc)
Rnd 4: (2 sc, inc) x 6 (24 sc)
Rnd 5: (3 sc, inc) x 6 (30 sc)
Rnd 6: (4 sc, inc) x 6 (36 sc)
Rnd 7: (5 sc, inc) x 6 (42 sc)
Rnds 8 to 13: sc in each st around (42 sc)
Rnd 14: (5 sc, dec) x 6 (36 sc)
Rnd 15: (4 sc, dec) x 6 (30 sc)
Rnd 16: (3 sc, dec) x 6 (24 sc)
✅ Checkpoint: Stuff the pumpkin firmly with polyester fiberfill before closing further.
Rnd 17: (2 sc, dec) x 6 (18 sc)
Rnd 18: (1 sc, dec) x 6 (12 sc)
Add a small amount of extra stuffing if needed to keep the pumpkin plump.
Rnd 19: dec x 6 (6 sc)
FO, leaving a long 24-inch tail for shaping the segments. Thread the tail onto your tapestry needle.
Section 2: Shaping the Pumpkin Segments
- Insert the threaded needle from the top center hole straight through to the bottom center hole, pull tight to create a slight indent, and bring the yarn back up the outside of the pumpkin to the top.
- Pull firmly to sink the yarn into the stitches, creating the first valley. Repeat this process 5 to 6 times evenly around the pumpkin, pulling snugly each time to form the distinct pumpkin ridges. Securely knot and hide all yarn tails inside the body.
Section 3: Stem with Card Slit (Make 1 in Dark Brown)
Working in continuous rounds:
Rnd 1: Magic ring, 6 sc in ring (6 sc)
Rnds 2 to 4: sc in each st around (6 sc)
Rnd 5 (Dividing for slit): sc in first 2 sts, ch 2, skip 2 sts, sc in last 2 sts (4 sc and 2-ch space)
Rnd 6: sc in first 2 sts, 2 sc into the 2-ch space, sc in last 2 sts (6 sc)
Rnds 7 to 9: sc in each st around (6 sc)
FO, leaving a 10-inch tail for sewing. The stem is already cylindrical; simply sew the bottom edge to the pumpkin.
Assembly and Finishing
- Center the stem over the top center hole of the pumpkin body.
- Using the remaining brown yarn tail, securely sew the base of the stem to the top ridges of the pumpkin.
- Weave in all remaining ends securely.
- Slip a pre-cut kraft paper place card into the slit of the stem.
Size Customization Tips
To make a slightly larger pumpkin, continue the increase sequence up to (6 sc, inc) x 6 (48 sc), work two extra straight rounds, and mirror the decrease sequence accordingly. Each extra increase round adds roughly 0.75 inches to the overall width.
Care Instructions
Spot clean gently with a damp cloth and mild soap. Do not submerge fully in water to protect the fiberfill stuffing and keep the pumpkin’s shape intact. Air dry completely before placing back on your table.
FAQ
Can I use cotton yarn instead of acrylic?
Yes! Cotton yarn works wonderfully and gives the pumpkins a crisp, matte texture with very clean stitch definition.
How do I keep the place card from leaning?
Ensure you insert the kraft paper card deep enough into the slit of the stem. Using slightly heavier cardstock (around 80 lb weight) also helps it stand perfectly upright.
Are these safe to give as party favors for children?
Yes, these make wonderful take-home gifts. However, if gifting to children under 3 years old, omit the paper card and ensure all yarn ends are securely woven in.
Happy Crocheting!
I hope you love bringing these charming pumpkin place card holders to life for your holiday gatherings. Be sure to save this pin on Pinterest and leave a comment below sharing what colors you chose for your Thanksgiving table!
📄 Your free PDF pattern