












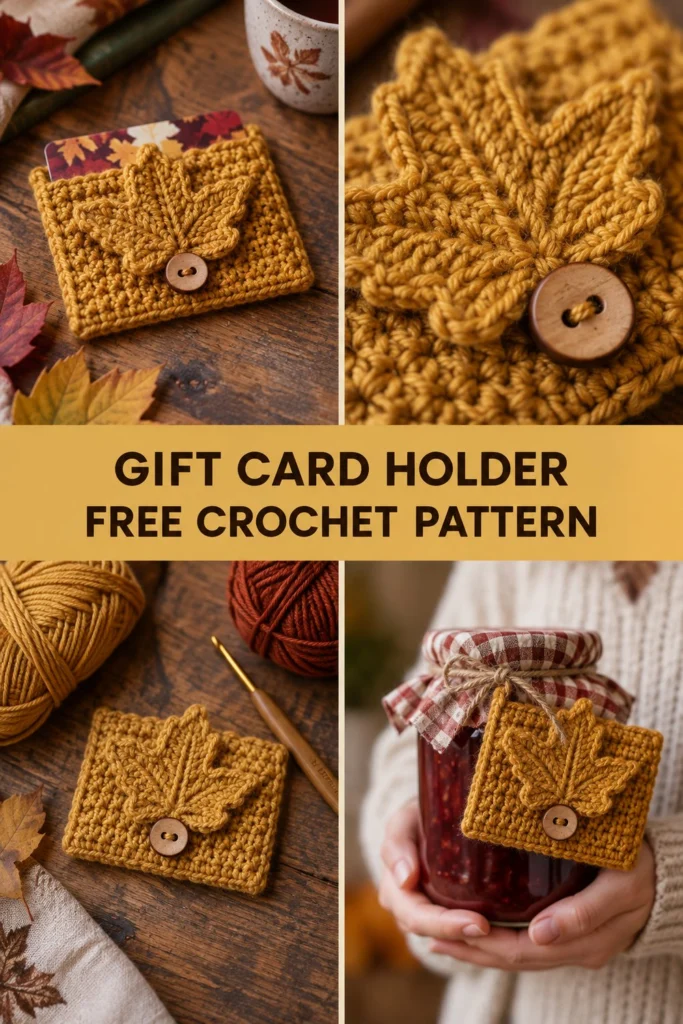
Turn a simple gift card into a thoughtful handmade present with this lovely autumn project. This little pouch is worked in simple rows of single crochet, folded and seamed, featuring a charming maple leaf shaped flap that closes securely over a wooden button. It is perfect for teachers, hosts, and anyone you are thankful for this season.
Quick Facts
- Skill level: Easy
- Finished size: 4.25 inches wide by 3.25 inches high (10.8 cm by 8.3 cm)
- Yarn: Worsted weight (Category 4) cotton or wool blend yarn, approx. 45 yards total in Harvest Gold
- Hook: US G/6 (4.0 mm) crochet hook
- Stitches used: Chain (ch), single crochet (sc), half double crochet (hdc), double crochet (dc), treble crochet (tr), slip stitch (sl st), front loop only (FLO), back loop only (BLO)
- Time to make: Under 1 hour
Size customization tips and adjustments are included further down in this guide.
What Makes This Crochet Gift Card Holder Special
The texture of this crochet pouch pattern comes from sturdy single crochet rows that protect your cards while holding their shape. The standout feature is the dimensional maple leaf flap worked from the center outward, complete with ribbed leaf veins and a neat button loop that slips right over a natural wooden button. It is a wonderful teacher gift crochet project that looks like it came straight from a boutique.
Skill Level
- Basic crochet stitches (sc, hdc, dc, tr, sl st)
- Working in rows and joining with slip stitches
- Basic sewing to attach buttons and weave in ends
- Reassurance line: If you know how to make a foundation chain and work basic single crochets, you can easily finish this project in an afternoon!
Finished Measurements
| Dimension | Inches | Centimeters |
|---|---|---|
| Width | 4.25 in | 10.8 cm |
| Height (closed pouch) | 3.25 in | 8.3 cm |
| Total length (flat un-folded) | 6.5 in | 16.5 cm |
Materials You Will Need
| Material | Description | Amount |
|---|---|---|
| Yarn | Worsted weight (Category 4) in Harvest Gold | 45 yards / 41 meters |
| Crochet Hook | US G/6 (4.0 mm) hook | 1 hook |
| Notions | 1 wooden button (approx. 0.75 in / 20 mm) | 1 piece |
| Notions | Yarn needle for weaving ends and sewing | 1 piece |
| Notions | Scissors | 1 pair |
Yarn Suggestions
| Brand & Line | Weight | Skein Yardage | Notes |
| — | — | — |
| Lion Brand 24/7 Cotton | Worsted (4) | 186 yards / 170 meters | Great stitch definition and crisp shape |
| Lily Sugar’n Cream | Worsted (4) | 120 yards / 109 meters | Affordable, widely available cotton |
| WeCrochet Dishie | Worsted (4) | 190 yards / 174 meters | Smooth, tightly spun, holds cards securely |
⚠️ Note: Avoid stretchy acrylic yarns for this project, as they can stretch out and cause gift cards to slip out of the pouch. Cotton or wool blends provide the necessary structure.
Gauge
- 16 sc and 18 rows = 4 inches (10 cm) using a US G/6 (4.0 mm) hook in single crochet.
Abbreviations
| Abbreviation | Meaning |
|---|---|
| ch | chain |
| sc | single crochet |
| hdc | half double crochet |
| dc | double crochet |
| tr | treble crochet |
| sl st | slip stitch |
| st(s) | stitch(es) |
| rep | repeat |
| sk | skip |
| FLO | front loop only |
| BLO | back loop only |
| RS | right side |
| WS | wrong side |
UK: sc = dc, hdc = htr, dc = tr.
Special Stitches Explained
- Magic Ring: Wrap yarn around your index finger twice to create a loop, insert hook under strands, pull up a loop, and work your first round of stitches into the center ring.
- Picot: Ch 3, sl st into the back bump of the first chain made.
Pattern Instructions
Section 1: Main Pouch Body (Harvest Gold, make 1)
Row 1: Ch 19, working in back bumps of chain, sc in 2nd ch from hook and in each ch across, turn. (18 sc)
Row 2: Ch 1 (does not count as st here and throughout), sc in first st, sc in each st across, turn. (18 sc)
Rows 3 to 28: Rep Row 2. (18 sc)
Fasten off, leaving a 12-inch (30 cm) tail for seaming the sides.
✅ Checkpoint: Your flat rectangle should measure approximately 4.5 inches wide by 6.5 inches long before folding.
Section 2: Maple Leaf Flap (Harvest Gold, make 1)
Worked separately, then sewn to the front of the pouch.
Row 1: Ch 9, sc in 2nd ch from hook, hdc in next ch, dc in next 2 ch, hdc in next ch, sc in next 2 ch, work (3 sc, ch 3, sl st in 3rd ch from hook, 2 sc) all in last ch. Working along opposite side of foundation chain, sc in next 2 ch, hdc in next ch, dc in next 2 ch, hdc in next ch, sc in last ch, turn leaving remaining ch unworked. (20 sts)
Row 2: Ch 1, sk first st, sc in next 2 sts, hdc in next st, dc in next st, tr in next st, ch 2, sl st in top of tr just made (picot made), dc in next st, hdc in next st, sc in next st, (1 sc, ch 8 for button loop, 1 sc) in top ch-3 space from previous row, sc in next st, hdc in next st, dc in next st, tr in next st, ch 2, sl st in top of tr, dc in next st, hdc in next st, sc in next 2 sts, sl st in last st. (24 sts including loop)
Fasten off, leaving a 6-inch (15 cm) tail for sewing.
Assembly
- Lay the main pouch body flat with the wrong side facing up. Fold the bottom edge up by 2.75 inches (7 cm) to create the pocket pouch, leaving the top 1 inch (2.5 cm) open as the flap fold area.
- Using the 12-inch tail, whipstitch along both side edges of the folded pouch to secure the pocket. Fasten off and weave in ends.
- Position the maple leaf flap centered on the upper front flap area of the pouch. Sew the base of the leaf firmly to the pouch using the leaf tail.
- Directly below the leaf tip where the button loop reaches down, sew the wooden button onto the front of the pouch pocket.
Finishing
Weave in all remaining yarn ends securely using your yarn needle. Test the button loop closure to ensure the gift card fits snugly inside the pouch without bowing the fabric.
Size Customization Tips
- Making it wider: Add chains in multiples of 1 for the foundation row (e.g., start with 21 chains for a slightly wider wallet pouch).
- Making it taller: Add 2 to 4 extra rows in the Main Pouch Body section before folding if you plan to hold multiple cards or cash alongside your gift card.
Care Instructions
Hand wash in cold water with mild detergent. Gently press out excess water in a clean towel and lay flat to dry in the shade. Do not bleach or iron.
FAQ
Can I use acrylic yarn instead of cotton?
Yes, you can use acrylic yarn, but keep in mind that cotton provides a firmer, crisper structure that holds cards securely without stretching out over time.
How do I adjust this pattern for a larger gift card?
Simply chain 3 to 5 extra stitches in the foundation row of the Main Pouch Body and add a few extra rows in length until the folded pouch matches your desired dimensions.
Is this safe to give as a gift for small children?
This project features a small wooden button which could pose a choking hazard for infants. For toddler gifts, embroider a small French knot instead of attaching a physical button.
Happy Crocheting!
I hope you enjoyed making this festive Thanksgiving gift card holder! Be sure to save this pin on Pinterest and leave a comment below letting me know what colors you chose for your autumn crafting.
📄 Your free PDF pattern