










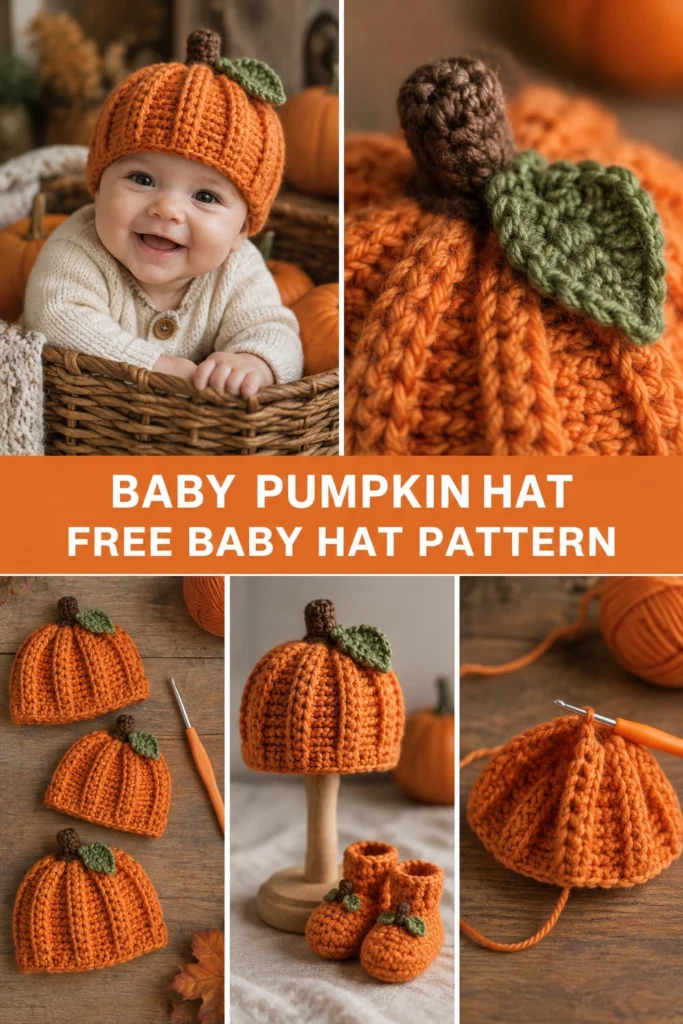
Welcome to the sweetest little pumpkin in the patch! This adorable baby hat is designed to look just like a miniature autumn pumpkin, complete with vertical ribbed texture, a tiny brown stem, and a sweet green leaf nestled on top. It makes the absolute best accessory for fall photo shoots, Halloween costumes, and chilly autumn walks.
Quick Facts
- Skill level: Easy / Intermediate beginner
- Finished size: Newborn, 0-3 months, 3-6 months, 6-12 months
- Yarn: Worsted weight (#4) yarn in pumpkin orange, dark brown, and olive green
- Hook: US H/8 (5.0 mm) crochet hook
- Stitches used: Ch, sl st, sc, hdc, fpdc, bpdc
- Time to make: 2 to 3 hours
Size tips and customization instructions are included further down the page.
What Makes This Crochet Baby Pumpkin Hat Special
This hat is cleverly constructed to mimic the natural segments of a pumpkin using front post and back post double crochet stitches. Working these post stitches in alternating columns creates a thick, stretchy, and deeply textured ribbing that holds its shape wonderfully. The tiny stem is worked in continuous rounds of single crochet, while the leaf is shaped with basic stitches and simple increases to create a realistic pointed contour.
Skill Level
- Basic crochet stitches (chain, slip stitch, single crochet, double crochet)
- Post stitches (front post double crochet and back post double crochet)
- Working in the round and joining with a slip stitch
- Basic assembly and sewing parts together
Don’t worry if post stitches are new to you—the texture builds quickly and is very forgiving!
Finished Measurements
| Size | Head Circumference | Hat Height |
|---|---|---|
| Newborn | 13 to 14 in (33 to 35.5 cm) | 5.0 in (12.5 cm) |
| 0-3 Months | 14 to 15 in (35.5 to 38 cm) | 5.5 in (14 cm) |
| 3-6 Months | 15 to 16 in (38 to 40.5 cm) | 6.0 in (15 cm) |
| 6-12 Months | 16 to 18 in (40.5 to 45.5 cm) | 6.5 in (16.5 cm) |
Materials You Will Need
| Material | Details / Color | Amount |
|---|---|---|
| Main Yarn (MC) | Worsted Weight (#4) / Pumpkin Orange | 70 – 110 yds (64 – 100 m) |
| Contrast Yarn A (CC1) | Worsted Weight (#4) / Dark Brown | 15 yds (14 m) |
| Contrast Yarn B (CC2) | Worsted Weight (#4) / Olive Green | 15 yds (14 m) |
| Crochet Hook | US H/8 (5.0 mm) | As specified |
| Notions | Yarn needle, stitch markers, small amount of polyester fiberfill stuffing for stem | Optional |
Yarn Suggestions
| Yarn Line | Weight | Yardage per Skein | Notes |
|---|---|---|---|
| Lion Brand Vanna’s Choice | Worsted (#4) | 170 yds (156 m) | Excellent stitch definition for ribbed post stitches. |
| Caron Simply Soft | Worsted (#4) | 315 yds (288 m) | Very soft against baby’s skin with a subtle sheen. |
| Red Heart Super Saver | Worsted (#4) | 364 yds (333 m) | Durable, widely available, holds firm shape. |
⚠️ Note: Avoid novelty, eyelash, or boucle yarns for the main hat body, as they will obscure the ribbed pumpkin texture and can shed fibers near a baby’s face.
Gauge
14 sts x 10 rows = 4 in (10 cm) in alternating fpdc/bpdc pattern using a 5.0 mm hook.
Abbreviations
- ch: chain
- sl st: slip stitch
- sc: single crochet
- hdc: half double crochet
- dc: double crochet
- fpdc: front post double crochet
- bpdc: back post double crochet
- inc: increase (work 2 sc in the same st)
- dec: decrease (sc 2 stitches together)
- st(s): stitch(es)
- MC: Main Color (Orange)
- CC1: Contrast Color 1 (Brown)
- CC2: Contrast Color 2 (Green)
- Rnd(s): round(s)
- Rep: repeat
- FO: fasten off
UK translation note: UK sc = US dc, UK hdc = US tr, UK dc = US htr. This pattern is written in standard US terms.
Special Stitches Explained
- Front Post Double Crochet (fpdc): Yarn over, insert hook from front to back to front around the post of the specified stitch from the row below, yarn over, pull up a loop, (yarn over, pull through 2 loops) twice.
- Back Post Double Crochet (bpdc): Yarn over, insert hook from back to front to back around the post of the specified stitch from the row below, yarn over, pull up a loop, (yarn over, pull through 2 loops) twice.
- Magic Ring: Wrap yarn around your index finger twice to form a ring, insert hook into center, pull up a loop, and work your starting stitches into the ring. Pull the tail tight to close.
Pattern Instructions
Pattern Notes
- The hat is worked from the crown down in joined rounds.
- The beginning chain-2 of each round does NOT count as a stitch unless specifically noted.
- Place a stitch marker in the first stitch of each round to keep track of your count.
Section 1: Hat Body (Orange / MC)
Rnd 1: With MC, make a magic ring, ch 2, work 10 hdc into the ring, join with sl st to top of first hdc. (10 hdc)
Rnd 2: Ch 2, work 2 hdc in each st around, join with sl st. (20 hdc)
Rnd 3: Ch 2, *(1 fpdc around next st, 1 hdc in next st); rep from * to * around, join with sl st. (20 sts: 10 fpdc, 10 hdc)
Rnd 4: Ch 2, *(1 fpdc around fpdc, 2 hdc in next hdc); rep from * to * around, join with sl st. (30 sts: 10 fpdc, 20 hdc)
Rnd 5: Ch 2, *(1 fpdc around fpdc, 1 hdc in next hdc, 1 fpdc around next hdc, 1 hdc in next hdc); rep from * to * around, join with sl st. (30 sts: 20 fpdc, 10 hdc)
(For Newborn size, skip to Rnd 8)
Rnd 6 (0-3m, 3-6m, 6-12m only): Ch 2, (1 fpdc around fpdc, 1 hdc in hdc, 1 fpdc around fpdc, 2 hdc in next hdc); rep from * to * around, join with sl st. (35 sts: 20 fpdc, 15 hdc)
(For 0-3m size, skip to Rnd 8)
Rnd 7 (3-6m, 6-12m only): Ch 2, (1 fpdc around fpdc, 1 hdc in hdc, 1 fpdc around fpdc, 1 hdc in hdc, 1 fpdc around fpdc, 2 hdc in next hdc); rep from * to * around, join with sl st. (40 sts: 25 fpdc, 15 hdc)
(For 3-6m size, skip to Rnd 8)
Rnd 7b (6-12m only): Ch 2, (1 fpdc around fpdc, 1 hdc in hdc) rep around, join with sl st. (45 sts: 23 fpdc, 22 hdc)
Rnds 6 to 9 (Newborn): Ch 2, work alternating fpdc around fpdc and hdc around hdc around, join with sl st. (30 sts)
Rnds 8 to 12 (0-3m): Ch 2, work ribbing pattern around, join with sl st. (35 sts)
Rnds 8 to 14 (3-6m): Ch 2, work ribbing pattern around, join with sl st. (40 sts)
Rnds 9 to 16 (6-12m): Ch 2, work ribbing pattern around, join with sl st. (45 sts)
Final Edge Rnd (Newborn): Ch 1, work 1 sc in each st around, join with sl st, FO, weave in ends. (30 sc)
Final Edge Rnd (0-3m): Ch 1, work 1 sc in each st around, join with sl st, FO, weave in ends. (35 sc)
Final Edge Rnd (3-6m): Ch 1, work 1 sc in each st around, join with sl st, FO, weave in ends. (40 sc)
Final Edge Rnd (6-12m): Ch 1, work 1 sc in each st around, join with sl st, FO, weave in ends. (45 sc)
✅ Checkpoint: At the end of the hat body, your ribbed pumpkin ridges should be clearly defined and elastic.
Section 2: Pumpkin Stem (Dark Brown / CC1, make 1)
Rnd 1: With CC1, make a magic ring, ch 1, work 6 sc in ring, join with sl st. (6 sc)
Rnd 2: Ch 1, work 1 sc in back loop only of each st around, join with sl st. (6 sc)
Rnds 3 to 5: Ch 1, work 1 sc in each st around, join with sl st. (6 sc)
Rnd 6: Ch 1, work 2 sc in each st around, join with sl st. (12 sc)
FO, leaving a 10 in (25 cm) tail for sewing. Lightly stuff the stem with a pinch of fiberfill.
Section 3: Pumpkin Leaf (Olive Green / CC2, make 1)
Row 1: With CC2, ch 9, work 1 sc in 2nd ch from hook, 1 hdc in next ch, 1 dc in next 2 ch, 1 hdc in next 2 ch, 1 sc in next ch, work (3 sc, ch 1, 3 sc) in last ch. Working along the opposite side of the foundation chain, work 1 sc, 1 hdc in next 2 ch, 1 dc in next 2 ch, 1 hdc, 1 sc, join with sl st to first st. (20 sts)
FO, leaving an 8 in (20 cm) tail for sewing.
Assembly
- Position the dark brown stem squarely over the magic ring at the exact center of the hat crown.
- Whipstitch the bottom flared edge of the stem securely to the top of the hat.
- Tuck the base of the olive green leaf slightly under one side of the stem base and stitch it down firmly.
- Secure all remaining yarn tails on the inside of the hat and trim neatly.
Finishing
Give your finished hat a gentle steam block or hand wash in lukewarm water with mild baby detergent. Lay flat to dry in its natural round shape.
Size Customization Tips
If you need to adjust the hat size between standard measurements, remember that each increase round adds 5 to 6 stitches to the total circumference. Ensure your stitch count remains a multiple that accommodates your alternating post-stitch ribbing columns.
Care Instructions
- Hand wash cold or machine wash gentle in a mesh garment bag.
- Use mild detergent.
- Lay flat to dry out of direct sunlight.
- Do not iron or bleach.
FAQ
Can I use cotton yarn instead of acrylic?
Yes! Cotton yarn works wonderfully and gives the pumpkin crisp stitch definition, though it has less stretch than acrylic. You may want to go up one hook size if your tension is very tight.
How do I make this hat larger for an older toddler?
To size up for a toddler (12-24 months), continue adding one more increase round following the established pattern logic, bringing your total stitch count to 50 sts, and add 2 extra straight ribbing rounds.
No. Because this hat is designed for babies and infants up to 12 months, all facial features, stems, and embellishments must be securely embroidered or crocheted with yarn to prevent any choking hazards.
Happy Crocheting!
I hope you enjoyed making this adorable baby pumpkin hat! Be sure to save this pin on Pinterest to your favorite baby crochet boards, and leave a comment below letting me know what colors you used for your pumpkin patch.
📄 Your free PDF pattern