
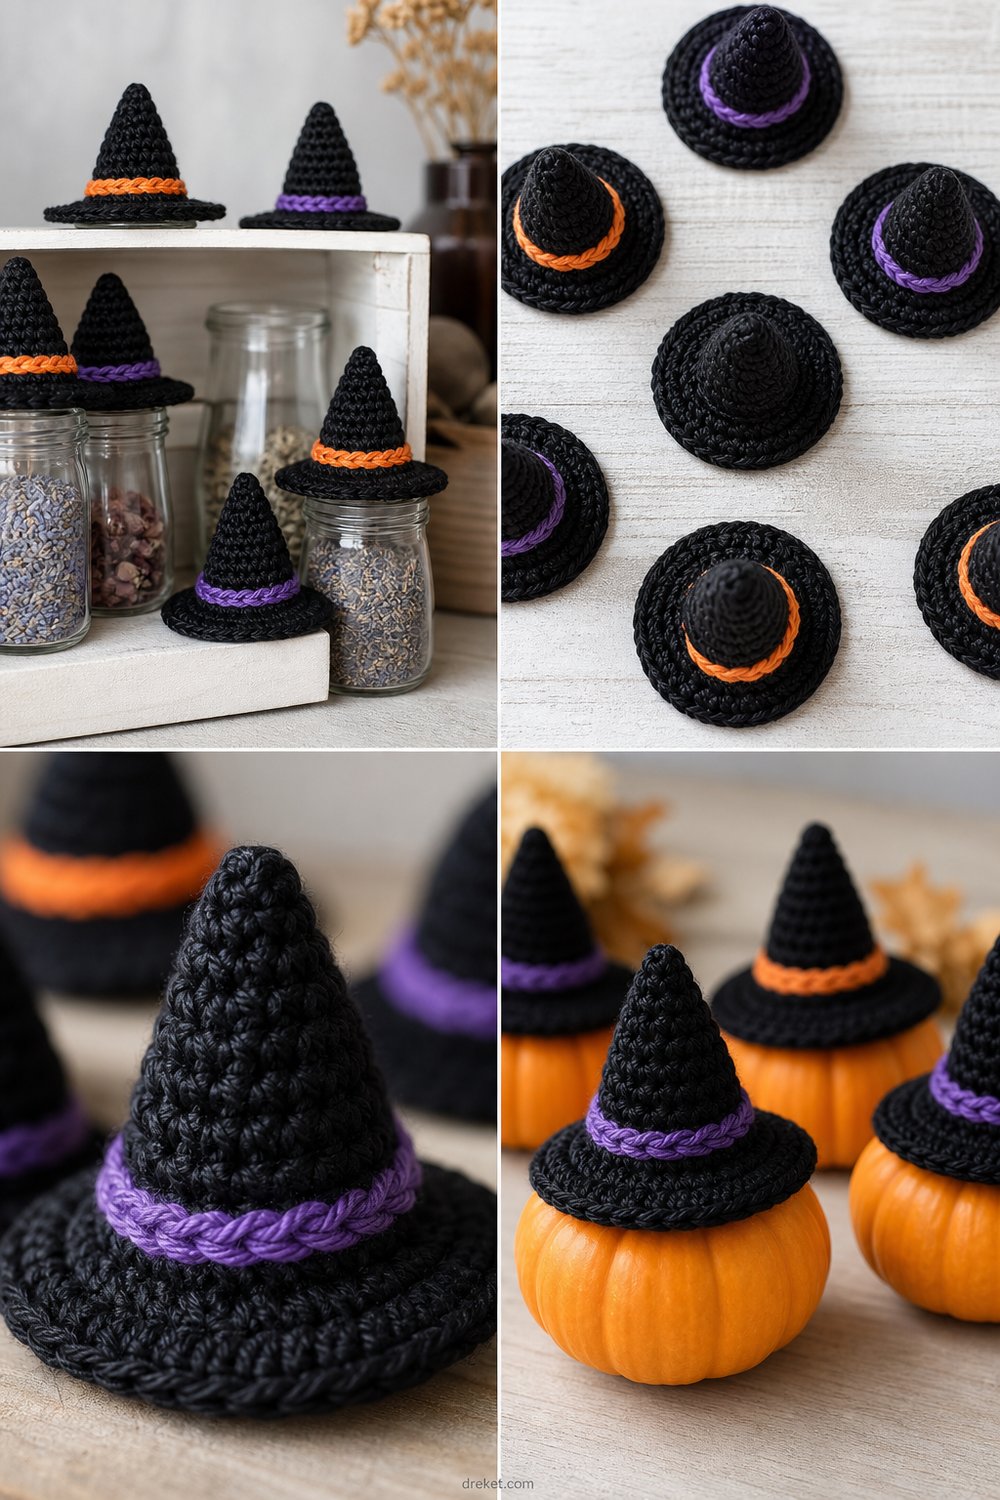
Bring a touch of handcrafted magic to your seasonal tablescapes and spooky shelves this autumn. Perched playfully atop glass jars, mini pumpkins, or strung into a whimsical mantel garland, these little accessories transform any space into a cozy, enchanted nook.
Tiny Witch Hat Halloween Decor Free Crochet Pattern
These charming mini decor pieces utilize basic stitches worked in the round, making them a remarkably quick project that can easily be whipped up in under an hour per hat. They make wonderful party favors, table place settings, or heartfelt handmade gifts for fellow Halloween enthusiasts.
💡 Designer Tip: Scroll down for sizing customization tips to adjust your hats for larger pumpkins or smaller trinkets!
What Makes This Tiny Witch Hat Halloween Decor Free Crochet Pattern Special
The secret to these hats standing up straight and looking crisp and professional lies in the yarn choice and construction method. By working exclusively in the back loops during the brim transition and utilizing a firm, dense tension, the pointed crown holds its sharp structural shape without needing internal wire or cardboard inserts. The high-contrast bands are added cleanly using surface slip stitches or simple round additions, perfectly mimicking classic witch hat aesthetics while maintaining a soft, glossy texture.
Skill Level
- Advanced Beginner
- Basic knowledge of working in the round
- Familiarity with front and back post stitches (optional, but standard stitches are used here)
- Understanding of basic increases and decreases (sc2tog)
Note: If you can work a single crochet in the round, you have all the skills needed to complete this pattern successfully!
Finished Measurements
| Size Option | Height (Inches / cm) | Brim Diameter (Inches / cm) |
|---|---|---|
| Standard Mini | 3.5 in / 8.9 cm | 3.0 in / 7.6 cm |
Materials You Will Need
- Yarn Weight: Sport (#2) or Light Worsted (#3) glossy-finish yarn
- Crochet Hook: US E/4 (3.5 mm) or size needed to obtain gauge
- Notions: Stitch marker, yarn needle, scissors
| Color Name | Exact Color Order | Yarn Weight | Yardage Needed |
|---|---|---|---|
| Black | Glossy-Black (Main Body) | Sport / Light Worsted | 25 yds / 23 m |
| Purple | Deep Purple (Accent Band) | Sport / Light Worsted | 5 yds / 5 m |
| Orange | Vibrant Orange (Accent Band) | Sport / Light Worsted | 5 yds / 5 m |
Yarn Suggestions
| Brand & Line Name | Yarn Weight | Yardage Per Skein | Notes |
|---|---|---|---|
| Schachenmayr Catania | Sport (#2) | 137 yds / 125 m | 100% mercerized cotton for a crisp, glossy finish. |
| Hobbii Friends Cotton 8/8 | DK (#3) | 82 yds / 75 m | Excellent stitch definition and holds a stiff shape naturally. |
| Knit Picks CotLin | Sport (#2) | 123 yds / 112 m | Linen blend adds subtle rustic texture. |
⚠️ Note: Avoid ultra-fuzzy novelty yarns or loosely spun wools for this project. They obscure the stitch definition and make it difficult for the crown to maintain its sharp, pointed silhouette.
Gauge
| Measurement Type | Stitch / Row Count |
|---|---|
| Stitch Gauge | 7 sc x 7 rows = 1 in / 2.5 cm |
| Round Gauge | First 3 rounds of Crown = 1 in / 2.5 cm across base |
💡 Designer Tip: Always check your gauge by making the first few rounds of the crown to ensure your hat won’t turn out too floppy or too rigid.
Abbreviations
| Abbreviation | Full Term |
|---|---|
| ch | chain |
| sc | single crochet |
| inc | increase (work 2 sc in the same stitch) |
| sc2tog | single crochet 2 together (decrease) |
| flo | front loop only |
| blo | back loop only |
| sl st | slip stitch |
| st(s) | stitch(es) |
| rep | repeat |
| rnd(s) | round(s) |
Special Stitches Explained
- sc2tog (Single Crochet Two Together): Insert hook in indicated stitch, yarn over, pull up a loop (2 loops on hook). Insert hook in next stitch, yarn over, pull up a loop (3 loops on hook). Yarn over, pull through all 3 loops on hook.
- BLO (Back Loop Only): Insert the hook under only the back loop of the designated stitch, leaving the front loop unworked.
Pattern Instructions
Section 1: The Crown
Using Black, make a magic ring.
- Rnd 1: Work 4 sc in magic ring. Pull ring tight to close. (4 sts)
- Rnd 2: Sc in each st around. (4 sts)
- Rnd 3: [Inc, sc in next st] 2 times. (6 sts)
- Rnd 4: Sc in each st around. (6 sts)
- Rnd 5: [Inc, sc in next 2 sts] 2 times. (8 sts)
- Rnd 6: Sc in each st around. (8 sts)
- Rnd 7: [Inc, sc in next st] 4 times. (12 sts)
- Rnd 8: Sc in each st around. (12 sts)
- Rnd 9: [Inc, sc in next 2 sts] 4 times. (16 sts)
- Rnd 10: Sc in each st around. (16 sts)
- Rnd 11: [Inc, sc in next 3 sts] 4 times. (20 sts)
- Rnd 12: Sc in each st around. (20 sts)
✅ Checkpoint: At the end of Rnd 12, your crown should measure approximately 3 inches tall with a clean, sharply pointed top and a stitch count of 20 sts.
Section 2: The Hat Band
- Rnd 13: Fasten off Black. Join Purple (or Orange). Working in blo for this round only, sc in each st around. Join with a sl st to first st. (20 sts)
- Rnd 14: Ch 1, working in blo of Rnd 13, sc in each st around. Fasten off accent color. (20 sts)
Section 3: The Brim
- Rnd 15: Rejoin Black in the unworked front loops of Rnd 12 (at the base of the band). Work [Inc, sc in next st] around. (30 sts)
- Rnd 16: [Inc, sc in next 2 sts] around. (40 sts)
- Rnd 17: [Inc, sc in next 3 sts] around. (50 sts)
- Rnd 18: Sc in each st around. Sl st to first st and fasten off. (50 sts)
✅ Checkpoint: Weave in all loose ends securely from the inside of the crown before styling your finished hat.
Size Customization Tips
- Sizing Up: To fit larger craft pumpkins, add 2 additional increase rounds to the base of the brim (repeating the pattern sequence up to 60 sts or 70 sts), and add 4 rows to the bottom of the crown before starting the band. This will increase the overall height by roughly 1 inch and the brim diameter by 1.5 inches.
- Sizing Down: To make miniature cupcake toppers, stop the crown increases at Rnd 8 (12 sts), omit Rnd 13-14 for a thinner band, and work brim increases only up to 30 sts. This reduces the footprint by roughly 30%.
Care Instructions
Spot clean gently with a damp cloth and mild soap. Do not submerge in water if using non-washable yarns or stiffening agents. Reshape while damp and allow to air dry completely on a flat surface.
Closing
Thank you so much for crafting along with this Tiny Witch Hat Halloween Decor Free Crochet Pattern! I hope these little hats bring an abundance of spooky charm to your seasonal decorating.
If you make a fleet of these for your home, I would love to see them! Please share your photos on social media, tag me, save this project to your Pinterest boards for next Halloween, and leave a comment below to let me know which color band is your favorite! Happy crocheting!