












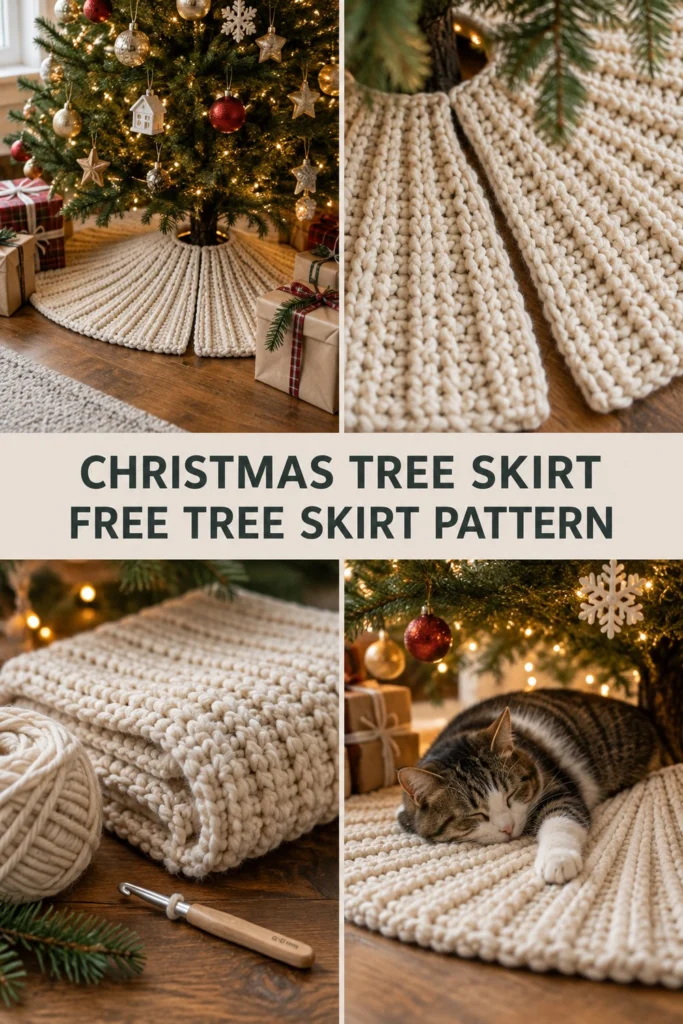
Imagine your tree sitting on a cozy, cream-colored chunky skirt you made yourself this holiday season. This project brings a handmade touch to your christmas home decor crochet collection, working up quickly with super chunky yarn and basic stitches.
Quick Facts
- Skill level: Intermediate
- Finished size: Approx. 36 inches (91 cm) in diameter
- Yarn: Super bulky / Super chunky weight (#6)
- Hook: 12 mm crochet hook
- Stitches used: ch, sl st, hdc, BLO
- Time to make: A weekend project
Detailed size customization tips are included further down the page to help you adjust the skirt for larger or smaller trees.
What Makes This Chunky Tree Skirt Special
This skirt is worked sideways in wedge sections using short rows in the back loop only (BLO). This technique allows the fabric to fan out naturally into a full circle with a clean center hole and a slit to slide right around the tree trunk. The vertical ribbed texture creates a thick, plush layer that rests beautifully beneath your branches.
Skill Level
- Working in rows and managing short rows
- Working in the back loop only (BLO) to create ribbing
- Basic shaping and counting rows
- Keeping consistent tension with super bulky yarn
Don’t worry if you haven’t worked short rows before—the pattern breaks down each wedge clearly so you can follow along step by step.
Finished Measurements
| Measurement | Inches | Centimeters |
|---|---|---|
| Diameter | 36 in | 91 cm |
| Center Hole Diameter | 4 in | 10 cm |
| Slit Length | 16 in | 41 cm |
Materials You Will Need
| Material | Description | Quantity |
|---|---|---|
| Yarn | Super bulky (#6) cream yarn | Approx. 550 yards (503 meters) |
| Crochet Hook | 12 mm (US P/16) | 1 |
| Notions | Tapestry needle, locking stitch markers, measuring tape | As needed |
Yarn Suggestions
| Yarn Line | Weight | Skein Yardage | Notes |
|---|---|---|---|
| Lion Brand Wool-Ease Thick & Quick | Super Bulky (#6) | 106 yds / 97 m per skein | Hold multiple strands or use a true jumbo/super bulky equivalent like Bernat Blanket Extra |
| Bernat Blanket | Super Bulky (#6) | 220 yds / 201 m per skein | Soft chenille texture; check gauge |
⚠️ Note: Avoid novelty fuzzy yarns that make stitch identification difficult, as working in the back loop requires clear visibility of your stitches.
Gauge
- 6 stitches and 5 rows = 4 inches (10 cm) in BLO hdc ribbing.
- Taking time to check your gauge ensures your wedges meet cleanly around the center circle.
Abbreviations
- ch: chain
- sl st: slip stitch
- hdc: half double crochet
- BLO: back loop only
- st(s): stitch(es)
- sk: skip
- rep: repeat
- RS: right side
- WS: wrong side
UK terms equivalent: sc = dc, hdc = htr, dc = tr.
Special Stitches Explained
- BLO hdc (Half Double Crochet in Back Loop Only): Yarn over, insert hook only under the back loop of the designated stitch, yarn over, pull up a loop, yarn over, and draw through all three loops on the hook. This leaves a distinct horizontal ridge on the front of the work.
- Short Rows: Rows that do not go all the way to the end of the previous row, used here to create wedge shaping that flares out from the center collar to the wide outer hem.
Pattern Instructions
Pattern Notes:
– The tree skirt is constructed in wedge panels joined together or worked continuously as a single flat piece with a side slit. For this seamless wedge method, we work the entire skirt in connected wedge sections around the center ring.
– Turning chains do not count as stitches unless explicitly stated.
Section 1: Center Collar Foundation
Row 1: Ch 25, working in 2nd ch from hook, hdc in each ch across (24 hdc). Turn.
Section 2: Wedge Panel Construction
We will now work short rows in BLO hdc to form the ribbed wedges. Each wedge consists of a short row set that grows from the narrow neck edge to the wide hem edge.
Row 2 (RS): Working in BLO, hdc in next 20 sts, leave remaining 4 sts unworked. Turn (20 hdc).
Row 3 (WS): Hdc in each st across to neck edge (20 hdc). Turn.
Row 4: Working in BLO, hdc in next 22 sts, leave remaining 2 sts unworked. Turn (22 hdc).
Row 5: Hdc in each st across (22 hdc). Turn.
Row 6: Working in BLO, hdc in all 24 sts across the full width of the wedge. Turn (24 hdc).
Row 7: Hdc in each st across (24 hdc). Turn.
✅ Checkpoint: You have completed one full wedge repeat. You should see a distinct fan shape starting to form with a narrow inner collar edge and a wider outer hem edge.
Repeat Rows 2 through 7 until you have completed 12 total wedges around the center collar circle, or until the outer skirt edges meet to form a complete circle with a single slit opening.
Assembly
- Align the starting edge and final edge of your worked panels to form the side slit.
- Thread your tapestry needle with a matching length of yarn (approx. 20 inches / 50 cm).
- Seam the very top collar edges together securely for about 2 inches if desired to stabilize the neck opening, leaving the remainder of the slit open for easy placement around the tree trunk.
Finishing
- Weave in all loose yarn ends securely on the wrong side of the work using your tapestry needle.
- Block lightly with steam if needed to relax the chunky stitches and make the ribs sit flat.
Size Customization Tips
- To make a larger tree skirt for a wide-base tree, add 2 to 4 extra chains to your initial foundation row, adjusting your short row turning points accordingly (adding about 1.5 inches of radius per extra chain length).
- To fit a smaller tabletop tree, start with ch 15 and reduce the wedge height rows.
Care Instructions
- Spot clean gently with a damp cloth and mild detergent.
- If machine washable yarn was used, launder on a delicate cool cycle in a mesh laundry bag.
- Dry flat away from direct heat to preserve the chunky ribbed texture.
FAQ
Can I use regular worsted weight yarn instead of super bulky?
You can, but the skirt will turn out much smaller, thinner, and less rigid. If you use worsted weight, hold 3 to 4 strands together and adjust your hook size to match the chunky gauge.
How do I keep the center hole from stretching out too much?
You can thread a piece of elastic cord or a matching strand of yarn through the very first foundation chain row and tie it gently to secure the inner collar snug against the tree trunk.
Is this tree skirt safe to use around pets?
Yes! The dense ribbed stitches and heavy yarn create a sturdy surface that cats and small dogs love to curl up on, as shown in our styling photos.
Happy Crocheting!
I hope you love making this chunky ribbed Christmas tree skirt for your holiday home. Save this pin on Pinterest to keep it handy for your holiday crafting list, and leave a comment below letting me know what color yarn you are using!
📄 Your free PDF pattern