











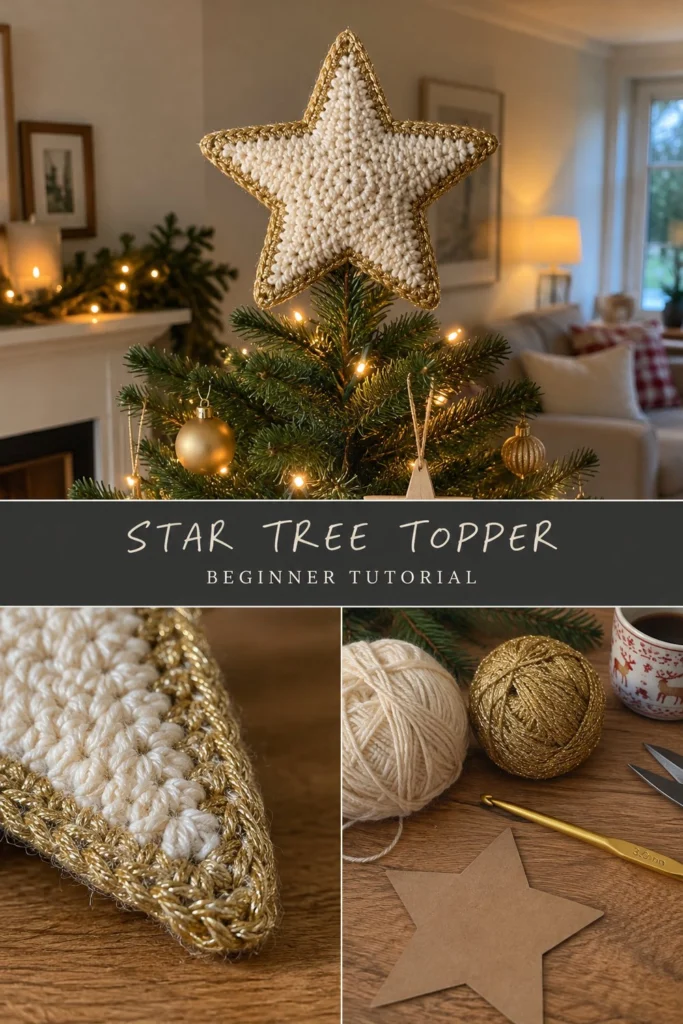
The tree topper is the crowning glory of your holiday decorations, and this year, it can be one you made by hand. This beginner-friendly design creates a lightweight, two-sided five-pointed star in a gorgeous combination of cream and gold metallic yarn, complete with a discreet tube at the back that slips securely over your topmost tree branch.
Crochet Star Tree Topper Free Pattern (Light, Stays Upright)
Quick Facts
- Skill level: Beginner
- Finished size: 9 inches (23 cm) across point to point
- Yarn: Worsted-weight cream yarn and metallic gold crochet thread or worsted gold yarn
- Hook: 3.5 mm (US E/4) crochet hook
- Stitches used: ch, sl st, sc, hdc, dc, inc, dec
- Time to make: 2 to 3 hours
Size tips and customization options are included further down the page.
What Makes This Crochet Star Tree Topper Special
This tree topper is engineered specifically to solve the age-old problem of heavy, sagging tree toppers. Instead of a dense, heavy three-dimensional solid shape, it is made of two flat pentagonal-based star panels joined around the edges with a light layer of polyester stuffing. The gold metallic yarn is worked as a continuous border around the cream star body, framing it with a brilliant holiday shimmer. A simple sc tube is attached to the back, allowing the star to slide right over the center branch so it stays upright all season long without leaning.
Skill Level
- Basic familiarity with working in the round and short rows for star points
- Basic increasing and decreasing
- Basic seaming and joining techniques
You’ve got this—even if you are relatively new to crochet, the clear step-by-step instructions will guide you easily through every point.
Finished Measurements
- Width: 9 inches (23 cm) across
- Height: 9 inches (23 cm) from bottom point to top point
- Thickness: 1.5 inches (4 cm) at the center
- Back Tube: 1.5 inches (4 cm) wide by 3 inches (8 cm) long
Materials You Will Need
| Material | Type / Color | Amount |
|---|---|---|
| Yarn A | Worsted-weight yarn / Cream | 50 yards (45 meters) |
| Yarn B | Metallic yarn or gold cord / Gold | 40 yards (37 meters) |
| Hook | 3.5 mm (US E/4) crochet hook | 1 hook |
| Notions | Polyester fiberfill stuffing | Small handful |
| Notions | Yarn needle for weaving ends | 1 needle |
| Notions | Stitch markers | 2 markers |
| Notions | Cardboard (optional, for template) | 1 small piece |
Yarn Suggestions
| Yarn Line | Weight | Notes |
|---|---|---|
| Caron Simply Soft (Cream) | Worsted | Has a subtle sheen that pairs wonderfully with metallic gold. |
| Lion Brand Vanna’s Choice (Linen/Cream) | Worsted | Firm structure that holds the star shape beautifully. |
| Knit Picks Metallic Fingering / Sport held double or gold cord | Metallic | Provides the brilliant sparkle seen around the star edges. |
⚠️ Note: Avoid ultra-fuzzy novelty yarns or heavy wools for this project. Smooth worsted yarns give the star clean definition and keep the weight minimal so your tree branch doesn’t bend.
Gauge
- Rnds 1 to 4 of the star center: 2.5 inches (6.5 cm) across using a 3.5 mm hook in Cream.
Abbreviations
- ch: chain
- sl st: slip stitch
- sc: single crochet
- hdc: half double crochet
- dc: double crochet
- inc: single crochet increase (2 sc in same stitch)
- dec: single crochet decrease (sc 2 stitches together)
- st(s): stitch(es)
- rnd(s): round(s)
- rep: repeat
- sk: skip
- RS: right side
UK terms equivalent: sc = dc, hdc = htr, dc = tr.
Special Stitches Explained
- Magic Ring: Wrap yarn around your index finger twice, insert hook under strands, pull up a loop, and ch 1 to secure. Work initial stitches directly into the ring.
- Invisible Decrease: Insert hook into the front loop only of the next two stitches, yarn over, pull through both front loops, yarn over, and pull through remaining two loops on hook.
Pattern Instructions
💡 Designer Tip: Use a stitch marker at the start of each round to keep track of your progress, especially when working the star points.
Section 1: Star Panels (Cream, make 2)
The star is worked in two identical flat pieces starting from a central circle, then building the five points outward.
Rnd 1: With Cream yarn, make a magic ring, ch 1, work 10 sc in ring, join with sl st to first sc. (10 sc)
Rnd 2: Ch 1, work inc in each st around, join with sl st. (20 sc)
Rnd 3: Ch 1, (1 sc in next st, inc in next st) rep from * to * around, join with sl st. *(30 sc)*
Rnd 4: Ch 1, (sc in next 2 sts, inc in next st) rep from * to * around, join with sl st. *(40 sc)*
Now you will work the 5 points individually using short rows.
Point 1:
Row 1 (RS): Ch 1, sc in next 8 sts, turn, leave remaining 32 sts unworked. (8 sc)
Row 2: Ch 1, dec, sc in next 4 sts, dec, turn. (6 sc)
Row 3: Ch 1, sc in each st across, turn. (6 sc)
Row 4: Ch 1, dec, sc in next 2 sts, dec, turn. (4 sc)
Row 5: Ch 1, sc in each st across, turn. (4 sc)
Row 6: Ch 1, dec, dec, turn. (2 sc)
Row 7: Ch 1, dec. (1 sc)
Fasten off Cream yarn.
Points 2 to 5:
Join Cream yarn in the next unworked st on Rnd 4, directly beside the base of the previous point. Repeat Rows 1 to 7 for each of the remaining 4 points. Make 2 identical star panels.
✅ Checkpoint: You should now have two complete 5-pointed cream star panels. Weave in all loose ends on the wrong sides before proceeding.
Section 2: Gold Metallic Edging & Join
Hold the two star panels together with wrong sides facing each other, matching all five points.
Rnd 1: Join Gold metallic yarn through both layers at the base of any point. Working through both thicknesses simultaneously, sc evenly up the side of the point, work 3 sc in the very tip of the point, sc down the other side of the point, and sc along the inner valley between points. Repeat this for all 5 points around the star. When you have worked around about 80% of the star, stuff lightly with polyester fiberfill between the panels to give it gentle puffiness. Finish working sc around the remaining edge, join with sl st to first sc, and fasten off. (210 sc)
Section 3: Branch Mounting Tube (Gold, make 1)
Row 1: Ch 12, join with sl st to form a ring, taking care not to twist the chain. (12 ch)
Rnd 1: Ch 1, sc in each ch around, join with sl st. (12 sc)
Rnds 2 to 16: Ch 1, sc in each st around, join with sl st. (12 sc)
Fasten off, leaving a 10-inch (25 cm) tail for sewing.
Assembly
- Flatten the mounting tube so it forms a neat cylinder.
- Position the open end of the tube centrally at the bottom back of the star (aligned with the bottom point).
- Using the yarn tail and a yarn needle, securely whipstitch the top edge of the tube to the back panel of the star, about 1 inch above the bottom point.
- Weave in all remaining ends securely.
Size Customization Tips
- To make a larger star, use a heavier weight yarn (like bulky velvet or Bernat Blanket) with a 6.0 mm hook, and add extra rounds to the central circle before working the points.
- To make a miniature tree topper for a tabletop tree, use sport-weight yarn and a 2.5 mm hook.
Care Instructions
Spot clean gently with a damp cloth and mild detergent if needed. Do not submerge in water or machine wash to protect the metallic thread and fiberfill shape. Store flat in a breathable box between holidays.
FAQ
Can I use regular cotton yarn instead of metallic gold for the border?
Yes! Cotton yarn in yellow or gold works wonderfully if you prefer a matte look over metallic sparkle.
How do I make sure the star doesn’t lean on my tree?
Ensure the mounting tube is sewn securely and straight onto the back panel, and push the top branch of your tree deep inside the tube so it supports the weight evenly.
Is this pattern suitable for complete beginners?
Absolutely. If you know how to make a magic ring, single crochet, and work simple decreases, you can easily complete this project in an afternoon.
Happy Crocheting!
I hope you love crowning your Christmas tree with your handmade star. Be sure to save this pin on Pinterest and share your gorgeous holiday creation in the comments below with your favorite color choices!
📄 Your free PDF pattern