











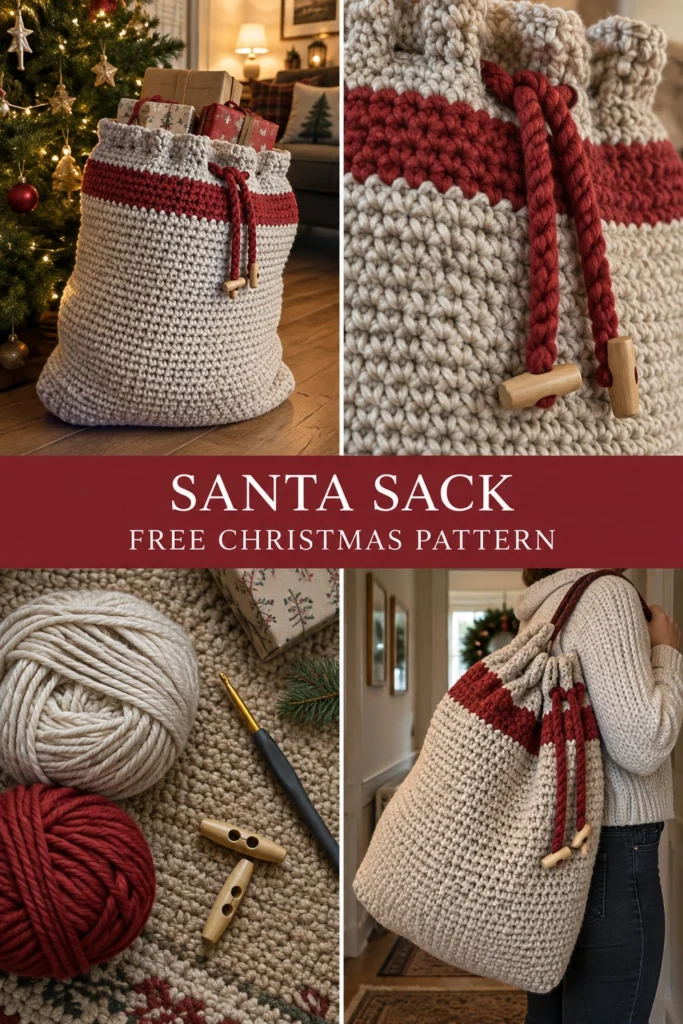
Every family needs one big sack for Santa’s deliveries on Christmas Eve. This crochet Santa sack is roomy enough for a whole pile of presents, worked from a flat oval base in firm oatmeal moss stitch with a rich red band where you can stitch a name. A thick twisted cord and wooden toggles close the top, turning it into a timeless keepsake you will bring out every December.
Crochet Santa Sack With Drawstring Free Christmas Pattern
Quick Facts
- Skill level: Intermediate
- Finished size: 48 cm (19 in) wide, 60 cm (24 in) tall, oval base 32 cm (12.5 in) long by 16 cm (6.3 in) wide
- Yarn: Bulky weight (5) cotton-acrylic blend or heavy wool blend in Oatmeal (Color A) and Crimson Red (Color B)
- Hook: 6.0 mm (US J/10) crochet hook
- Stitches used: ch, sl st, sc, moss stitch (sc, ch 1, sk 1), esc (extended single crochet)
- Time to make: Weekend project (approx. 10 to 12 hours)
Size customization tips are included further down.
What Makes This Santa Sack Special
This project is built for durability and classic holiday charm. It begins with a firm oval base worked in continuous rounds so the bottom won’t sag under heavy gifts. The main body uses moss stitch—a wonderfully textured stitch that grows quickly and holds its shape while remaining flexible. The vibrant red colorwork band provides a clean canvas for a custom name, and the heavy-duty twisted cord paired with chunky wooden toggles gives it a rustic, heirloom-grade finish.
Skill Level
- Working in continuous rounds and joined rounds
- Foundation chain and oval increases
- Moss stitch (alternating single crochet and chain-1 spaces)
- Basic color changes and yarn joining
- Twisting a multi-strand cord and threading through eyelets
Reassurance: If you know how to single crochet and skip stitches, you have all the skills needed to complete this project.
Finished Measurements
| Dimension | Metric | Imperial |
|---|---|---|
| Width (laid flat) | 48 cm | 19 in |
| Height (top to bottom) | 60 cm | 24 in |
| Base Length | 32 cm | 12.5 in |
| Base Width | 16 cm | 6.3 in |
Materials You Will Need
| Material | Color | Details / Weight | Quantity |
|---|---|---|---|
| Yarn A | Oatmeal | Bulky weight (5), cotton/acrylic blend | 600 grams / approx. 550 meters (600 yards) |
| Yarn B | Crimson Red | Bulky weight (5), cotton/acrylic blend | 150 grams / approx. 140 meters (150 yards) |
| Hook | N/A | 6.0 mm (US J/10) crochet hook | 1 |
| Notions | Natural / Brown | Large wooden toggle buttons (approx. 45mm to 50mm) | 2 |
| Notions | Multi | Tapestry needle for weaving ends and embroidery | 1 |
| Notions | N/A | Stitch markers | 4 |
Yarn Suggestions
| Yarn Line | Weight | Skein Yardage | Notes |
|---|---|---|---|
| Lion Brand Hue + Me | Bulky (5) | 137 yards / 125 meters per 125g | Excellent stitch definition, firm structure for bags |
| Patons Classic Wool Bulky | Bulky (5) | 120 yards / 110 meters per 100g | Traditional wool look with great stretch and warmth |
| Bernat Maker Home Dec | Bulky (5) | 317 yards / 290 meters per 250g | Tubularity gives fantastic weight and durability |
⚠️ Note: Avoid very fuzzy yarns like mohair or novelty eyelash yarns for this project. They obscure the moss stitch texture, make color changes difficult, and will catch on gift wrap edges.
Gauge
- 13 sts x 14 rows = 10 cm (4 in) in moss stitch using a 6.0 mm hook.
- First 3 rounds of the oval base should measure approximately 12 cm (4.7 in) in length.
Abbreviations
| Abbreviation | Full Term |
|---|---|
| ch | Chain |
| sl st | Slip stitch |
| sc | Single crochet |
| hdc | Half double crochet |
| dc | Double crochet |
| sk | Skip |
| sp | Space |
| st(s) | Stitch(es) |
| inc | Increase (work 2 sts in same st) |
| dec | Decrease (sc2tog) |
| Rnd(s) | Round(s) |
| Row(s) | Row(s) |
| BLO | Back loop only |
| [ … ] | Repeat instructions inside brackets |
UK note: UK sc = US dc, UK hdc = US tr, UK dc = US dtr.
Special Stitches Explained
- Moss Stitch: Worked over an even number of stitches. [Sc in next st, ch 1, sk next st]. On subsequent rounds, work the sc into the ch-1 space of the previous round and ch 1 over the sc of the previous round.
- Oval Base Increase: Worked by placing 3 sc in the end anchor stitches of each round to smoothly curve the flat bottom without ruffling.
- Twisted Cord: Two bundles of yarn twisted tightly in opposite directions and allowed to twist together naturally, secured at both ends with knots and wooden toggles.
Pattern Instructions
Pattern Notes
- The base is worked in continuous spiral rounds without joining. Use a stitch marker to keep track of the first stitch of each round.
- The body transitions to joined rounds once the moss stitch begins.
- Always count your chain-1 spaces as stitches when verifying stitch counts.
Section 1: Oval Base (Color A)
Using Color A and 6.0 mm hook, ch 31.
Rnd 1: Working in back bumps of foundation chain: 2 sc in 2nd ch from hook, sc in next 28 ch, 3 sc in last ch. Working along opposite side of foundation chain: sc in next 28 ch, sc in last ch (joins with first st). (62 sc)
Rnd 2: Inc in first 2 sts, sc in next 28 sts, inc in next 3 sts, sc in next 28 sts, inc in last st. (68 sc)
Rnd 3: [1 sc, inc] 2 times, sc in next 28 sts, [1 sc, inc] 3 times, sc in next 28 sts, 1 sc, inc. (74 sc)
Rnd 4: [2 sc, inc] 2 times, sc in next 28 sts, [2 sc, inc] 3 times, sc in next 28 sts, 2 sc, inc. (80 sc)
Rnd 5: [3 sc, inc] 2 times, sc in next 28 sts, [3 sc, inc] 3 times, sc in next 28 sts, 3 sc, inc. (86 sc)
Rnd 6: [4 sc, inc] 2 times, sc in next 28 sts, [4 sc, inc] 3 times, sc in next 28 sts, 4 sc, inc. (92 sc)
Rnd 7: Working in BLO: sc in each st around. (92 sc)
Rnds 8 to 12: Sc in each st around. (92 sc)
✅ Checkpoint: Your base should now have a distinct upright rim formed by the BLO round, measuring about 32 cm long by 16 cm wide.
Section 2: Main Body & Moss Stitch (Color A)
Rnd 1: Join Color A with a sl st to start moss stitch. Ch 1 (does not count as st), [sc in next st, ch 1, sk next st] around, join with sl st to first sc. (92 sts: 46 sc, 46 ch-1 sps)
Rnds 2 to 24: Sl st into first ch-1 sp, ch 1, [sc in next ch-1 sp, ch 1, sk next sc] around, join with sl st to first sc. (92 sts per round)
Section 3: Red Colorwork Band (Color B)
Fasten off Color A. Join Color B.
Rnds 25 to 30: Continuing moss stitch in Color B: sl st into first ch-1 sp, ch 1, [sc in next ch-1 sp, ch 1, sk next sc] around, join with sl st to first sc. (92 sts per round)
💡 Designer Tip: If you wish to stitch a name onto this red band using duplicate stitch, do so now while the bag is still open and flat before working the remaining oatmeal rounds.
Fasten off Color B. Rejoin Color A.
Section 4: Upper Body & Eyelet Round (Color A)
Rnds 31 to 36: Continuing moss stitch in Color A: sl st into first ch-1 sp, ch 1, [sc in next ch-1 sp, ch 1, sk next sc] around, join with sl st to first sc. (92 sts per round)
Rnd 37 (Eyelet Round): Ch 1, sc in first st, ch 3, sk next 2 sts, [sc in next st, ch 3, sk next 2 sts] around, join with sl st to first sc. (31 sc, 31 ch-3 sps)
Rnds 38 to 40: Ch 1, [sc in next ch-3 sp, ch 3] around, join with sl st to first sc. (31 sc, 31 ch-3 sps)
Rnd 41: Sl st in each st and ch around. Fasten off and weave in all ends. (124 sts)
Section 5: Drawstring Cord (Color B)
Cut six strands of Color B, each 200 cm (78 in) long. Divide into two sets of 3 strands.
1. Twist each 3-strand set tightly in one direction until it begins to kink.
2. Carefully fold the twisted strands in half, holding the ends, and let them twist together naturally into a thick cord.
3. Tie secure knots at both ends to prevent unravelling.
4. Thread the cord through the eyelet round (Rnd 37) weaving in and out.
5. Attach a wooden toggle to each end of the cord and knot firmly.
Assembly & Finishing
- Check all yarn tails and weave them securely into the moss stitch fabric on the inside of the sack.
- Inspect the base to ensure the oval sits flat and the rim stands cleanly.
- Pull the drawstring tight to test the closure.
Size Customization Tips
- Making it taller: Add more moss stitch rounds in Section 2 before joining the red band. Each additional 2 rounds adds approximately 1 cm (0.4 in) to the height.
- Making it wider: Increase the starting chain length in increments of 6 stitches, adjusting the oval base side counts accordingly.
Care Instructions
- Hand wash gently in cool water with mild wool detergent.
- Do not bleach or tumble dry.
- Lay flat on a towel to dry completely, reshaping the oval base while damp.
FAQ
Can I use acrylic yarn instead of wool or cotton?
Yes! Acrylic yarn works wonderfully for this sack. It is lightweight, holds its shape well, is completely machine washable, and comes in vibrant holiday reds and oatmeals.
How do I personalize the red band with a name?
Use white or cream yarn and a tapestry needle to embroider a name using the duplicate stitch technique directly onto the moss stitch stitches of the red band (Rnds 25 to 30).
Is this bag safe to store heavy gifts?
The combination of the firm oval base, tightly worked moss stitch, and bulky yarn creates a very sturdy fabric capable of holding heavy toys, books, and wrapped gifts with ease.
Happy Crocheting!
I hope you love making this classic Christmas Santa sack as much as I loved designing it for you. Pin this pattern on Pinterest for this year’s Christmas Eve preparations, and leave a comment below to share what colors you are using for yours!
📄 Your free PDF pattern