












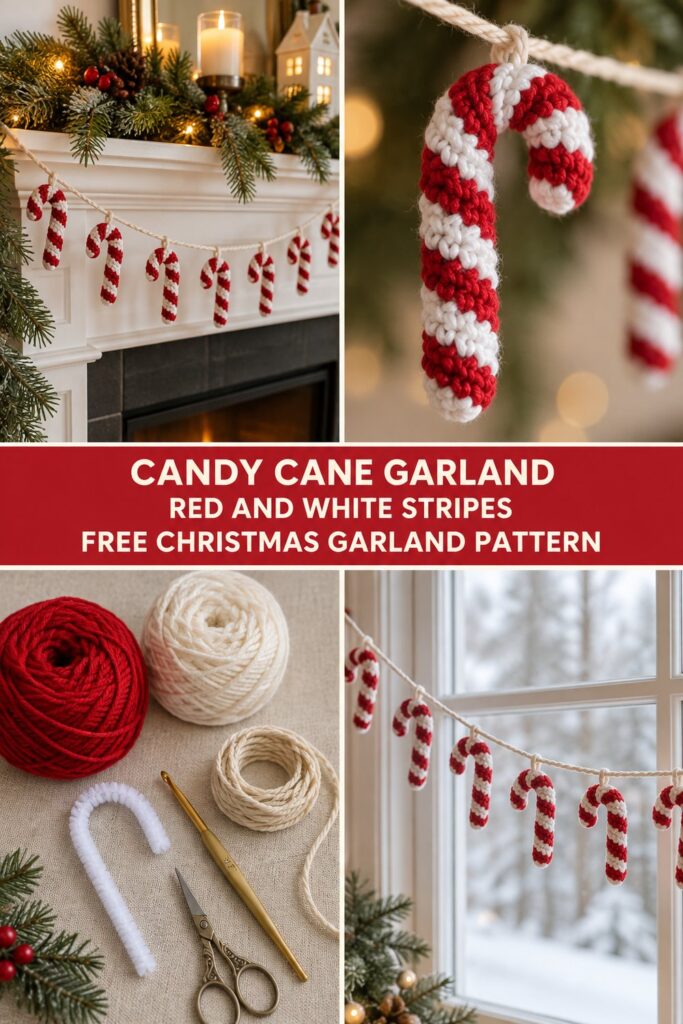
There is nothing quite like stringing handmade peppermint stripes across a glowing pine mantelpiece to make the holiday season feel truly magical. This festive crochet candy cane garland brings classic Victorian holiday charm right into your living room, transforming humble yarn scraps into a cheerful heirloom-quality decoration that you will reach for year after year.
Quick Facts
- Stitches Used: Chain (ch), Single Crochet (sc), Slip Stitch (sl st)
- Size Fit: One size standard garland (each candy cane measures approx. 4 inches / 10 cm tall; garland length is customizable)
- Estimated Hours to Complete: 2 to 3 hours total for a standard 6-cane garland
- Gift-Appeal Framing: Perfect as a heartfelt, handmade holiday hostess gift, a charming mantelpiece decoration, or a fun afternoon quick-make project for holiday craft markets.
Sizing and length customization tips are included later in the pattern so you can tailor your garland to fit any mantel, window frame, or staircase.
What Makes This Crochet Candy Cane Garland Special
This design relies on a clever, beginner-friendly construction method: you work in continuous rounds of single crochet directly over a pliable pipe cleaner (chenille stem) inserted as you go. This hidden armature is what allows you to bend the top of each cane into that iconic curved hook shape without collapsing or losing definition. By carrying both your red and white yarn colors simultaneously throughout the tube, the stitches naturally form crisp, diagonal spiral stripes reminiscent of traditional holiday peppermint candy. It is an engaging, low-stress scrap yarn project that yields stunning, professional-looking results.
Skill Level
- Beginner-Friendly Intermediate: Requires basic knowledge of amigurumi-style working in the round and managing two colors at once.
- Required skills:
- Working in continuous spiral rounds (without joining)
- Carrying yarn floats behind or inside stitches
- Basic shaping and bending of wire/pipe cleaners
- Simple assembly and stringing
💡 Designer Tip: If you have never carried yarn while working continuous rounds, do not worry! Simply lay the unused color along the top of your previous stitches and crochet directly over it to trap it neatly inside the tube.
Finished Measurements
| Dimension | Inches | Centimeters |
|---|---|---|
| Candy Cane Height | 4.0 in | 10.0 cm |
| Candy Cane Width (Hook) | 1.5 in | 3.8 cm |
| Candy Cane Tube Diameter | 0.5 in | 1.3 cm |
| Garland Length (6 Canes) | 48.0 in | 121.9 cm |
Materials You Will Need
- Yarn: Sport weight or light DK cotton/acrylic blend yarn (approx. 5 yards per candy cane)
- Hook: US B/1 (2.25 mm) or US C/2 (2.5 mm) crochet hook to keep stitches tight
- Notions: Standard fluffy craft pipe cleaners (chenille stems) in white, tapestry needle, sharp scissors, natural cream jute twine for hanging.
| Color Name | Exact Color Order | Yarn Weight | Estimated Yardage / Meters |
|---|---|---|---|
| Candy Red | Color A | Sport / Light DK | 15 yds / 14 m (per 3 canes) |
| Snow White | Color B | Sport / Light DK | 15 yds / 14 m (per 3 canes) |
Yarn Suggestions
| Brand & Line Name | Yarn Weight | Skein Yardage | Notes |
|---|---|---|---|
| Schachenmayr Catania | Sport (Fine 2) | 137 yds (125 m) per 50g | 100% mercerized cotton; gives ultra-crisp, defined stitches. |
| Hobbii Friends Cotton 8/4 | Fingering / Sport | 175 yds (160 m) per 50g | Wonderful color range, durable, and budget-friendly for scraps. |
| Knit Picks CotLin | DK (Light 3) | 123 yds (112 m) per 50g | Linen-cotton blend; provides a lovely rustic matte finish. |
⚠️ Note: Avoid extremely fuzzy yarns like mohair or brushed acrylic for this project. Because the magic of a candy cane lies in its sharp color contrast and crisp spiral lines, smooth mercerized cotton or tight acrylic yields the best visual definition.
Gauge
| Measurement Type | Stitch / Row Count | Dimensions |
|---|---|---|
| Single Crochet Tube | 6 sts x 6 rounds | 1 inch x 1 inch (2.5 cm x 2.5 cm) |
💡 Designer Tip: Gauge is not strictly critical for length here, but keeping your tension very firm is essential so that the pipe cleaner armature does not poke through the stitches. Swatch a tiny tube first if you tend to crochet loosely!
Abbreviations
| Abbreviation | Full Term |
|---|---|
| ch | Chain |
| sc | Single Crochet |
| sl st | Slip Stitch |
| st(s) | Stitch(es) |
| rnd(s) | Round(s) |
| MC | Main Color (Red) |
| CC | Contrasting Color (White) |
Special Stitches Explained
- Two-Color Spiral Carry (CSC): Work single crochet stitches while carrying the inactive yarn color inside the stitches. To switch active colors cleanly without holes, complete the final pull-through of the current stitch using the new color.
- Invisible Fasten Off: Cut yarn leaving a 6-inch tail. Thread tail onto a tapestry needle, pass under both loops of the final stitch, and bring back down through the center of the tube to secure.
Pattern Instructions
Section 1: Crocheted Candy Cane Tube
Make as many candy canes as desired for your garland (a set of 6 is recommended for a standard mantel span).
Using Color A (Red) and Color B (White), holding both yarns and carrying the inactive color inside your stitches:
- Rnd 1: With Color A, leave a 4-inch starting tail, ch 2, work 6 sc in the 2nd ch from hook. Do not join; work in continuous spiral rounds. Lay Color B inside the stitches to carry it. (6 sc)
- Rnd 2: Rnd 2: Working in continuous rounds, 2 sc in each st around, changing colors every 2 stitches to create the spiral effect. (12 sts)
- Rnd 3 to 22: Rnd 3 to 22: Continue working 1 sc in each st around, maintaining the color-switching sequence to form the spiral stripes. (12 sts per round)
✅ Checkpoint: At the end of Rnd 22, your tube should measure approximately 4 inches in length with a clean, tight, spiraling red-and-white stripe pattern.
Section 2: Armature Insertion & Shaping
- Step 1: Take one white craft pipe cleaner and insert it straight down through the hollow center of your crocheted tube until it reaches the bottom end.
- Step 2: Trim the pipe cleaner so it extends about 1/4 inch past the top and bottom openings. Push the cut wire ends slightly inward so they do not poke through the yarn.
- Step 3: Bend the top 1 inch of the tube-covered pipe cleaner firmly into a classic candy cane hook shape. Gently curve the entire tube if desired to give it a realistic, slightly organic swing.
- Step 4: Using your tapestry needle and remaining yarn tails, securely sew closed both the top and bottom openings of the tube, weaving in all loose ends invisibly.
Section 3: Assembly & Stringing the Garland
- Step 1: Cut a length of natural cream jute twine long enough to span your desired hanging space, plus an extra 2 feet on each end for tying and looping.
- Step 2: Lay your finished candy canes face-down in a row along a flat surface, spacing them evenly (approximately 6 to 8 inches apart from one another).
- Step 3: Using a length of matching yarn or a tapestry needle with twine, securely anchor the top hook curve of each candy cane to the main cream jute twine with 2-3 firm stitches.
- Step 4: Check the hang and spacing of each candy cane, adjusting their positions along the twine as needed. Tie small loops at both ends of the jute twine for easy hanging.
Size Customization Tips
- Making a Longer Garland: Simply repeat Section 1 to create more candy cane motifs. For every additional 3 candy canes you add, budget roughly 2 additional feet of cream jute twine and one extra skein split of red and white yarn.
- Making Mini Tree Ornaments: Omit Section 3 (stringing onto twine) and instead attach a small 3-inch loop of metallic gold thread to the top curve of each individual candy cane for instant, charming Christmas tree decorations.
Care Instructions
- Spot clean gently with a damp cloth and mild soap if needed.
- Do not submerge in hot water or machine wash, as the internal pipe cleaner armature may rust or bend out of shape.
- Store flat wrapped loosely in acid-free tissue paper or a cotton dust bag at the end of the holiday season to preserve the crisp shape and yarn vibrancy for next year.
Crochet Candy Cane Garland
Thank you so much for crafting along with me today! I hope making this sweet holiday decoration brings heaps of cozy, festive cheer into your home. If you stitch up your own crochet candy cane garland, please be sure to snap a photo and tag me on social media. Pin this project to your favorite holiday Pinterest board so you can easily find it next year, and leave a comment below to let me know where you plan to hang your finished garland!
📄 Your free PDF pattern