











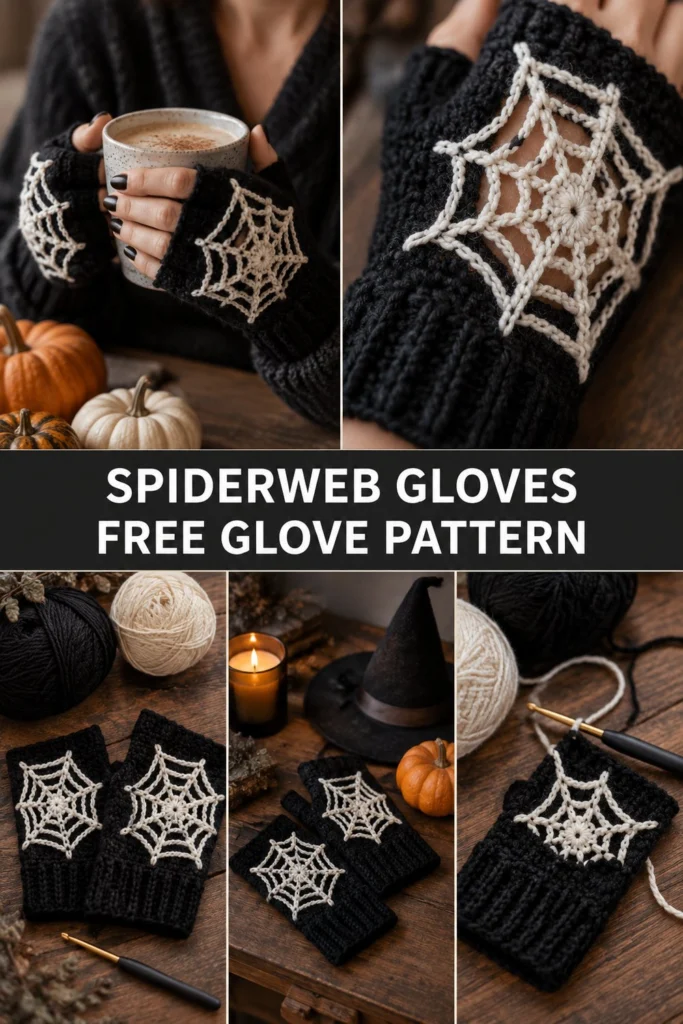
Get ready for spooky season with these eerie yet elegant crochet spiderweb fingerless gloves! Designed with a cozy ribbed cuff and a simple thumb gap, these gloves keep your hands warm while leaving your fingers free to crochet, type, or sip your favorite autumn brew.
Quick Facts
- Skill level: Intermediate
- Finished size: Women’s Small, Medium, and Large (detailed below)
- Yarn: Worsted weight (Category 4) in Black and Off-White
- Hook: 4.5 mm (US 7) crochet hook
- Stitches used: Ch, sl st, sc, hdc, blo
- Time to make: 3 to 4 hours per pair
Size tips and adjustments are included further down the page to ensure a custom fit.
What Makes These Crochet Fingerless Gloves Special
These gloves blend simple construction with stunning detail. The base is worked entirely in seamless rounds of single crochet and half double crochet for durability and warmth, while a stretchy ribbed cuff keeps them securely in place. The showstopping white spiderweb is worked directly onto the back of each hand using surface slip stitches, creating a clean, professional embroidery effect without needing a sewing needle.
Skill Level
- Working in the round (spiral)
- Working in the back loops only (BLO)
- Creating a thumb hole using chains and skipped stitches
- Surface slip stitching (embroidery)
Don’t worry if you haven’t tried surface slip stitching before—it’s just like regular slip stitching, but you work through the fabric of your completed glove!
Finished Measurements
| Size | Hand Circumference | Glove Length |
|---|---|---|
| Small | 6.5 inches (16.5 cm) | 7.0 inches (17.8 cm) |
| Medium | 7.5 inches (19.0 cm) | 7.5 inches (19.0 cm) |
| Large | 8.5 inches (21.5 cm) | 8.0 inches (20.3 cm) |
Materials You Will Need
| Material | Color / Type | Details |
|---|---|---|
| Main Yarn (MC) | Black / Worsted Weight (4) | 120 – 150 yds (110 – 137 m) |
| Contrast Yarn (CC) | Off-White / Worsted Weight (4) | 25 – 35 yds (23 – 32 m) |
| Hook | 4.5 mm (US 7) | Crochet hook |
| Notions | Tapestry needle, scissors, stitch markers | For weaving ends and marking spaces |
Yarn Suggestions
| Yarn Line | Weight | Notes |
|---|---|---|
| Caron Simply Soft | Worsted (4) | Great sheen and smooth texture for surface work |
| Lion Brand Vanna’s Choice | Worsted (4) | Sturdy structure, holds stitch definition well |
| Knit Picks Brava Worsted | Worsted (4) | Budget-friendly, vast color range |
⚠️ Note: Avoid novelty fuzzy yarns or homespun yarns for this project. You need a smooth, tightly plied yarn so your surface slip stitch spiderweb stands out clearly against the black background.
Gauge
16 sts x 18 rows = 4 inches (10 cm) in single crochet using a 4.5 mm hook.
Abbreviations
- ch – chain
- sl st – slip stitch
- sc – single crochet
- hdc – half double crochet
- blo – back loop only
- st(s) – stitch(es)
- Rnd(s) – round(s)
- MC – Main Color (Black)
- CC – Contrast Color (Off-White)
UK terminology note: sc = dc, hdc = htr, sl st = slip stitch.
Special Stitches Explained
- Surface Slip Stitch (Surface Sl St): Hold your working yarn behind your work. Insert your hook from the front to the back through the fabric, yarn over with the working yarn, pull a loop through to the front, and pull it directly through the loop already on your hook. Continue along your marked path.
- BLO (Back Loop Only): Work the specified stitch into the back loop of the designated stitch, leaving the front loop unworked.
Pattern Instructions
Note: Gloves are worked from the bottom cuff up in continuous spirals without joining rounds, unless specified. Use a stitch marker to track the beginning of each round.
Section 1: Ribbed Cuff (Black, Make 2)
With MC, ch 9.
Row 1: Working in the back bumps of the foundation chain, sc in 2nd ch from hook and in each ch across, turn (8 sc)
Row 2: Ch 1, working in blo, sc in each st across, turn (8 sc)
Rows 3 to 22 (24, 26): Repeat Row 2 until cuff measures approximately 6.5 (7.5, 8.5) inches when slightly stretched.
Bring the two short ends of the cuff together and slip stitch them closed through both thicknesses to form a seamless band. Do not cut yarn; rotate your work to begin working along the raw edge of the cuff.
Section 2: Hand and Body (Black, Make 2)
Rnd 1: Ch 1, work 28 (32, 36) sc evenly around the top edge of the cuff, join with a sl st to the first sc (28, 32, 36 sc)
Rnd 2: Ch 1, sc in each st around (28, 32, 36 sc)
Rnd 3: Sc in next 10 (12, 14) sts, ch 4, skip 4 sts (thumb gap created), sc in remaining 14 (16, 18) sts (24, 28, 32 sc + 4 chs)
Rnd 4: Sc in each st and each ch around (28, 32, 36 sc)
Rnds 5 to 10: Sc in each st around (28, 32, 36 sc)
Rnd 11: Hdc in each st around, sl st to first st, fasten off MC and weave in ends (28, 32, 36 hdc)
✅ Checkpoint: You should now have two completed black glove tubes with a gap for your thumb and a neat hdc top edge.
Section 3: Spiderweb Embroidery (Off-White)
Using your CC yarn and a tapestry needle or crochet hook, embroider the spiderweb onto the back of each hand using surface slip stitches.
- Center Ring: Embroider a small circle or starburst of surface slip stitches right in the center of the hand (approx. 4 rounds up from the cuff).
- Radial Strands: From the center ring, work 8 straight lines of surface slip stitches radiating outward diagonally and upward toward the fingers and wrist to form the structural threads of the web.
- Connecting Arcs: Create 2 concentric tiers of curved surface slip stitches connecting each radial strand together, sagging slightly downward to mimic a natural spiderweb shape.
Assembly & Finishing
- Weave in all loose ends securely on the inside of the gloves using your tapestry needle.
- Trim yarn tails to about 1/4 inch.
- Gently block the gloves by dampening them and laying them flat to dry on a towel to set the stitches.
Size Customization Tips
If you need a wider hand span, increase your initial cuff length by multiples of 2 rows (adding 2 sts to the hand base in Rnd 1). To make the gloves longer, simply add 2 to 4 extra straight single crochet rounds before working the final hdc round.
Care Instructions
Hand wash gently in cool water with mild wool detergent. Do not bleach. Lay flat in the shade to dry. Do not iron or tumble dry to preserve the stretch of the ribbed cuff and the neatness of the surface crochet.
FAQ
Can I use a different yarn weight?
You can use DK weight yarn for a lighter, more fitted glove, but you will need to adjust your hook size down to 3.5 mm or 4.0 mm and increase your stitch counts to match your desired hand measurements.
How do I make the thumb hole larger or smaller?
Simply adjust the chain count in Rnd 3! Skip 3 chains for a snugger thumb, or skip 5 chains for a wider thumb opening.
Are these gloves safe to wash in a machine?
If you use machine-washable acrylic yarn (like Caron Simply Soft), you can machine wash them on a gentle, cool cycle inside a mesh laundry bag, though hand washing will always extend the life of your handmade items.
Happy Crocheting!
I hope you enjoyed making these spooky spiderweb fingerless gloves! Save this pattern to your Pinterest board for later, and leave a comment below to let me know what colors you used for your Halloween accessories.
📄 Your free PDF pattern