
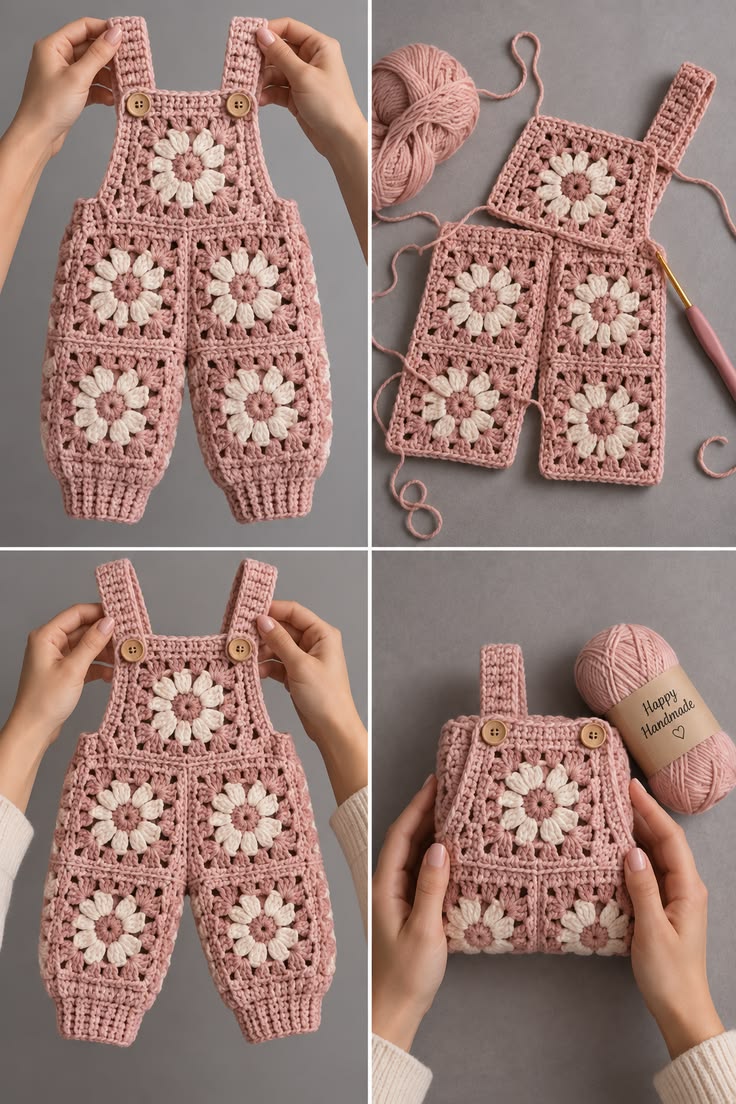
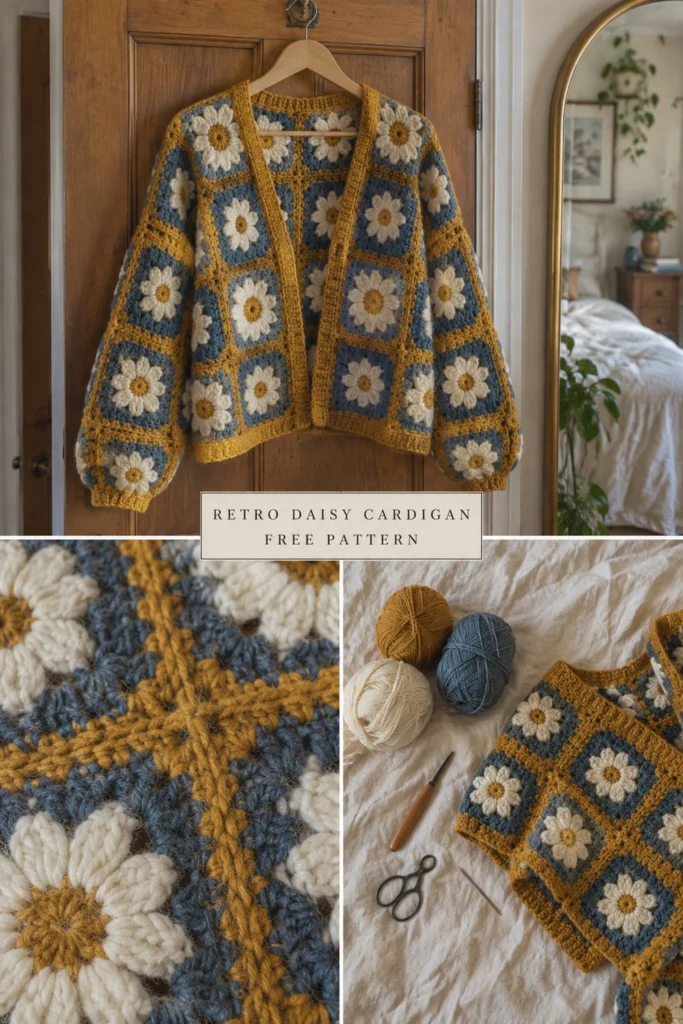
If you have been looking for a project that combines vintage charm with modern wearable comfort, this retro-inspired granny square cardigan is the one. Featuring cheerful daisy motifs framed by rich mustard and dusty denim blue, it is designed to be as fun to make as it is to wear. In this guide, I will walk you through every single step to create your own heirloom-quality sweater.
Free Crochet Retro Daisy Cardigan Pattern: Granny Squares, Easy Sizing
Quick Facts
- Skill level: Intermediate
- Finished size: XS (S, M, L, XL, 2XL, 3XL)
- Yarn: Worsted weight yarn in Mustard, Dusty Denim Blue, and Ivory
- Hook: 5.0 mm (H-8) crochet hook
- Stitches used: ch, sl st, sc, hdc, dc, tr
- Time to make: Approx. 20–30 hours
Sizing adjustments and instructions for building your custom fit are included further down.
What Makes This Crochet Retro Daisy Cardigan Special
This cardigan relies on the magic of the traditional motif layout combined with modern construction. Instead of making a flat panel and cutting it, every granny square is joined as you go or seamed cleanly using a sturdy mustard border that links the dusty denim and ivory daisy centers together. The ribbed button band and cuffs are worked directly into the garment for a polished finish that keeps its shape.
Skill Level
- Working in the round and in rows
- Changing colors cleanly
- Basic seaming or join-as-you-go techniques
- Reading standard US crochet terminology
Don’t worry if you haven’t made a cardigan before—take it one square at a time and watch your retro wardrobe staple grow!
Finished Measurements
| Size | Chest / Bust (in / cm) | Length (in / cm) | Sleeve Length (in / cm) |
|---|---|---|---|
| XS | 34 / 86.5 | 20 / 51 | 18 / 45.5 |
| S | 38 / 96.5 | 21 / 53.5 | 18 / 45.5 |
| M | 42 / 106.5 | 22 / 56 | 18.5 / 47 |
| L | 46 / 117 | 23 / 58.5 | 18.5 / 47 |
| XL | 50 / 127 | 24 / 61 | 19 / 48.5 |
| 2XL | 54 / 137 | 25 / 63.5 | 19 / 48.5 |
| 3XL | 58 / 147.5 | 26 / 66 | 19.5 / 49.5 |
Note: Ease included is approximately 4–6 inches (10–15 cm) of positive ease for a cozy, relaxed vintage fit.
Materials You Will Need
| Color Name | Yarn Weight | Fiber | Yards (approx.) | Meters (approx.) |
|---|---|---|---|---|
| Mustard | Worsted (4) | Wool / Acrylic blend | 650–950 yd | 595–870 m |
| Dusty Denim Blue | Worsted (4) | Wool / Acrylic blend | 500–750 yd | 455–685 m |
| Ivory | Worsted (4) | Wool / Acrylic blend | 300–450 yd | 275–410 m |
- Crochet Hook: 5.0 mm (US H-8)
- Notions: Tapestry needle for weaving in ends, sharp scissors, locking stitch markers, measuring tape.
Yarn Suggestions
- Lion Brand Wool-Ease: (Worsted, 80% Acrylic / 20% Wool, 197 yd / 180 m per 85g skein) — Excellent stitch definition and warmth.
- Caron Simply Soft: (Aran/Worsted, 100% Acrylic, 315 yd / 288 m per 170g skein) — Provides a lovely soft drape with a slight sheen.
- Knit Picks Brava Worsted: (Worsted, 100% Premium Acrylic, 218 yd / 199 m per 100g skein) — Budget-friendly with reliable durability and colorfastness.
⚠️ Note: Avoid novelty novelty yarns or eyelash yarns for this project. You need a smooth, tightly twisted worsted weight yarn so your daisy petals pop and your granny squares remain crisp and square.
Gauge
- Granny Square Motif: One completed square measures approx. 5.5 x 5.5 inches (14 x 14 cm) using a 5.0 mm hook.
- Check your gauge by making a single test square. If your square is too large, drop down a hook size. If it is too small, go up a hook size.
Abbreviations
- ch = chain
- sl st = slip stitch
- sc = single crochet
- hdc = half double crochet
- dc = double crochet
- tr = treble crochet
- st(s) = stitch(es)
- sp(s) = space(s)
- sk = skip
- rep = repeat
- rnd(s) = round(s)
- beg = beginning
- inc = increase (2 sts in same st)
- dec = decrease (work 2 sts together)
- BLO = back loop only
- FLO = front loop only
- RS = right side
- WS = wrong side
UK terms conversion: sc = dc, hdc = htr, dc = tr.
Special Stitches Explained
- Puff Stitch: [Yarn over, insert hook into st/sp, yarn over and pull up a loop] 3 times in the same st/sp (7 loops on hook), yarn over and draw through all 7 loops on hook, ch 1 to secure.
- Daisy Cluster (Petal): Work 3 dc together in the same ch-space, sharing the top loop.
- Corner Shell: (3 dc, ch 2, 3 dc) worked into the same corner chain space.
Pattern Instructions
General Construction Notes
- Rounds are joined with a slip stitch to the first stitch unless otherwise noted.
- Turning chains at the start of rows/rounds do not count as stitches unless specifically stated.
- Use stitch markers to keep track of your rounds and panel alignment.
Section 1: Daisy Granny Squares (Make N according to size)
Note on totals:
– XS: 42 squares total
– S: 46 squares total
– M: 50 squares total
– L: 54 squares total
– XL: 58 squares total
– 2XL: 62 squares total
– 3XL: 66 squares total
Rnd 1 (Ivory – Center): With Ivory, start with a magic ring, ch 2 (does not count as st), work 12 hdc into ring, join with sl st to first hdc. Fasten off Ivory. (12 hdc)
Rnd 2 (Mustard – Petals): Join Mustard with a sl st in any hdc. Ch 3, work 2 dc in same hdc (counts as first petal), *[yarn over, insert hook in next hdc, yarn over and pull up a loop] 3 times, yarn over and pull through all 7 loops on hook (puff made), ch 2*; rep from * around, working 1 puff in each hdc, join with sl st to top of beg ch-3. Fasten off Mustard. *(12 petals, 12 ch-2 sps)*
Rnd 3 (Dusty Denim Blue – Square Foundation): Join Dusty Denim Blue with a sl st in any ch-2 corner space. Ch 3 (counts as first dc), work (2 dc, ch 2, 3 dc) in same corner sp, *ch 1, sk next petal, 3 dc in next ch-2 sp, ch 1, sk next petal, (3 dc, ch 2, 3 dc) in next corner ch-2 sp*; rep from * around ending with ch 1, join with sl st to top of beg ch-3. *(4 corners, 8 side dc clusters)*
Rnd 4 (Dusty Denim Blue): Sl st in each of next 2 dc and into corner ch-2 sp. Ch 3, work (2 dc, ch 2, 3 dc) in same corner sp, *ch 1, [3 dc in next ch-1 sp, ch 1] across to next corner, (3 dc, ch 2, 3 dc) in corner sp*; rep from * around, join with sl st to top of beg ch-3. Fasten off Dusty Denim Blue. *(4 corners, expanding side clusters)*
Rnd 5 (Mustard – Final Border & Joining Round): Join Mustard with a sl st in any corner ch-2 sp. Ch 3, work (2 dc, ch 2, 3 dc) in same corner sp, *ch 1, [3 dc in next ch-1 sp, ch 1] across to next corner, work (3 dc, ch 2, 3 dc) in corner sp*; rep from * around, join with sl st to top of beg ch-3. Fasten off Mustard, leaving a 12-inch tail if you plan to whipstitch squares together, or fasten off short if joining as you go. *(5.5 x 5.5 inches)*
✅ Checkpoint: Measure your completed square. It should measure precisely 5.5 x 5.5 inches (14 x 14 cm) across. Block squares lightly if edges curl.
Section 2: Cardigan Layout & Assembly
Arrange your finished granny squares flat on a clean surface following the layout diagram below for your size:
– Back Panel: 2 squares wide x 3 squares high (plus shoulder shaping if required by larger sizes).
– Front Panels (Left and Right): 1 square wide x 3 squares high each.
– Sleeves: 2 squares wide x 2 squares long per sleeve.
Sew the shoulder seams and side seams using the Mustard yarn tails and a whipstitch through the back loops only of Rnd 5, creating clean ridges on the outside for a retro textured look. Attach the folded sleeves to the armhole openings.
Section 3: Bottom Ribbing & Front Placket
Row 1 (Mustard): Join Mustard yarn at the bottom right front corner of the cardigan. Ch 1, work sc evenly along the bottom hem, up the right front opening, around the back neckline, and down the left front opening, working 3 sc in each outer corner. Join with sl st to first sc. (250 sc)
Rows 2 to 4 (Mustard): Ch 2 (counts as hdc), working in BLO, hdc in each st around, working 3 hdc in each corner. Join with sl st to top of beg ch-2. Fasten off. (250 hdc)
Section 4: Sleeve Cuffs
Rnd 1 (Mustard): Join Mustard with sl st at the underarm seam of one sleeve cuff. Ch 1, work sc evenly around the cuff opening, decreasing 4 to 6 evenly spaced sc to gather the sleeve gently into a balloon shape. Join with sl st. (32 sc)
Rnds 2 to 4 (Mustard): Ch 2, work hdc in BLO around. Join with sl st to top of beg ch-2. Fasten off and weave in all ends securely. Repeat for the second sleeve. (32 hdc)
Size Customization Tips
- Going Up a Size: Each additional granny square added to the back panel increases the chest circumference by approximately 5.5 inches (14 cm).
- Lengthening the Body: Add a 4th horizontal row of squares to the bottom of the front and back panels before adding the bottom ribbing.
- Sleeve Fit: For a slimmer sleeve, omit the decreases on Cuff Rnd 1. For a fuller balloon sleeve, add an extra round of increases before starting the hdc cuff ribbing.
Care Instructions
- Hand wash gently in cool water using mild wool detergent.
- Do not bleach or wring out.
- Lay flat on a clean towel to dry in the shade, reshaping your squares while damp.
- Do not iron directly on the puff stitches.
FAQ
Can I use different colors for the daisies?
Yes! While mustard, dusty denim blue, and ivory give this cardigan its signature retro 1970s aesthetic, you can easily swap the daisy petals for white or pink, and the background for olive green or chocolate brown.
Are the squares joined as you go or sewn together?
You can choose whichever method you prefer. Joining as you go on the final Mustard round saves time on weaving in ends, while whipstitching individual squares provides crisp structural definition.
Can I make this pattern for children?
Absolutely. To scale down for a child size, reduce the number of squares used in the body panels to a 2 x 2 grid and adjust hook size or yarn weight to fit your recipient.
Happy Crocheting!
I hope you enjoy stitching up your very own retro daisy cardigan! If you make one, be sure to save this pin on Pinterest and leave a comment below letting me know what color combinations you used. Happy crafting!
📄 Your free PDF pattern