











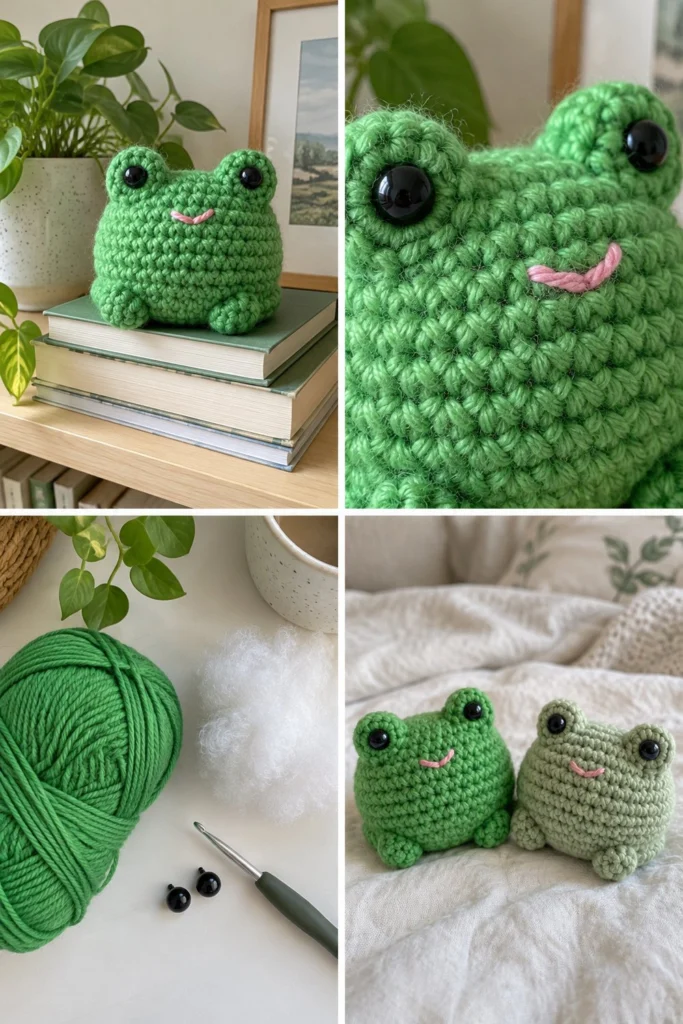
Meet the friendliest frog you will ever make, crafted entirely in one piece with zero sewing required. Its round, squashy body grows from a simple magic ring, the cheerful eye bumps pop right out of the top rounds, and the little legs form automatically on the bottom so you can finish the whole plushie straight off the hook.
Beginner Crochet Frog Plushie – Free No-Sew Amigurumi Pattern
Quick Facts
- Skill level: Easy / Beginner Amigurumi
- Finished size: 4.5 inches wide by 3.5 inches tall (11.5 cm by 9 cm)
- Yarn: Worsted weight (Medium 4) cotton or acrylic yarn in Kelly Green (approx. 70 yards / 64 meters) and a scrap of light pink for the smile embroidery
- Hook: US E/4 (3.5 mm) crochet hook
- Stitches used: US terms (ch, sc, hdc, dc, tr, sl st, inc, dec, puff)
- Time to make: 2 to 3 hours
💡 Designer Tip: Size customization tips are included further down the page to help you adjust your frog’s proportions if you change your yarn weight.
What Makes This Crochet Frog Plushie Special
This design completely eliminates the tedious sewing steps that usually slow down amigurumi projects. The body is worked continuously in the round, the eye bumps are built directly into round 9 using puff and double crochet stitches, and the tiny feet are shaped using tall cluster stitches in the lower base rounds. Finished with a sweet embroidered smile and safety eyes snapped right into the eye bumps, it is a fast, frustration-free project.
Skill Level
- Basic understanding of crochet terminology and working in the round
- Comfort with a magic ring and basic increases/decreases
- Beginner amigurumi makers looking for a fun, stash-busting project with no assembly sewing
Finished Measurements
| Dimension | Inches | Centimeters |
|---|---|---|
| Width (Side to Side) | 4.5 in | 11.5 cm |
| Height (Base to Top of Eyes) | 3.5 in | 9.0 cm |
| Depth (Front to Back) | 4.0 in | 10.0 cm |
Materials You Will Need
| Material | Color / Details | Amount |
|---|---|---|
| Worsted Weight Yarn (Medium 4) | Kelly Green | 70 yards / 64 meters |
| Scrap Yarn | Light Pink (for smile) | 2 yards / 2 meters |
| Safety Eyes (pair) | Black, 12 mm | 2 pieces |
| Crochet Hook | US E/4 (3.5 mm) | 1 hook |
| Notions | Polyester fiberfill stuffing | 1 oz / 30 g |
| Notions | Stitch markers | 2 markers |
| Notions | Yarn needle and scissors | 1 set |
Yarn Suggestions
| Yarn Line | Weight | Skein Yardage | Notes |
|---|---|---|---|
| Lion Brand 24/7 Cotton | Worsted (4) | 186 yds / 170 m | Mercerized for great stitch definition |
| Lily Sugar ‘n Cream | Worsted (4) | 120 yds / 109 m | 100% cotton, firm and durable |
| Red Heart Super Saver | Worsted (4) | 364 yds / 333 m | Budget-friendly acrylic option |
⚠️ Note: Avoid fuzzy eyelash yarns or novelty yarns for your first attempt, as they hide your stitches and make it difficult to locate the eye bump and leg placements.
Gauge
- 16 sts and 18 rows = 4 inches (10 cm) in single crochet using a 3.5 mm hook.
- Rnds 1 to 6 of the flat circle = 2 inches (5 cm) across.
Abbreviations
- ch: chain
- sc: single crochet
- hdc: half double crochet
- dc: double crochet
- tr: treble crochet
- sl st: slip stitch
- inc: single crochet increase (2 sc in same st)
- dec: invisible single crochet decrease (sc 2 sts together through front loops)
- puff: puff stitch (work 5 dc into the indicated stitch)
- st(s): stitch(es)
- rnd(s): round(s)
- FO: fasten off
UK translation note: sc = dc, hdc = htr, dc = tr.
Special Stitches Explained
- Magic Ring: Wrap yarn around your index finger twice, insert hook under loops, pull up a loop, ch 1, and work the first round of stitches into the center of the ring. Pull the tail to close.
- Invisible Decrease (dec): Insert hook into the front loop of the first stitch, then immediately into the front loop of the second stitch. Yarn over, pull through both front loops, yarn over and pull through remaining two loops.
- Puff Eye Bump: Worked as a 5-dc cluster in one stitch to create the rounded bulge for the eye.
Pattern Instructions
Section 1: Frog Body (Kelly Green, make 1)
Note: The body is worked in continuous spiral rounds without joining. Use a stitch marker to track the first stitch of each round.
- Rnd 1: Start 6 sc in a magic ring (6 sc)
- Rnd 2: (inc) x 6 (12 sc)
- Rnd 3: (1 sc, inc) x 6 (18 sc)
- Rnd 4: (2 sc, inc) x 6, working the front legs into the base as follows: [2 sc, make a 4-tr cluster in next st for first front foot, 2 sc, inc, 2 sc, make a 4-tr cluster in next st for second front foot, inc] (adjusting spacing across the round for balance) (24 sc)
- Rnd 5: (3 sc, inc) x 6 (30 sc)
- Rnd 6: (4 sc, inc) x 6 (36 sc)
- Rnds 7 to 11: sc in each st around (36 sc)
- Rnd 12 (Eye Bumps): 5 sc, [puff st in next st] for first eye, 6 sc, [puff st in next st] for second eye, 22 sc (36 sc)
- Rnds 13 to 15: sc in each st around (36 sc)
- Rnd 16: (4 sc, dec) x 6 (30 sc)
- Rnd 17: (3 sc, dec) x 6 (24 sc)
- Rnd 18: (2 sc, dec) x 6 (18 sc)
✅ Checkpoint: Stop here to insert your safety eyes into the center of each puff eye bump on Rnd 12 and secure the backs on the inside. Firmly stuff the frog body with polyester fiberfill before closing.
- Rnd 19: (1 sc, dec) x 6 (12 sc)
- Rnd 20: (dec) x 6 (6 sc)
- FO, leaving a 6-inch tail. Thread the tail through the front loops of the final 6 stitches and pull tight to close the bottom flat base. Weave in all loose ends securely.
Assembly
- Eyes: Insert the 12 mm safety eyes directly through the center of the two puff bumps created in Rnd 12. Secure the locking washers on the inside of the frog before stuffing.
- Smile: Using a yarn needle and the light pink scrap yarn, stitch a small, gentle upward curve centered between the eyes, spanning approximately 4 stitches across Rnd 10.
Finishing
- Weave in any remaining yarn tails inside the body.
- Gently press and shape the plushie between your hands to distribute the fiberfill evenly and give the frog its signature round, squishy silhouette.
Size Customization Tips
- To make a larger frog, switch to a bulky weight yarn (Weight 5) and a US J/10 (6.0 mm) hook, working the same stitch counts. Each extra round of increases adds about 0.8 inches (2 cm) to the overall body width.
- To make a mini pocket frog, use fingering weight yarn (Weight 1) with a US B/1 (2.25 mm) hook.
Care Instructions
- Hand wash gently in cool water with mild soap.
- Do not bleach or iron.
- Reshape while damp and allow to air dry completely on a flat surface.
Frequently Asked Questions
Can I use acrylic yarn instead of cotton?
Yes! Acrylic yarn works wonderfully and gives the frog a softer, fluffier texture, though cotton holds its crisp shape slightly better for amigurumi.
Are safety eyes safe for babies and toddlers?
Safety eyes can pose a choking hazard for children under 3 years old. For baby toys, embroider the eyes using black embroidery floss with French knots or satin stitch instead.
How do I keep my stitches tight so the stuffing doesn’t show?
Always use a crochet hook that is 0.5 mm to 1 mm smaller than recommended on your yarn label, and maintain an even, firm tension as you work your single crochets.
Happy Crocheting!
I hope you love making your new little frog friend! Be sure to save this pin on Pinterest and leave a comment below to share what color combination you used for yours. Happy crafting!
📄 Your free PDF pattern