

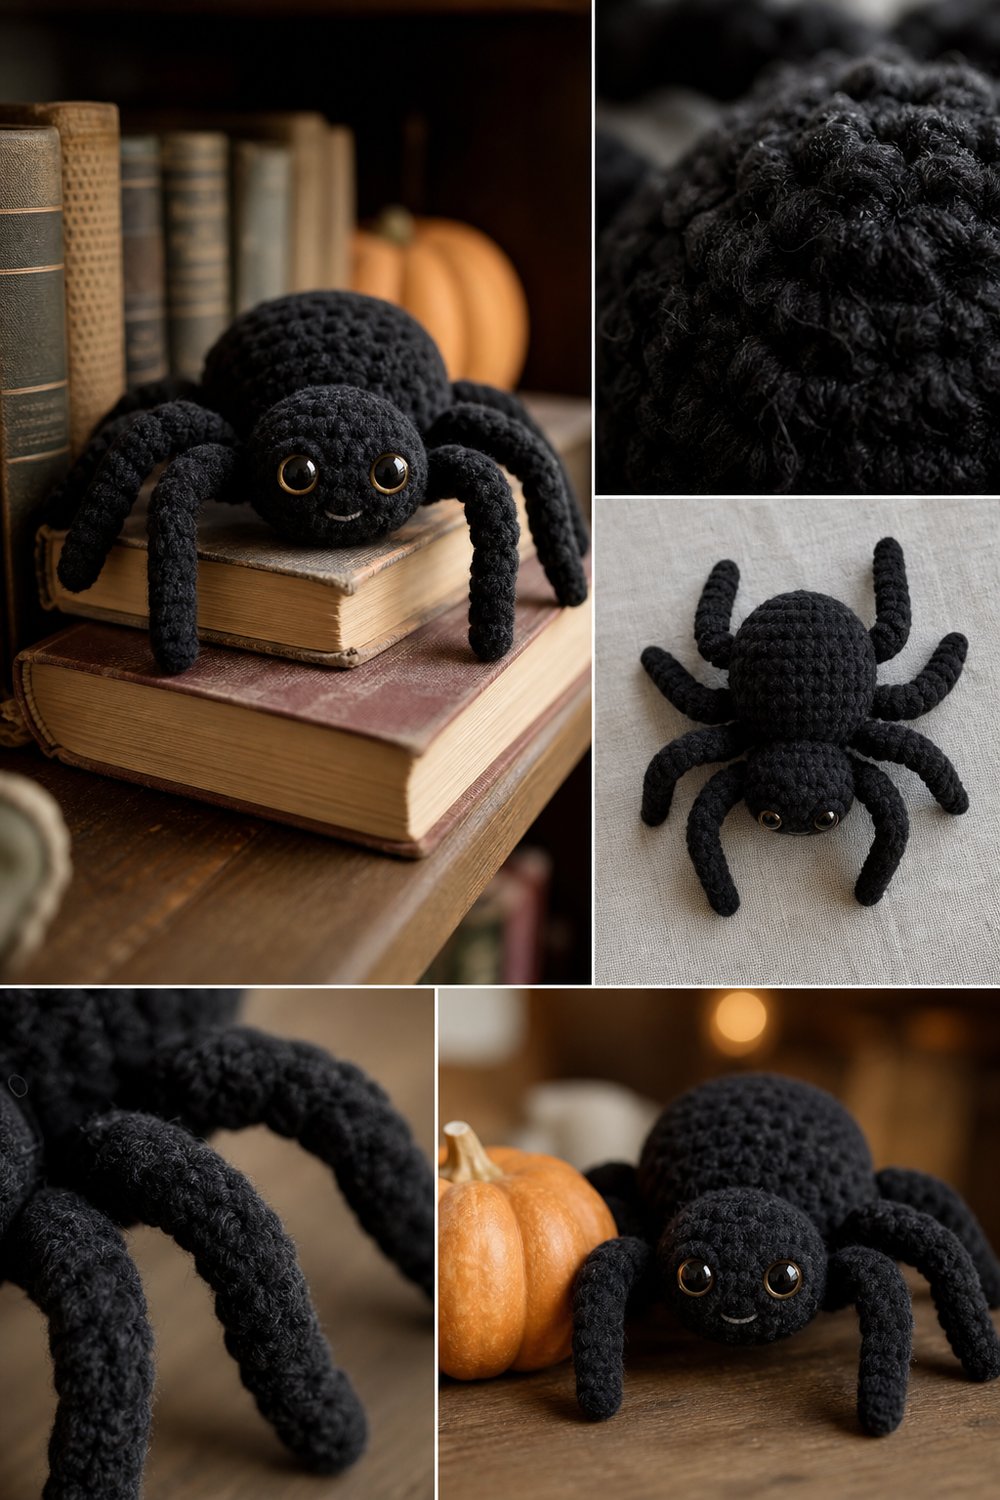
Transform your autumn living space into a cozy, haunted haven with a handcrafted companion that balances spooky seasonal style with undeniable charm. Perched on a stack of well-loved books or keeping watch beside a mini pumpkin on your mantel, this eight-legged friend brings a warm, tactile presence to your seasonal decor.
Creepy Cute Spider Halloween Decor Free Crochet Pattern
This amigurumi-style decor piece is worked primarily in standard single crochet stitches using plush novelty yarn, measures approximately 5 inches across, and takes about 3 to 4 hours to complete. It makes a wonderfully quick weekend project, a thoughtful handmade gift for autumn lovers, or a charming party favor for Halloween gatherings.
Sizing customization tips are included later in this article if you wish to scale your spider up or down.
What Makes This Creepy Cute Spider Halloween Decor Special
This design achieves its signature “creepy-cute” aesthetic through a careful balance of proportions and clever construction techniques. The body is worked in two distinct spherical segments—a plump abdomen and a slightly flattened cephalothorax—using continuous spiral rounds to avoid a visible seam. The secret to the spider’s playful character lies in its oversized, safety-locked eyes paired with fuzzy plush yarn that softens the silhouette. Furthermore, the eight legs are crafted with hidden internal aluminum wire armature, allowing you to bend and pose each leg dynamically so your spider can grip books, crawl up a shelf edge, or sit flat on a table.
Skill Level
- Skill Level: Intermediate
- Required Techniques: Working in the round, working into a magic ring, increasing, decreasing, invisible decreases, inserting safety eyes, and threading/securing internal wire armature.
💡 Designer Tip: If you are comfortable crocheting basic amigurumi spheres and working with fuzzy yarn, you will breeze through this pattern. Don’t let the wire armature intimidate you—it is simply slipped into the legs before final stuffing and closing!
Finished Measurements
| Dimension | Inches | Centimeters |
|---|---|---|
| Body Length (Cephalothorax to Abdomen) | 4.5 inches | 11.5 cm |
| Span Across Legs | 8.0 inches | 20.3 cm |
| Body Height | 3.0 inches | 7.6 cm |
Materials You Will Need
- Yarn Weight: Bulky / #5 bulky plush polyester yarn
- Hook Size: US E/4 (3.5 mm) crochet hook (or size needed to obtain tight, firm stitches that prevent stuffing from showing)
- Additional Tools: Tapestry needle, stitch markers, polyfill fiberfill stuffing, 12mm black safety eyes with washers (2), 16-gauge craft wire or floral wire (approx. 48 inches total), wire cutters, and pliers.
| Color Name | Yarn Weight | Yardage Needed (Yards) | Yardage Needed (Meters) |
|---|---|---|---|
| Pitch Black | Bulky (#5) | 65 yds | 60 m |
| Charcoal Grey | Bulky (#5) | 10 yds | 9 m |
| Pure White | Worsted (#4 for eye highlights, optional) | 2 yds | 2 m |
Yarn Suggestions
| Yarn Brand & Line Name | Yarn Weight | Yardage per Skein | Notes |
|---|---|---|---|
| Bernat Blanket | Super Bulky (#6) [Adjust hook to 5.0mm] | 220 yds / 201 m | Creates an extra-plush, oversized spider. |
| Lion Brand Go For Fleece | Bulky (#5) | 246 yds / 225 m | Incredible soft halo texture; highly recommended for this project. |
| Premier Yarns Parfait Chunky | Bulky (#5) | 120 yds / 110 m | Excellent stitch definition despite the fuzziness. |
⚠️ Note: Avoid novelty eyelash yarn or extremely hairy novelty fur yarns for your first attempt. They obscure your stitches, making it nearly impossible to count rounds or locate your loops accurately.
Gauge
| Measurement Type | Stitch Count / Row Count | Dimensions |
|---|---|---|
| Single Crochet Gauge | 12 sc x 14 rows | 4 x 4 inches (10 x 10 cm) |
⚠️ Note: Amigurumi requires a much tighter tension than garments. Use a hook size smaller than the yarn label recommendation to ensure your stitches are dense and your polyfill stuffing never pokes through. Always swatch before starting.
Abbreviations
| Abbreviation | Full Meaning |
|---|---|
| ch | Chain |
| sc | Single crochet |
| inc | Increase (work 2 sc in the same stitch) |
| dec | Decrease (invisible decrease preferred: insert hook into front loops of next 2 stitches, yarn over, pull through both, yarn over, pull through remaining loops) |
| sl st | Slip stitch |
| st(s) | Stitch(es) |
| Rnd(s) | Round(s) |
| FO | Fasten off |
Special Stitches Explained
- Invisible Decrease (inv-dec): Insert your hook into the front loop only of the first stitch, then immediately insert your hook into the front loop only of the second stitch. Yarn over and pull through both front loops (2 loops on hook). Yarn over and pull through remaining 2 loops. This prevents unsightly bumps on amigurumi decreases.
- Bobble Leg Attachment (CLA): Working single crochets directly through both the body wall and the base of a completed leg piece to secure internal wiring without sewing.
Pattern Instructions
Section 1: Cephalothorax (Head/Chest)
Using Pitch Black yarn and working in continuous spiral rounds (do not join with a sl st; use a stitch marker to track the beginning of each round).
- Rnd 1: Work 6 sc into a magic ring. (6 st)
- Rnd 2: [inc] 6 times. (12 st)
- Rnd 3: [sc 1, inc] 6 times. (18 st)
- Rnd 4: [sc 2, inc] 6 times. (24 st)
- Rnds 5–8: sc in each st around (4 rounds total). (24 st)
- Rnd 9: [sc 2, dec] 6 times. (18 st)
✅ Checkpoint: Insert your 12mm safety eyes between Rnds 6 and 7, leaving approximately 3 stitches between them. Secure the backings firmly. Begin stuffing the cephalothorax firmly with polyfill.
- Rnd 10: [sc 1, dec] 6 times. (12 st)
- Rnd 11: [dec] 6 times. (6 st)
FO, leaving a long tail of yarn to sew the cephalothorax to the abdomen later. Weave tail through front loops of remaining 6 stitches and pull tightly to close.
Section 2: Abdomen (Body)
Using Pitch Black yarn, working in continuous spiral rounds.
- Rnd 1: Work 6 sc into a magic ring. (6 st)
- Rnd 2: [inc] 6 times. (12 st)
- Rnd 3: [sc 1, inc] 6 times. (18 st)
- Rnd 4: [sc 2, inc] 6 times. (24 st)
- Rnd 5: [sc 3, inc] 6 times. (30 st)
- Rnds 6–11: sc in each st around (6 rounds total). (30 st)
- Rnd 12: [sc 3, dec] 6 times. (24 st)
- Rnd 13: [sc 2, dec] 6 times. (18 st)
✅ Checkpoint: Stuff the abdomen firmly with polyfill fiberfill, shaping it into a plump, oval silhouette.
- Rnd 14: [sc 1, dec] 6 times. (12 st)
- Rnd 15: [dec] 6 times. (6 st)
FO, close remaining hole, and weave in ends.
Section 3: Legs (Make 8)
Using Pitch Black yarn. Do not stuff with polyfill; wire will provide structure.
- Rnd 1: Work 6 sc into a magic ring. (6 st)
- Rnds 2–10: sc in each st around (9 rounds total). (6 st)
FO, leaving a 6-inch tail for assembly.
Armature Preparation: Cut 4 pieces of craft wire, each 12 inches long. Fold each wire in half to create four 6-inch double-thickness wire segments with rounded looped ends (so sharp wire ends do not poke through the yarn). Insert one wire segment through two completed leg tubes, pushing the folded center into the feet tips and leaving the open wire ends protruding from the top openings of the legs. Repeat for all 4 pairs of legs.
Section 4: Assembly & Finishing
- Join Body Segments: Position the flat back of the cephalothorax against the front of the plump abdomen. Using your long yarn tail from the cephalothorax, whipstitch the two segments securely together.
- Attach Legs: Thread the protruding wire ends of your four leg pairs through the bottom sides of the cephalothorax (four legs on the left, four legs on the right). Twist the interior wire ends together securely inside the body cavity before final closure, or anchor them firmly into the stitches using your yarn tails.
- Pose Your Spider: Bend the wire armature in each leg to create realistic knee bends so the spider stands balanced on its own.
Size Customization Tips
- Scaling Up: To make a larger floor-sitting plush spider, switch to a Super Bulky (#6) yarn with a 6.0mm hook and add 2 additional increase rounds to both the cephalothorax and abdomen sections. This will increase your finished leg span to approximately 12 inches.
- Scaling Down: To create a tiny spider ornament for hanging, use Sport weight yarn (#2) and a 2.0mm hook, omitting Rnds 10-11 of the abdomen and Rnds 5-8 of the legs. Your finished span will shrink to roughly 3 inches.
Care Instructions
Spot clean only with a damp cloth and mild soap. Do not submerge in water or machine wash, as moisture can rust the internal wire armature and distort the polyfill stuffing. Air dry completely away from direct heat sources.
Closing
Thank you so much for creating along with the Creepy Cute Spider Halloween Decor Free Crochet Pattern! I hope this little eight-legged critter brings a smile to your face and adds a touch of handmade magic to your autumn decor.
If you loved this pattern, please save it to your Pinterest boards, share your finished photos on Instagram tagging me @YourDesignHandle, and leave a friendly comment below telling me what name you gave your new spider! Happy crocheting!