
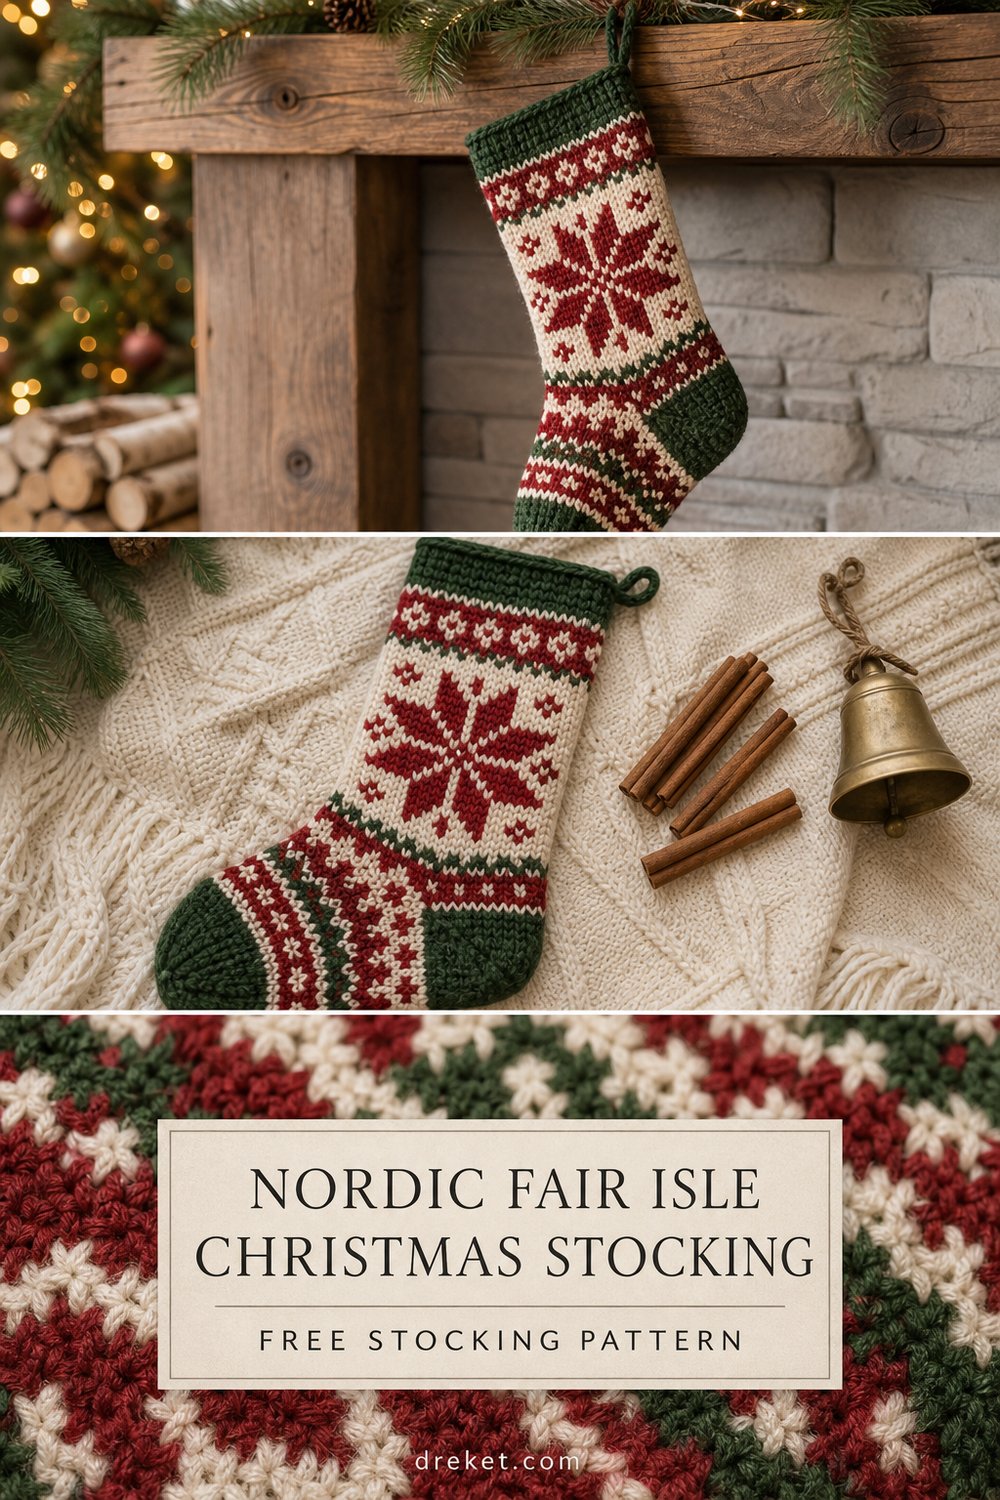
Gather around the hearth as the warm glow of bokeh lights dances across rustic pine sprigs and your mantelpiece comes alive with handmade tradition. The Nordic Fair Isle Christmas Stocking brings timeless Scandinavian heritage into your holiday home, blending rich festive colors with the crisp structure of classic tapestry crochet.
Nordic Fair Isle Christmas Stocking Free Crochet Pattern
This heirloom-quality Christmas stocking is crafted using traditional tapestry crochet and worked entirely in the round to create a dense, double-thick fabric that holds its shape whether hung empty or stuffed to the brim with holiday treats. Featuring a striking red, cream, and forest green palette, this project uses standard stitches and colorwork floats to build an intricate snowflake motif. Designed to take approximately 8 to 10 hours to complete, it makes an unforgettable holiday gift that will be treasured and hung by the chimney with care for generations to come.
💡 Designer Tip: Sizing customization tips are included later in this pattern if you wish to adjust the length or width of your stocking.
What Makes This Nordic Fair Isle Christmas Stocking Special
The magic of this stocking lies in its seamless tapestry crochet construction and authentic colorwork aesthetic. By carrying unused yarn floats neatly along the wrong side of your stitches—and occasionally trapping them inside your working stitches—the fabric gains an extra layer of warmth and rigidity without feeling stiff. The geometric snowflakes and traditional Nordic bands mirror the look of a fine-knit heirloom sweater, but are built entirely with crochet, offering a satisfying project for intermediate makers looking to master advanced colorwork.
Skill Level
- Intermediate
- Required Skills: Working in the round, changing colors in tapestry crochet, carrying yarn floats, working short-rows for a turned heel, and decreasing in the round.
⚠️ Note: If you have never tried tapestry crochet in the round before, practice a small swatch first to master your tension and yarn management before diving into the main body.
Finished Measurements
| Measurement | Inches | Centimeters |
|---|---|---|
| Total Length (Top Cuff to Toe) | 18″ | 45.7 cm |
| Cuff Circumference | 16″ | 40.6 cm |
| Foot Length (Heel to Toe) | 10″ | 25.4 cm |
| Leg Length (Cuff to Heel) | 11″ | 27.9 cm |
Materials You Will Need
- Yarn Weight: Worsted weight (#4 Medium)
- Hook: US G/6 (4.0 mm) crochet hook
- Additional Tools: Tapestry needle for weaving ends, stitch markers (2), measuring tape, and a small brass bell or wooden beads for optional embellishment.
| Color Name | Exact Shade Match | Yardage Needed | Meters Needed |
|---|---|---|---|
| Color A | Red | 160 yds | 146 m |
| Color B | Cream | 140 yds | 128 m |
| Color C | Forest Green | 100 yds | 91 m |
Yarn Suggestions
| Brand & Line Name | Yarn Weight | Yardage per Skein | Notes |
|---|---|---|---|
| Knit Picks Wool of the Andes Worsted | Worsted (#4) | 110 yds / 100 g | 100% Peruvian Highland Wool; offers excellent stitch definition and holds crisp colorwork lines. |
| Lion Brand Vanna’s Choice | Worsted (#4) | 170 yds / 100 g | 100% Premium Acrylic; durable, machine washable, and budget-friendly. |
| Cascade 220 | Worsted (#4) | 220 yds / 100 g | 100% Peruvian Wool; creates a warm, traditional felted-look heirloom piece. |
⚠️ Note: Avoid novelty yarns, super-slick silky bamboo blends, or extremely stretchy yarns, as they make maintaining even tension during colorwork transitions difficult and can distort your snowflake motifs.
Gauge
| Measurement | Stitches & Rows |
|---|---|
| Tapestry Crochet Gauge | 18 stitches and 20 rows = 4 inches (10 cm) in sc colorwork |
💡 Designer Tip: Always make a gauge swatch using your tapestry crochet technique. If your colorwork puckers, loosen your carried yarn floats across the back of your work.
Abbreviations
| Abbreviation | Full Term |
|---|---|
| ch | chain |
| sl st | slip stitch |
| sc | single crochet |
| sc2tog | single crochet 2 stitches together (decrease) |
| st(s) | stitch(es) |
| Rnd(s) | Round(s) |
| MC | Main Color (Red) |
| CC1 | Contrast Color 1 (Cream) |
| CC2 | Contrast Color 2 (Forest Green) |
| RS | Right Side |
| WS | Wrong Side |
Special Stitches Explained
- Tapestry Crochet Single Crochet (tasc): Insert hook into indicated stitch, yarn over, pull up a loop, drop current working yarn, pick up new color, yarn over, pull through both loops on hook. Carry unused yarn strand(s) along the top of the previous round’s stitches, enclosing them within your working stitches.
- Short-Row Turned Heel (sr-heel): Working back and forth in rows over half of the total stitches (leaving the remaining stitches unworked on a holder), working decreases at the edges of the heel flap to create a cupped pocket, then rejoining in-the-round for the foot.
Pattern Instructions
Section 1: The Cuff
Using Color B (Cream) and a 4.0 mm hook, ch 72, join with a sl st to form a ring, taking care not to twist the chain.
- Rnd 1: Ch 1, working into the back bumps of the foundation chain, sc in each ch around. Join with sl st to first sc. (72 sc)
- Rnds 2–8: Working in continuous rounds (do not join, use a stitch marker to mark the first st of each round), sc in each st around. (72 sc per round)
- Rnd 9: Switch to Color C (Forest Green). Work sc in each st around. (72 sc)
Section 2: The Fair Isle Nordic Leg Motif
Following the colorwork chart notes or standard Nordic patterning (alternating between Color A, Color B, and Color C), work the snowflake and geometric bands. Carry unused colors behind your working stitches.
- Rnds 10–25: Following the 16-round Nordic snowflake chart repeat, working 12-st motif repeat 6 times around. (72 sc per round)
✅ Checkpoint: At the end of Rnd 25, count your stitches. You should have exactly 72 sc around before beginning the heel setup.
Section 3: The Heel Flap and Turn
You will now work back and forth in rows across the first 36 stitches of Rnd 25 for the heel. Leave the remaining 36 stitches unworked (these will form the top of the foot). Switch to Color A (Red).
- Row 1 (RS): Sc in next 36 sts, turn. (36 sts)
- Rows 2–18: Working in turned rows, ch 1, sc across each st to end, turn. (36 sts)
- Heel Turn: Ch 1, sc in 20 sts, sc2tog, turn. (Leave remaining sts unworked).
- Next Row: Ch 1, sc in 5 sts, sc2tog, turn.
- Continue working short-row decreases until all outer heel stitches have been absorbed into the central heel pocket, establishing a clean 3-dimensional heel cup. Secure and cut yarn.
Section 4: The Foot and Toe
Rejoin Color A (Red) at the edge of the heel opening. You will now resume working in the round around both the unworked top-of-foot stitches and the heel edges.
- Rnd 1: Sc evenly around the entire foot opening, picking up stitches along the edges of the heel flap to rejoin with the instep stitches. (72 sc total around)
- Rnds 2–16: Sc in each st around in continuous rounds. (72 sc per round)
- Rnd 17 (Toe Shaping): Begin decreasing for the toe: [sc in next 7 sts, sc2tog] 8 times around. (64 sc)
- Rnds 18–19: Sc in each st around. (64 sc)
- Rnd 20: [sc in next 6 sts, sc2tog] 8 times around. (56 sc)
- Rnd 21: Sc in each st around. (56 sc)
- Rnd 22: [sc in next 5 sts, sc2tog] 8 times around. (48 sc)
- Rnd 23: [sc in next 4 sts, sc2tog] 8 times around. (40 sc)
- Rnd 24: [sc in next 3 sts, sc2tog] 8 times around. (32 sc)
- Rnd 25: [sc in next 2 sts, sc2tog] 8 times around. (24 sc)
- Rnd 26: [sc in next st, sc2tog] 8 times around. (16 sc)
- Rnd 27: [sc2tog] 8 times around. (8 sc)
Fasten off, leaving a 10-inch tail. Thread tail through remaining 8 stitches, pull tightly to close the toe hole, and weave in securely on the wrong side.
Section 5: Hanging Loop and Finishing
- Hanging Loop: Join Color A to the inside top seam of the cuff. Ch 14, sl st back into the same base st to form a sturdy loop. Fasten off and weave in all ends. Attach an optional brass bell to the tip of the loop for a festive touch.
Size Customization Tips
- To adjust the length: Add or subtract rounds in Section 1 (The Cuff) or Section 4 (The Foot) before beginning toe decreases. Each added or removed round changes the total length by approximately 0.2 inches (0.5 cm).
- To adjust the width: Because the Fair Isle snowflake chart requires a stitch count that is a multiple of 12, any adjustments to the circumference must be made in multiples of 12 stitches (e.g., reduce to 60 stitches for a smaller stocking or increase to 84 stitches for a larger stocking).
Care Instructions
Hand wash gently in cool water with mild wool wash. Do not wring or twist the fabric; gently press out excess water with a clean towel. Lay flat to dry, shaping the stocking carefully over a cardboard insert or folded towel to ensure crisp, clean lines for your holiday display.
Closing
Thank you so much for joining me to create the Nordic Fair Isle Christmas Stocking Free Crochet Pattern! I hope this project brings warmth, handcrafted beauty, and holiday cheer to your mantelpiece for years to come.
If you loved making this pattern, please share your finished stockings on social media! Tag me and use the hashtag #NordicFairIsleStocking so I can admire your stunning colorwork creations. Be sure to save this pattern to your Pinterest holiday crochet boards, and leave a comment below letting me know which colors you chose for your mantel this season! Happy crocheting and happy holidays!