
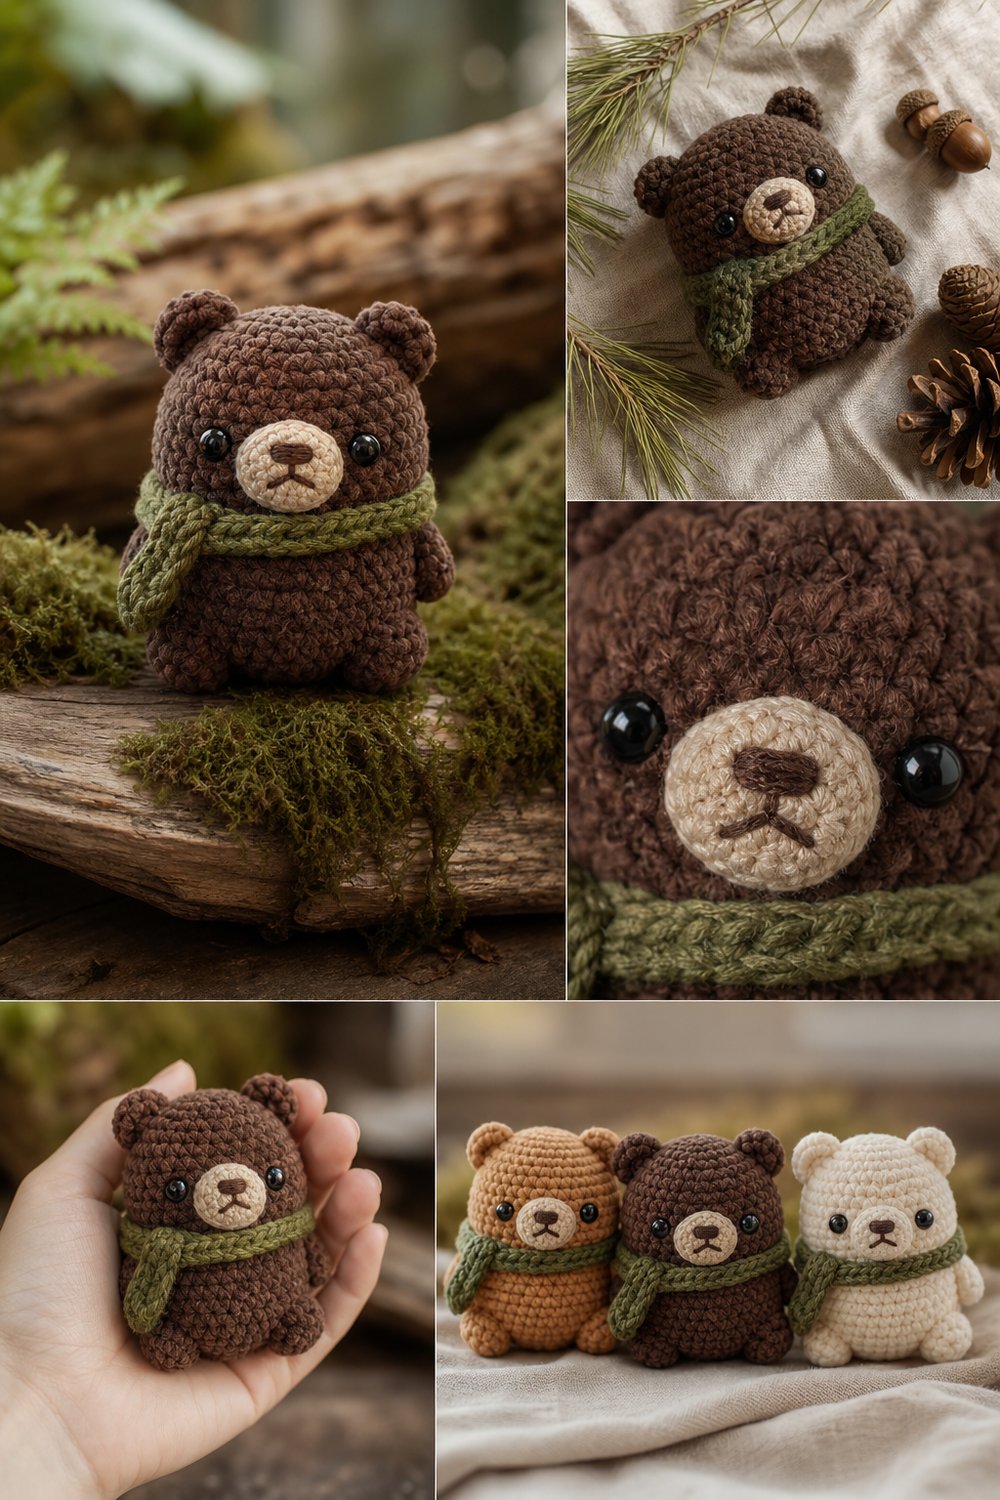
There is nothing quite like holding a palm-sized amigurumi friend crafted from velvety chenille-cotton yarn, its little moss green scarf whispering tales of enchanted indoor woodland terrariums. This stash-buster pattern is designed to work up quickly using leftover yarn bits from your stash, yielding an irresistibly chubby, pocket-sized companion that fits right in the palm of your hand.
Chubby Woodland Pocket Bear Toy Free Stash Buster Pattern
Quick Facts
- Stitches Used: US Terminology (mr, sc, inc, dec, blo)
- Size Fit: One Size (Palm-sized / Pocket Amigurumi)
- Estimated Hours to Complete: 2 to 3 hours
- Gift-Appeal: Perfect for quick holiday gifts, market prep, stocking stuffers, or a sweet pocket companion for nature lovers.
Sizing customization tips are included later in this post to help you scale your bear up or down depending on your yarn weight.
What Makes This Chubby Woodland Pocket Bear Toy Special
This design achieves its signature “chubby” silhouette through a carefully orchestrated sphere-to-cylinder shaping technique that eliminates awkward seams. By working in continuous spiral rounds with an ultra-velvety chenille-cotton blend yarn, the stitches naturally hide the polyfill while creating a dense, tactile fabric that feels incredible to the touch. The tiny moss green scarf is worked in simple back-loop-only stitches to create a delicate knit-like ribbing effect, contrasting sharply with the rich brown bear body.
Skill Level
- Skill Level: Intermediate
- Required Skills:
- Working in the round (spiral)
- Magic ring (mr)
- Single crochet (sc)
- Invisible single crochet decrease (dec)
- Basic amigurumi assembly and embroidery
- Reassurance Line: If you are comfortable with basic amigurumi shaping and counting your stitches, you will breeze through this little project in an afternoon!
Finished Measurements
| Dimension | Inches | Centimeters |
|---|---|---|
| Height (Sitting) | 3.5 inches | 9.0 cm |
| Width (Body) | 2.5 inches | 6.4 cm |
| Depth (Snout to Back) | 2.0 inches | 5.1 cm |
Materials You Will Need
| Color | Yarn Weight / Type | Yardage Needed |
|---|---|---|
| 1. Rich Brown (Bear Body) | Chenille-Cotton (Worsted/Aran) | 35 yards (32 meters) |
| 2. Moss Green (Scarf) | Sport Weight Cotton / Acrylic | 10 yards (9 meters) |
| 3. Cream / Ecru (Snout) | Chenille-Cotton (Worsted/Aran) | 5 yards (5 meters) |
| Scrap Black Yarn | Embroidery Floss or Sport Weight | Small amount for nose/eyes |
- Crochet Hook: 3.5 mm (E-4) hook (or size needed to obtain tight amigurumi tension)
- Additional Tools: Tapestry needle, stitch markers, polyester fiberfill stuffing, 6mm safety eyes, scissors.
Yarn Suggestions
| Brand & Line Name | Yarn Weight | Skein Yardage | Notes |
|---|---|---|---|
| Hobbii Honey Bunny | Bulky Chenille (works as Aran with tighter hook) | 131 yards (120 meters) | Creates the ultimate velvety texture for the body. |
| Lion Brand Vel-Luxe | Chenille (Medium) | 246 yards (225 meters) | Beautiful sheen and wonderful stitch definition. |
| Schachenmayr Catania | Sport (Fingering) | 137 yards (125 meters) | Perfect for the delicate moss green scarf detail. |
⚠️ Note: Avoid novelty eyelash yarns or ultra-fuzzy mohair for this pattern, as they obscure your stitch definition and make it difficult to locate your working rounds in amigurumi construction.
Gauge
| Measurement | Stitches & Rows |
|---|---|
| 4 inches (10 cm) | 16 sc x 18 rows using a 3.5 mm hook |
💡 Designer Tip: Always swatch and crochet tightly for amigurumi projects to prevent the polyester stuffing from showing through your stitches.
Abbreviations
| Abbreviation | Full Term |
|---|---|
| ch | Chain |
| mr | Magic Ring |
| sc | Single Crochet |
| inc | Single Crochet Increase (work 2 sc in same stitch) |
| dec | Invisible Single Crochet Decrease (sc 2 stitches together through front loops) |
| blo | Back Loop Only |
| sl st | Slip Stitch |
| st(s) | Stitch(es) |
| Rnd(s) | Round(s) |
| FO | Fasten Off |
Special Stitches Explained
- Magic Ring (mr): Create an adjustable loop, hold the yarn tail, and work the specified number of single crochets into the center of the ring. Pull the tail tight to close the center hole securely.
- Invisible Single Crochet Decrease (dec): Insert your hook into the front loop only of the next stitch, then immediately insert your hook into the front loop only of the following stitch (3 loops on hook). Yarn over and pull through the first 2 loops, yarn over and pull through remaining 2 loops.
- Back Loop Only (blo): Working exclusively under the rear loop of the designated stitch, leaving the front loop unworked to create a raised horizontal ridge.
Pattern Instructions
Section 1: Head and Body (Worked as One Piece from Top Down)
Using Rich Brown, make a mr.
– Rnd 1: Work 6 sc in mr. (6 sc)
– Rnd 2: [Inc] around. (12 sc)
– Rnd 3: [Sc 1, inc] around. (18 sc)
– Rnd 4: [Sc 2, inc] around. (24 sc)
– Rnd 5: [Sc 3, inc] around. (30 sc)
– Rnds 6–10: Sc in each st around. (30 sc)
– Rnd 11: [Sc 3, dec] around. (24 sc)
– Rnd 12: [Sc 2, dec] around. (18 sc)
(Insert 6mm safety eyes between Rnds 7 and 8, approximately 5 stitches apart. Begin stuffing the head firmly with polyester fiberfill.)
✅ Checkpoint: At the end of Rnd 12, your head piece should form a rounded dome with securely fastened safety eyes and firm stuffing. Total stitch count is (18 sc).
- Rnd 13: [Sc 1, inc] around to shape the chubby shoulders. (27 sc)
- Rnds 14–17: Sc in each st around. (27 sc)
- Rnd 18: [Sc 1, dec] around. (18 sc)
(Continue stuffing the body firmly, ensuring the base remains nicely rounded.) - Rnd 19: [Dec] around. (9 sc)
- Rnd 20: [Dec] 4 times, sl st in last st. (5 sc)
FO, leaving a long tail. Thread tail through front loops of remaining 5 stitches and pull tight to close the bottom base. Weave in ends.
Section 2: Snout
Using Cream / Ecru, make a mr.
– Rnd 1: Work 6 sc in mr. (6 sc)
– Rnd 2: [Inc] around. (12 sc)
– Rnd 3: Sc in each st around. (12 sc)
FO, leaving a long tail for sewing. Lightly stuff and sew the snout centered between the safety eyes on the head. Using black embroidery floss, stitch a small inverted “Y” shape for the nose and mouth.
Section 3: Ears (Make 2)
Using Rich Brown, make a mr.
– Rnd 1: Work 5 sc in mr. (5 sc)
– Rnd 2: [Inc] around. (10 sc)
– Rnd 3: Sc in each st around. (10 sc)
FO, flattening the base without stuffing. Sew the ears securely to the top of the head spanning Rnds 3 through 6.
Section 4: Arms (Make 2)
Using Rich Brown, make a mr.
– Rnd 1: Work 6 sc in mr. (6 sc)
– Rnds 2–4: Sc in each st around. (6 sc)
FO, leaving a long tail. Lightly stuff the tips and sew the arms to the upper sides of the body just below the neck transition.
Section 5: Moss Green Scarf
Using Moss Green, ch 36.
– Row 1: Starting in the 2nd ch from hook, work sc in each ch across, turn. (35 sc)
– Row 2: Ch 1, working in blo, sc in each st across. (35 sc)
FO and weave in ends. Wrap the cozy ribbed scarf around the bear’s neck, crossing it over neatly and tacking it in place with a few stitches if desired.
Size Customization Tips
- To scale down your bear: Use a sport-weight yarn with a 2.5 mm hook. This will yield a miniature pocket bear measuring roughly 2 inches in height.
- To scale up your bear: Use a super bulky blanket yarn with a 5.0 mm hook. This will create a large, huggable plushie measuring approximately 6.5 inches in height, adjusting your safety eye size to 12mm accordingly.
Care Instructions
Gently hand wash your Chubby Woodland Pocket Bear in lukewarm water using a mild wool wash. Do not wring or twist the plush fabric. Press out excess water gently in a clean towel and lay flat in the shade to dry completely. Do not tumble dry or iron.
Closing
Thank you so much for crafting along with me to make your very own Chubby Woodland Pocket Bear Toy Free Stash Buster Pattern! I hope this little fellow brings a touch of cozy forest magic to your day.
I would love to see your handmade bears! Please share your photos on Instagram, tag me @YourDesignerHandle, save this project to your Pinterest boards for later, and leave a comment below letting me know what color your bear turned out to be!