
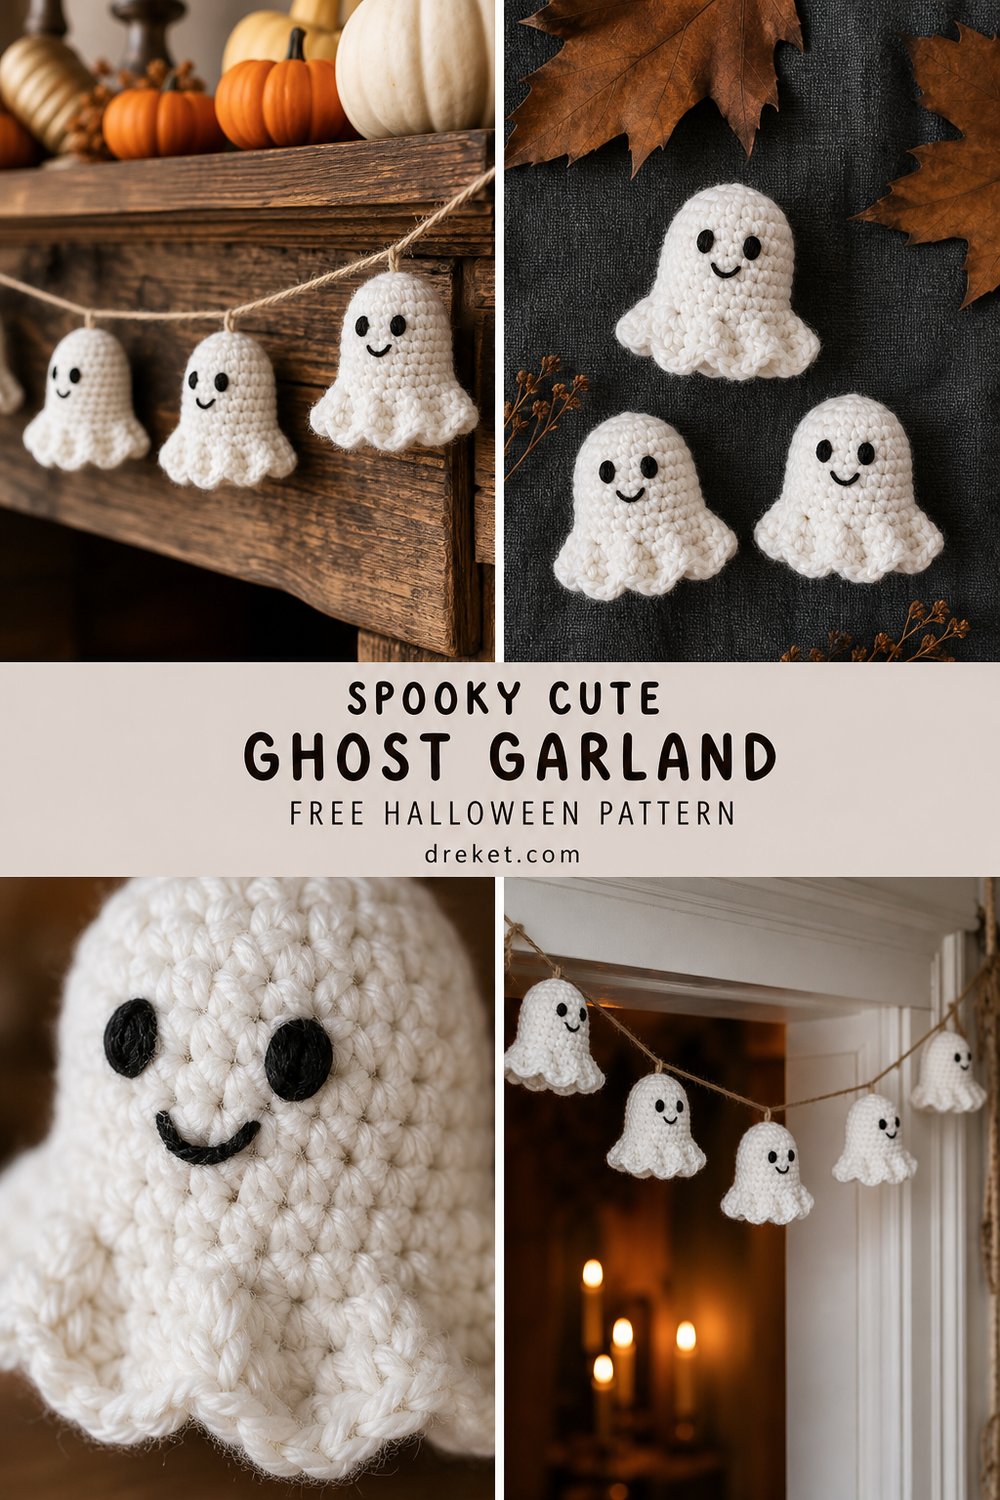
Bring a touch of handcrafted whimsy to your autumn hearth with a string of plush, smiling specters draped softly across a rustic wood mantel. This charming project combines clean single crochet textures with cozy cotton yarn, casting a warm, inviting glow against the cool tones of changing seasonal foliage.
Spooky Cute Ghost Garland Free Crochet Pattern
The Spooky Cute Ghost Garland is worked entirely in foundational single crochet stitches using a fine-gauge cotton yarn, resulting in crisp, tidy stitch definition that holds its shape without drooping. Designed as a modular home decor piece, this project takes about 4 to 6 hours from start to finish, making it a delightfully quick weekend make or a thoughtful, handmade gift for a fellow autumn enthusiast.
Sizing and length customization tips for expanding your garland are included later in the pattern.
What Makes This Spooky Cute Ghost Garland Special
This design achieves its signature look through a clever combination of seamless flat-to-round shaping and precise tension control. Each ghost is worked from the rounded head down to a flowing, textured base, creating a sturdy body that refuses to curl or slouch. By utilizing tightly packed single crochet stitches with a smaller-than-recommended hook, the fabric gains a dense, plush quality that stands up beautifully to repeated seasonal display. The minimalist embroidered facial features add a dash of personality without interrupting the clean, modern aesthetic of the natural fiber garland.
Skill Level
- Skill Level: Easy / Advanced Beginner
- Required Skills:
- Working in the round and in rows
- Basic increases (2 sc in next st) and invisible decreases (inv-dec)
- Simple surface embroidery (French knots and straight stitches)
- Basic chaining and slip stitching for the hanging cord
💡 Designer Tip: If you can work a standard single crochet and weave in your ends neatly, you have all the skills needed to bring this entire garland to life!
Finished Measurements
The standard garland creates a span of approximately 5 feet (152.4 cm) featuring 5 individual ghosts, though spacing can be adjusted freely along the natural twine hanging cord.
| Component | Imperial (Inches) | Metric (Centimeters) |
|---|---|---|
| Individual Ghost Height | 4.5 inches | 11.4 cm |
| Individual Ghost Width | 3.25 inches | 8.3 cm |
| Standard Garland Length | 60 inches | 152.4 cm |
| Hanging Cord Length | 72 inches | 182.9 cm |
Materials You Will Need
- Yarn Weight: Fine / Sport (#2) or light Worsted (#4) depending on desired density (pattern uses Sport weight cotton)
- Crochet Hook: US C/2 (2.75 mm) or US E/4 (3.5 mm)
- Notions: Tapestry needle, stitch markers, polyester fiberfill stuffing, black embroidery floss, natural jute twine or sturdy cotton cord for stringing
| Color Name / Description | Yarn Weight | Yardage Needed (Yards) | Yardage Needed (Meters) |
|---|---|---|---|
| White (Pure Cotton) | Sport (#2) | 120 yds | 110 m |
| Charcoal (Embroidery Accent) | Embroidery Floss | 5 yds | 4.5 m |
| Natural Jute Twine | Cord (3-ply) | 72 yds | 66 m |
Yarn Suggestions
To capture that crisp, plush texture seen in the photography, choose a smooth, mercerized or semi-mercerized cotton that won’t pill. Avoid fuzzy or brushed novelty yarns (such as mohair or roving wool), as they obscure the clean single crochet stitch definition and make shaping the ghosts difficult.
| Yarn Brand & Line Name | Yarn Weight | Skein Yardage | Notes |
|---|---|---|---|
| Schachenmayr Catania | Sport (#2) | 137 yds (125 m) / 50g | Excellent stitch definition, wide color range. |
| Knit Picks Dishie | Worsted (#4) | 190 yds (174 m) / 100g | Durable, tightly spun cotton with a matte finish. |
| Hobbii Rainbow Cotton 8/8 | DK (#3) | 82 yds (75 m) / 50g | Soft 100% cotton, perfect structure for plush toys. |
Gauge
Gauge is not strictly critical for this decorative project, but maintaining a firm, consistent tension ensures the stuffing does not peek through the stitches.
| Measurement Type | Stitches / Rows | Imperial | Metric |
|---|---|---|---|
| Single Crochet Gauge | 22 sts x 26 rows | 4 x 4 inches | 10 x 10 cm |
⚠️ Note: Always swatch with a hook size smaller than yarn recommendations to create the dense fabric required for amigurumi-style stuffing.
Abbreviations
| Abbreviation | Full Term |
|---|---|
| ch | chain |
| sc | single crochet |
| inc | increase (work 2 sc in the same stitch) |
| inv-dec | invisible decrease (insert hook in front loops of next 2 sts, yarn over, pull through both, yarn over, pull through remaining 2 loops) |
| sl st | slip stitch |
| st(s) | stitch(es) |
| Rnd / Row | Round / Row |
| FO | fasten off |
Special Stitches Explained
- Invisible Decrease (inv-dec): Insert your crochet hook under the front loop only of the first stitch, then immediately insert it under the front loop only of the second stitch. (You should have 3 loops on your hook). Yarn over and pull through the first 2 loops on your hook. Yarn over and pull through the remaining 2 loops.
- Wavy Base Ripple: Worked across the bottom edge by alternating slip stitches and double crochets to create a gentle, flowing spectral drape.
Pattern Instructions
Section 1: The Ghost Body (Make 5)
Working from the top of the head downward in continuous spirals (do not join rounds unless specified; use a stitch marker to track the first stitch of each round).
- Rnd 1: Magic ring, work 6 sc into the ring. (6 sts)
- Rnd 2: inc in each st around. (12 sts)
- Rnd 3: (sc in next st, inc in next st) 6 times. (18 sts)
- Rnd 4: (sc in next 2 sts, inc in next st) 6 times. (24 sts)
- Rnd 5: (sc in next 3 sts, inc in next st) 6 times. (30 sts)
- Rnds 6–9: sc in each st around (4 rows total). (30 sts)
- Rnd 10: (sc in next 3 sts, inv-dec) 6 times. (24 sts)
- Rnd 11: sc in each st around. (24 sts)
- Rnd 12: (sc in next 2 sts, inv-dec) 6 times. (18 sts)
- Rnd 13: sc in each st around. (18 sts)
✅ Checkpoint: Pause here to firmly stuff the head cavity with polyester fiberfill. Ensure the head is round and firm before continuing down the narrow body.
- Rnd 14: (sc in next st, inc in next st) 9 times. (27 sts)
- Rnds 15–17: sc in each st around (3 rows total). (27 sts)
- Rnd 18: (sc in next 2 sts, inc in next st) 9 times. (36 sts)
- Rnds 19–21: sc in each st around (3 rows total). (36 sts)
Section 2: Wavy Bottom Edge
- Rnd 22: Working into the final body round, create the scalloped hem: (skip 1 st, work 5 dc in next st, skip 1 st, sl st in next st) repeat from * to * around the entire base. Join with a sl st to the first st. FO, leaving a long tail for weaving.
Section 3: Face Embroidery & Assembly
- Using black embroidery floss and a tapestry needle, stitch two small French knots for the eyes and a sweet little oval or straight-stitch mouth centered on the upper portion of the head (around Rnds 5–7).
- Weave in all interior loose yarn ends securely.
- Thread the natural jute twine through the top back stitches of each ghost, spacing them approximately 6 inches apart. Secure each ghost with a tiny anchor stitch to prevent sliding along the garland cord.
Size Customization Tips
- Scaling Up: To make larger statement ghosts for a porch or large entryway, switch to a Worsted Weight (#4) yarn paired with a US G/6 (4.0 mm) hook, adding 2 extra repeating rounds to the head and body sections.
- Garment/Garland Length: To lengthen your garland for a wider mantelpiece, simply repeat Section 1 to craft additional ghosts (we recommend odd numbers like 7, 9, or 11 for optimal visual balance) and extend your jute hanging twine accordingly.
Care Instructions
- Hand wash gently in cool water with mild wool-safe detergent.
- Do not bleach or wring out aggressively.
- Reshape gently while damp and lay flat on a clean towel to dry completely.
- Store flat in a breathable cotton bag between holiday seasons to keep your ghosts crisp and clean.
Spooky Cute Ghost Garland
I hope you thoroughly enjoy crocheting this charming little troupe of specters for your seasonal decor! There is nothing quite like cozying up with a ball of cotton yarn on a crisp autumn afternoon.
If you make your own garland, please share your lovely creations with me! Tag your photos on social media using #SpookyCuteGarland and #DreketPatterns, pin this tutorial to your favorite Pinterest Halloween boards for later, and drop a friendly comment below letting me know how your little ghosts turned out! Happy crocheting!