
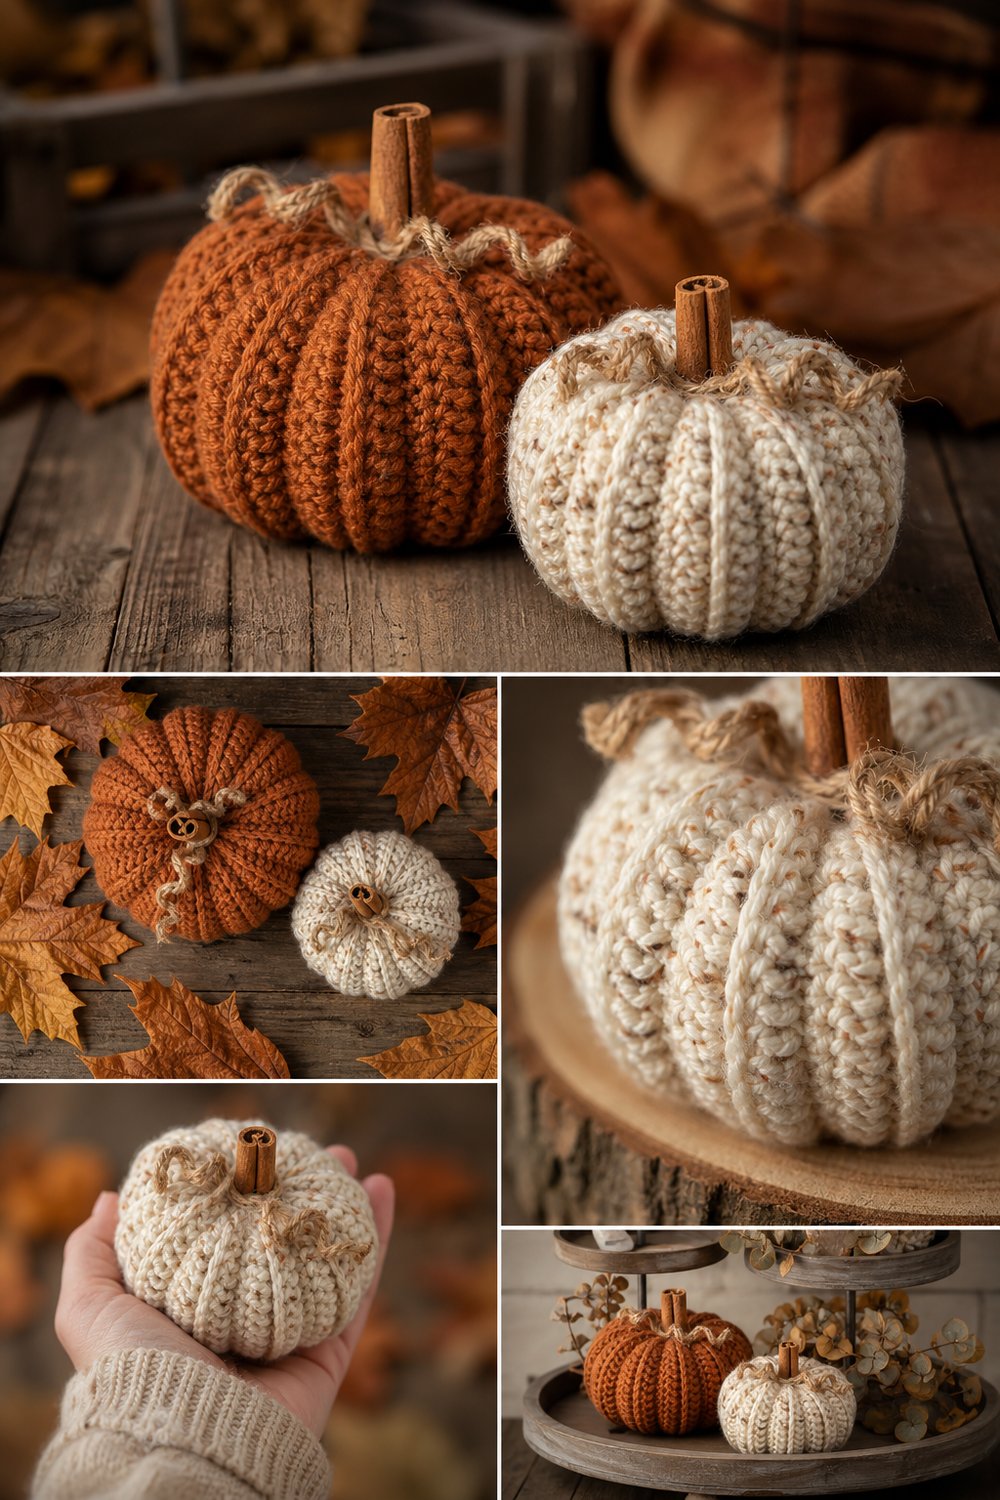
Bring the rustic elegance of a crisp autumn afternoon into your home with a pair of handmade fiber decorations that capture the absolute best of the harvest season. Styled to sit beautifully on a weathered timber table or a tiered farmhouse tray, these charming pumpkins feature rich, deep vertical ribbing and organic textures that evoke a cozy, welcoming autumn atmosphere. Whether you are refreshing your own seasonal mantel display or crafting a thoughtful handmade gift for a dear friend, this project works up quickly and brings an instant touch of artisanal warmth to any space.
Rustic Harvest Burlap Pumpkin Duo Free Fall Pattern
Quick Facts
- Stitches Used: Chain, Single Crochet, Slip Stitch in the Back Loop Only
- Size Fit: Small (Palm-Sized) and Large (Centerpiece-Sized)
- Estimated Hours to Complete: 2 to 3 hours for the duo
- Gift-Appeal: Exceptionally high; makes a stunning hostess gift, housewarming present, or Thanksgiving table favor.
Sizing customization tips for altering the height and circumference of your pumpkins are included later in the pattern.
What Makes This Rustic Harvest Burlap Pumpkin Duo Free Fall Pattern Special
This design achieves its signature heirloom look through a clever combination of fabric-like texture and structural shaping. Instead of working in the round, the pumpkin bodies are crocheted flat as ribbed rectangles using a slip-stitch ribbing technique that mimics traditional knit texture with heavy chunky yarn. Once seamed into a tube and cinched at the top and bottom, the fabric naturally falls into deep, structural vertical ridges. Capping off each pumpkin with a real cinnamon stick stem and a curled jute twine tendril gives the project an authentic organic finish that completely elevates it above standard crochet decor.
Skill Level
- Level: Intermediate (due to working exclusively in the back loop slip stitch and maintaining consistent tension)
- Required skills:
- Working foundational chains
- Slip stitching into the back loop only (BLO sl st)
- Working flat rows with turning chains
- Basic gathering, stuffing, and assembly techniques
- Simple yarn needle sewing and knotting
💡 Designer Tip: If you are new to working entirely in slip stitches, keep your tension slightly loose. A relaxed grip prevents the rows from pulling too tight and ensures your pumpkin remains soft and squishable rather than stiff.
Finished Measurements
| Pumpkin Size | Circumference | Height (Excluding Stem) | Base Diameter |
|---|---|---|---|
| Small (Palm-Sized) | 12 inches (30.5 cm) | 3.5 inches (9 cm) | 3.5 inches (9 cm) |
| Large (Centerpiece) | 18 inches (45.5 cm) | 5.5 inches (14 cm) | 5.5 inches (14 cm) |
Materials You Will Need
- Yarn Weight: #5 Bulky or #6 Super Bulky tweed/textured yarn
- Crochet Hook: US J/10 (6.0 mm) or US K/10.5 (6.5 mm) depending on your tension
- Notions: Tapestry needle, locking stitch markers, polyester fiberfill stuffing, 2 real cinnamon sticks (approx. 3–4 inches long), natural jute twine (approx. 2 mm thickness), hot glue gun and glue sticks (optional, for securing stems).
| Color Name | Color Order (Image Match) | Yarn Weight | Total Yardage Needed |
|---|---|---|---|
| Cinnamon Orange | Color 1 (Primary Duo Tone) | #5 Bulky Tweed | 65 yds (59 m) |
| Cream | Color 2 (Secondary Duo Tone) | #5 Bulky Tweed | 65 yds (59 m) |
Yarn Suggestions
To capture that authentic rustic burlap look shown in the photographs, look for tweed or heathered wool-blend yarns that feature small flecks of contrasting color.
| Brand & Line Name | Yarn Weight | Skein Yardage | Notes |
|---|---|---|---|
| Lion Brand Wool-Ease Thick & Quick | #6 Super Bulky | 106 yds (97 m) per skein | Excellent stitch definition; choose rustic heather colors. |
| Bernat Softee Chunky | #5 Bulky | 108 yds (99 m) per skein | Provides a soft, squishy texture with great durability. |
| Paintbox Yarns Simply Chunky | #5 Bulky | 136 yds (124 m) per skein | Fantastic color range, though you may want to double up or hold with a thin tweed strand for extra texture. |
⚠️ Note: Avoid ultra-smooth mercerized cottons or slippery synthetic novelty yarns. They lack the rustic matte structure and squishy density required to hold the deep vertical pumpkin ridges in place.
Gauge
Gauge is measured over the slip stitch ribbing pattern. Because pumpkins are stuffed toys, exact gauge is not critical, but maintaining even row tension is essential for a symmetrical shape.
| Stitch / Technique | Gauge Over 4 Inches (10 cm) | Notes |
|---|---|---|
| BLO Sl St Ribbing | 12 sts x 10 rows = 4 inches (10 cm) | Measured across relaxed, un-stretched fabric. |
💡 Designer Tip: Take a moment to work a small 4-inch test swatch before beginning your pumpkin. If your rows curl tightly or pull inward, drop up one hook size to relax the fabric.
Abbreviations
| Abbreviation | Full Term |
|---|---|
| ch | chain |
| sl st | slip stitch |
| blo | back loop only |
| st(s) | stitch(es) |
| rep | repeat |
| RS | right side |
| WS | wrong side |
Special Stitches Explained
- Back Loop Only Slip Stitch (BLO sl st): Insert hook under the back loop only of the designated stitch, yarn over, pull yarn through the stitch and directly through the loop on your hook. This creates a tight, highly elastic fabric with pronounced ridges.
- Gathering Seam: A running stitch woven evenly through the outermost edge stitches of an open rectangle, pulled tight like a drawstring to close an opening securely.
Pattern Instructions
Section 1: Small Pumpkin Body (Make 1 in Cinnamon Orange)
Row 1: Using US J/10 (6.0 mm) hook, ch 16. Starting in the 2nd ch from hook, work 1 sl st in each ch across. Turn. (15 sl st)
Row 2: Ch 1 (does not count as a st here and throughout), working in blo, work 1 sl st in each st across. Turn. (15 sl st)
Rows 3–32: Rep Row 2 until your panel measures approximately 12 inches (30.5 cm) when slightly stretched. Fasten off, leaving a long 24-inch tail for assembly and cinching. Do not cut your starting tail; keep it for bottom cinching.
✅ Checkpoint: Count your horizontal ridges along the top edge. You should have 32 raised ridges, and your panel should form a neat rectangle measuring about 12″ x 4.5″ un-stretched.
Section 2: Large Pumpkin Body (Make 1 in Cream)
Row 1: Using US J/10 (6.0 mm) hook, ch 22. Starting in the 2nd ch from hook, work 1 sl st in each ch across. Turn. (21 sl st)
Row 2: Ch 1, working in blo, work 1 sl st in each st across. Turn. (21 sl st)
Rows 3–42: Rep Row 2 until your panel measures approximately 18 inches (45.5 cm) when slightly stretched. Fasten off, leaving a long 30-inch tail for assembly. Keep the starting tail intact.
Section 3: Assembly, Stuffing & Stem Integration
- Vertical Seam: Fold your crocheted rectangle in half lengthwise so that Row 1 and your final row align. Using your tapestry needle and the long working tail, whipstitch through both the outer loops of the final row and the foundation chain of the first row to form a seamless cylinder. Securely knot and weave in the tail end.
- Bottom Cinch: Thread your starting tail onto your tapestry needle. Weave a running stitch in and out of every other row end along the bottom edge of the cylinder. Pull the tail firmly to cinch the bottom completely closed like a pouch. Knot securely and bury the remaining tail inside the pumpkin core.
- Stuffing: Turn the pumpkin right-side out (hiding the vertical seam inside). Firmly stuff the pumpkin with polyester fiberfill. Pack it densely enough to hold its rounded shape, ensuring the stuffing reaches evenly into all the inner rib corners.
- Top Cinch: Thread your long top working tail onto your tapestry needle. Weave a running stitch around the top edge row ends, exactly as you did for the bottom. Pull tight to close the top aperture partially, leaving a small central opening about the width of your cinnamon stick. Knot securely.
- Shaping the Ridges: To achieve the classic indented pumpkin shape, take your long top tail (or a separate strand of matching yarn), anchor it firmly at the bottom center, and bring it up the outside of the pumpkin through one of the deep valley grooves to the top center. Pull firmly to indent the ridge, wrap it across the top, and take it back down through an opposite valley. Repeat this 4 to 6 times evenly around the pumpkin to create distinct lobes. Secure and weave in all ends.
- Adding Stem and Tendrils: Insert one cinnamon stick into the top center opening. Use a dab of hot glue at the base of the stick to anchor it firmly into the stuffing if desired. Wrap a 6-inch strand of natural jute twine tightly around the base of the cinnamon stick, tying a neat knot and letting the cut ends curl naturally or wrapping them around a pencil to form rustic tendrils.
Size Customization Tips
- To Adjust Height: Simply change your starting chain length! Adding more chains increases the height of your pumpkin, while fewer chains creates a squat, flat pumpkin profile.
- To Adjust Circumference: Work more or fewer rows of slip-stitch ribbing. Every 2 rows adds approximately 0.75 inches (2 cm) to the total circumference of your finished pumpkin.
Care Instructions
Spot clean gently with a damp cloth and mild soap as needed. Do not submerge in water or machine wash, as moisture can weaken the real cinnamon stick stem and distort the polyester stuffing. Allow to air dry completely before returning to your seasonal display.
Closing
Rustic Harvest Burlap Pumpkin Duo Free Fall Pattern
I hope crafting this delightful pumpkin duo brings an abundance of cozy, autumnal joy into your home! There is nothing quite like the feeling of styling your space with handmade seasonal treasures. I would love to see your gorgeous creations—please snap a photo, tag me on social media, save this project to your favorite fall boards on Pinterest, and leave a comment below to let me know which color combination you chose for your duo! Happy crocheting!