

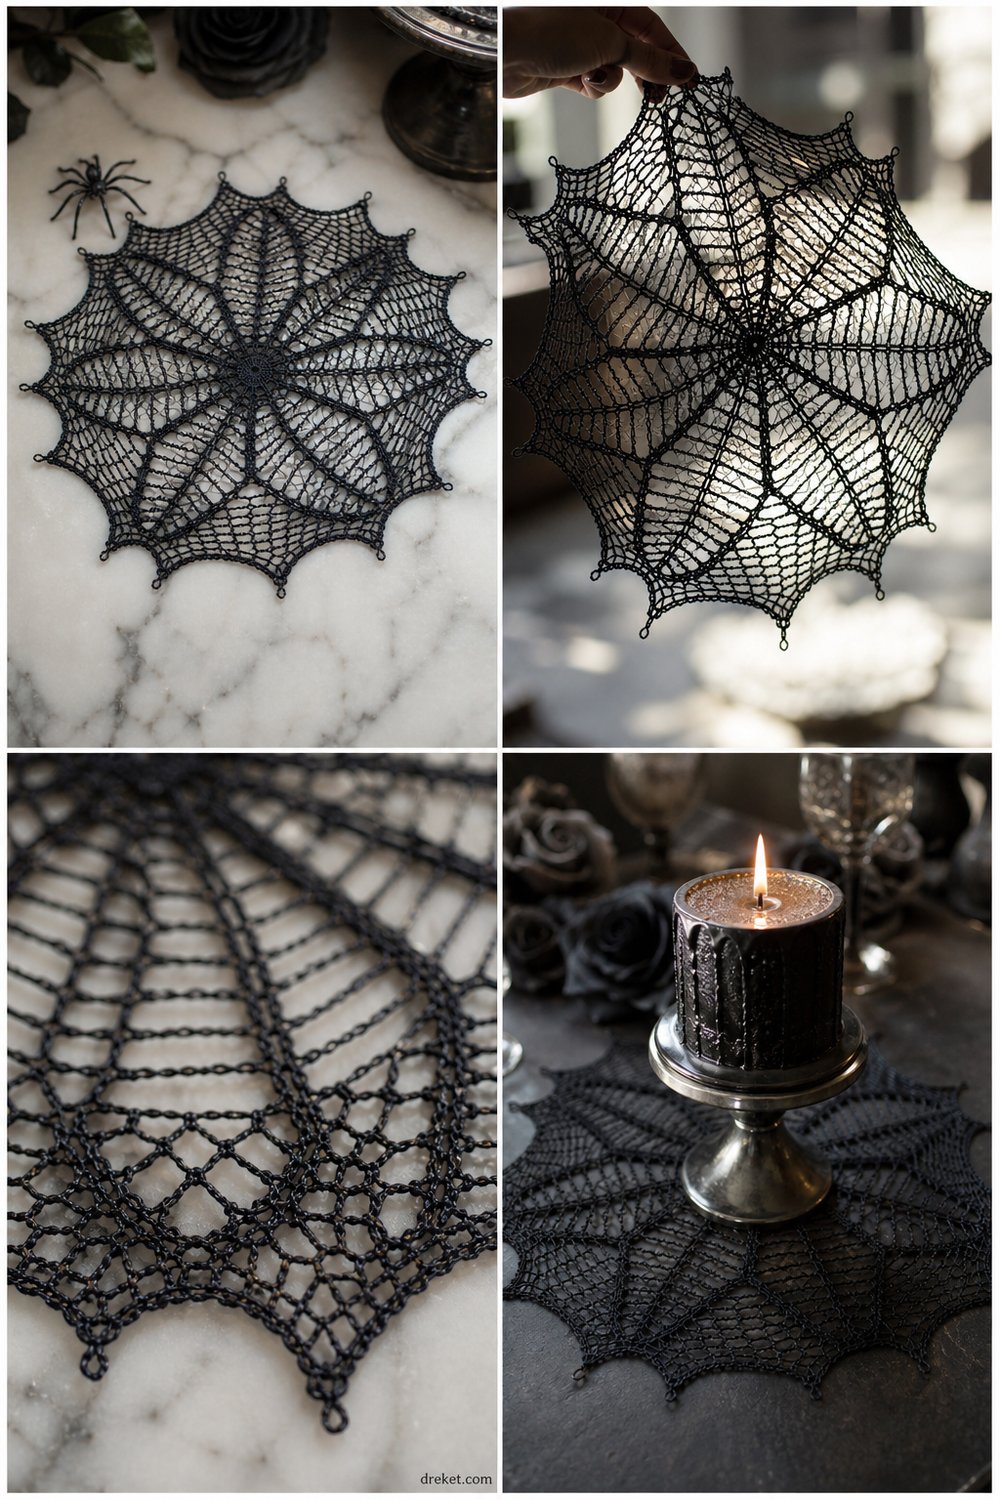
Transform your tables into a moody sanctuary with a handcrafted piece that channels Victorian elegance and modern occult charm. As candlelight flickers across delicate openwork mesh and dramatic radiating spokes, this stunning project brings an enchanting, sophisticated edge to your seasonal or everyday decor.
Gothic Black Spiderweb Doily Free Crochet Pattern
Quick Facts
This design utilizes foundational and advanced thread-crochet stitches, including chains, single crochets, double crochets, and picots, to build a breathtaking radial spiderweb motif. Sized perfectly as a striking centerpiece mat, it takes approximately 4 to 6 hours to complete depending on your comfort level with thread work. It makes an exquisite, unforgettable handmade gift for lovers of gothic aesthetics, Halloween enthusiasts, or anyone who appreciates dark academia decor.
💡 Designer Tip: Sizing customization tips are included later in the article if you wish to scale this pattern up into a larger table runner or down into a coaster.
What Makes This Gothic Black Spiderweb Doily Special
This doily achieves its signature look through a meticulous combination of traditional filet crochet mesh and dramatic radiating structural spokes. By working in the round from the center outward, the pattern gradually builds tension to form eight distinct anchor points, mirroring an authentic orb-weaver’s web. The inclusion of crisp picot edges along the outer perimeter mimics delicate dew-kissed silk, giving the finished piece a remarkably realistic and ethereal structural silhouette.
Skill Level
- Skill Level: Intermediate
- Magic ring / adjustable loop construction
- Working in the round
- Filet crochet mesh (chains and skipping stitches)
- Picot edging technique
- Blocking fine thread lace projects
⚠️ Note: While it requires patience due to the fine thread, adventurous beginners with a steady hand and a willingness to count carefully will find this project completely achievable.
Finished Measurements
| Size Option | Diameter (Inches) | Diameter (Centimeters) |
|---|---|---|
| Standard Centerpiece | 12 inches | 30.5 cm |
Materials You Will Need
- Yarn Weight: Size 10 Crochet Cotton Thread
- Hook Size: Steel crochet hook size 1.5 mm (US Steel Hook Size 8)
- Additional Tools: Tapestry needle for weaving ends, rust-proof T-pins, blocking board or foam mat, household starch or fabric stiffener (optional).
| Color Name | Yarn Weight | Yardage Needed |
|---|---|---|
| Black | Size 10 Crochet Cotton | 120 yards (110 meters) |
Yarn Suggestions
| Yarn Brand & Line | Weight | Yardage per Skein | Notes |
|---|---|---|---|
| Aunt Lydia’s Classic Crochet Thread Size 10 | Size 10 Bedspread Weight | 400 yards / 365 m | Excellent stitch definition, deeply saturated solid black colorway. |
| DMC Petra Crochet Cotton Thread Size 10 | Size 10 Perle Cotton | 305 yards / 278 m | Mercerized cotton with a subtle, elegant sheen. |
⚠️ Note: Avoid fuzzy acrylic or high-stretch wool yarns for this pattern; they will obscure the fine geometric mesh and prevent the spiderweb motif from holding its sharp structural shape.
Gauge
| Measurement Type | Stitch / Row Count | Finished Size |
|---|---|---|
| Mesh Gauge | 5 mesh blocks x 5 rows = 2 inches (5 cm) | Worked with 1.5 mm hook |
💡 Designer Tip: Always swatch using your chosen thread and hook. Thread tension can vary wildly from yarn work, so ensuring your gauge matches will guarantee your doily lays completely flat without puckering.
Abbreviations
| Abbreviation | Full Term |
|---|---|
| ch | Chain |
| dc | Double crochet |
| sc | Single crochet |
| sl st | Slip stitch |
| sp | Space |
| st(s) | Stitch(es) |
| sk | Skip |
| picot | Ch 3, sl st in the 3rd ch from hook |
| rep | Repeat |
| rnd(s) | Round(s) |
Special Stitches Explained
- Picot: Chain 3, insert your hook into the back bump and front loop of the first chain made, yarn over, pull through the stitch and through the loop on your hook.
- V-stitch (V-st): (1 dc, ch 2, 1 dc) worked into the specified stitch or chain space.
Pattern Instructions
Section 1: The Center Hub
Rnd 1: Make a magic ring. Ch 3 (counts as first dc here and throughout), work 23 dc inside the ring. Join with a sl st to the top of the beginning ch-3. (24 dc)
Rnd 2: Ch 1, 1 sc in same st, *ch 5, sk 2 dc, 1 sc in next dc; rep from * around ending with ch 2, 1 dc in the first sc to form the last ch-5 sp. (8 sc, 8 ch-5 sps)
Rnd 3: Ch 1, 1 sc in the loop just formed, *ch 5, 1 sc in next ch-5 sp; rep from * around ending with ch 2, 1 dc in the first sc. (8 sc, 8 ch-5 sps)
Rnd 4: Repeat Rnd 3. (8 sc, 8 ch-5 sps)
Section 2: Radiating Spokes & Web Mesh
Rnd 5: Ch 3 (counts as 1 dc), (2 dc, ch 2, 3 dc) in same ch-5 sp, *ch 3, 1 sc in next ch-5 sp, ch 3, (3 dc, ch 2, 3 dc) in next ch-5 sp; rep from * around, ending with ch 3, 1 sc in next ch-5 sp, ch 3, join with sl st to top of beg ch-3. (48 dc, 8 ch-2 sps, 8 sc, 16 ch-3 sps)
Rnd 6: Sl st across to the ch-2 sp. Ch 3, (2 dc, ch 2, 3 dc) in same ch-2 sp, *ch 4, sk ch-3 sp and sc, 1 sc in next ch-3 sp, ch 4, (3 dc, ch 2, 3 dc) in next ch-2 sp; rep from * around, ending with ch 4, 1 sc, ch 4, join with sl st to top of beg ch-3. (48 dc, 8 ch-2 sps, 8 sc, 16 ch-4 sps)
Rnd 7: Sl st across to ch-2 sp. Ch 3, (2 dc, ch 2, 3 dc) in same ch-2 sp, *ch 5, sk ch-4 sp, 1 sc in next sc, ch 5, (3 dc, ch 2, 3 dc) in next ch-2 sp; rep from * around, ending with ch 5, 1 sc, ch 5, join with sl st to top of beg ch-3. (48 dc, 8 ch-2 sps, 8 sc, 16 ch-5 sps)
✅ Checkpoint: At the end of Rnd 7, you should have 8 distinct radiating spoke clusters of (3 dc, ch 2, 3 dc) separated by widening arches of chain-5 loops. Verify your stitch count before proceeding to the outer mesh expansion.
Section 3: Outer Web Expansion & Picot Edge
Rnd 8: Sl st across to ch-2 sp. Ch 3, (2 dc, ch 2, 3 dc) in same ch-2 sp, *ch 5, working in the next ch-5 sp work (1 sc, ch 3, 1 sc), ch 5, (3 dc, ch 2, 3 dc) in next ch-2 sp; rep from * around, ending with ch 5, (1 sc, ch 3, 1 sc) in last ch-5 sp, ch 5, join with sl st to top of beg ch-3. (48 dc, 8 ch-2 sps, 16 sc, 8 ch-3 sps, 16 ch-5 sps)
Rnd 9: Sl st across to ch-2 sp. Ch 3, (2 dc, ch 2, 3 dc) in same ch-2 sp, *ch 6, 1 sc in next ch-5 sp, ch 3, 1 sc in next ch-3 sp, ch 3, 1 sc in next ch-5 sp, ch 6, (3 dc, ch 2, 3 dc) in next ch-2 sp; rep from * around, ending with matching chains and join with sl st to top of beg ch-3.
Rnd 10: Sl st across to ch-2 sp. Ch 3, (2 dc, ch 2, 3 dc) in same ch-2 sp, *ch 7, [1 sc in next ch-3 sp, ch 3] twice, 1 sc in next ch-3 sp, ch 7, (3 dc, ch 2, 3 dc) in next ch-2 sp; rep from * around, ending with matching chains and join with sl st.
Rnd 11 (Final Edging Round): Sl st across to ch-2 sp. Ch 1, work (1 sc, picot, 1 sc, picot, 1 sc) in the same ch-2 sp, *ch 5, [1 sc in next ch-3 sp, picot, ch 3] 3 times, 1 sc in next ch-3 sp, ch 5, work (1 sc, picot, 1 sc, picot, 1 sc) in next ch-2 sp; rep from * around, ending with ch 5, join with a sl st to the first sc. Fasten off securely.
Size Customization Tips
- To make it larger: Continue expanding the mesh arches in Section 3 by increasing your chain spaces by 1 chain per round (e.g., ch 8, ch 9) before working your final picot border. This will increase the final diameter by approximately 2 to 3 inches.
- To make it smaller: Omit Rnd 9 and Rnd 10 entirely, jumping straight from Rnd 8 into the final Rnd 11 picot edging. This reduces the overall diameter down to roughly 8 inches, creating a lovely coaster or mug rug.
Care Instructions
To maintain the crisp, intricate geometric details of your black spiderweb doily, hand wash gently in cool water with a mild, pH-neutral detergent. Do not wring or twist. Roll gently in a clean towel to press out excess moisture. Pin the doily out flat onto a blocking board or padded surface, carefully stretching each spoke and picot point outward to open up the mesh. Allow to air dry completely. For extra stiffness, lightly spray with a fabric stiffener or starch before pinning.
Gothic Black Spiderweb Doily
Thank you so much for crafting along with me today! I hope creating this gothic centerpiece brings a touch of dark elegance and handmade magic into your home. If you make one, please be sure to share your photos, tag me on social media, save this pattern to your Pinterest boards for later, and leave a comment below letting me know how your spooky web turned out!