
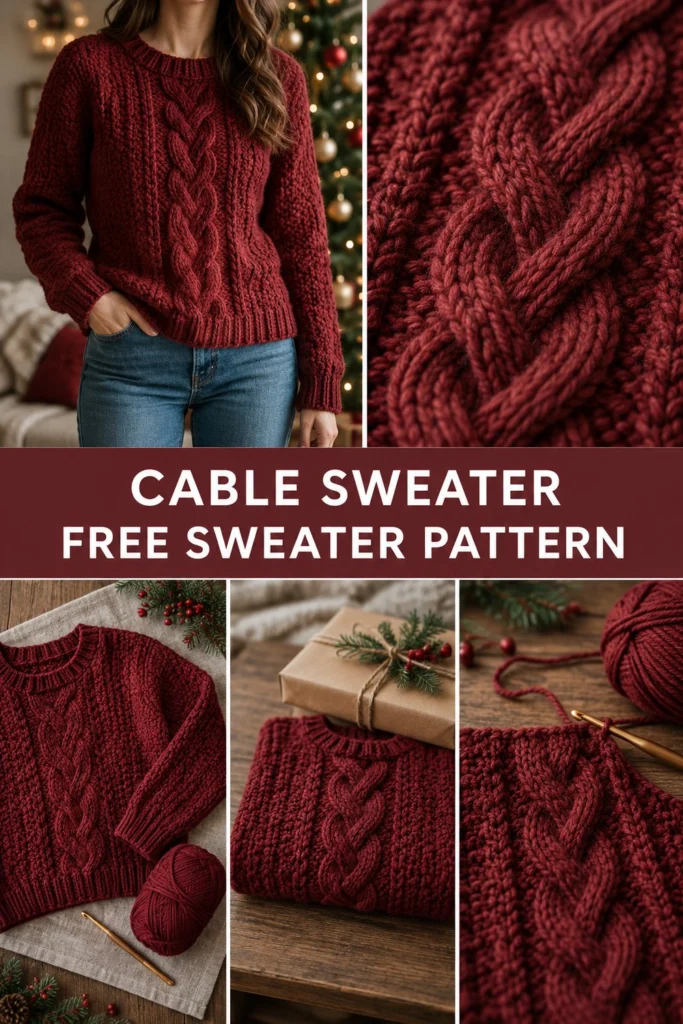
Get ready to make your new favourite holiday garment with this cozy cranberry pullover. Featuring a stunning central cable panel made with front and back post stitches, a simple half double crochet body, and neat ribbed cuffs and hem, this design brings together style and warmth.
Cranberry Cable Crochet Christmas Sweater Free Pattern
Quick Facts
- Skill level: Intermediate
- Finished size: XS (S, M, L, XL, 2XL)
- Yarn: Worsted weight (Category 4) wool or acrylic blend, approx. 1200 (1350, 1500, 1650, 1800, 1950) yards
- Hook: 5.5 mm (US I-9) crochet hook
- Stitches used: Ch, sl st, sc, hdc, fphdc, bphdc, fptr, bptr, fpdc, bpdc
- Time to make: Approx. 15 to 25 hours
What Makes This Crochet Cable Sweater Special
This pattern uses a drop-shoulder construction built from four flat panels (front, back, and two sleeves) sewn together before adding the collar and ribbing. The front panel showcases a gorgeous raised cable created by crossing front and back post treble stitches, framed by simple half double crochet rows. The rich cranberry hue mirrors festive winter decor, making it the ultimate Christmas crochet project.
Skill Level
- Comfort working flat in rows and in the round
- Familiarity with post stitches (FPtr, BPtr, FPdc, BPdc)
- Ability to read crochet charts or structured cable instructions
- Experience with basic seaming and garment construction
Finished Measurements
| Size | Chest / Bust (in) | Length (in) | Sleeve Length (in) | Positive Ease (in) |
|---|---|---|---|---|
| XS | 34 | 22 | 18 | 2–4 |
| S | 38 | 23 | 18 | 2–4 |
| M | 42 | 24 | 19 | 2–4 |
| L | 46 | 25 | 19 | 2–4 |
| XL | 50 | 26 | 20 | 2–4 |
| 2XL | 54 | 27 | 20 | 2–4 |
| Size | Chest / Bust (cm) | Length (cm) | Sleeve Length (cm) | Positive Ease (cm) |
|---|---|---|---|---|
| XS | 86.5 | 56 | 45.5 | 5–10 |
| S | 96.5 | 58.5 | 45.5 | 5–10 |
| M | 106.5 | 61 | 48 | 5–10 |
| L | 117 | 63.5 | 48 | 5–10 |
| XL | 127 | 66 | 51 | 5–10 |
| 2XL | 137 | 68.5 | 51 | 5–10 |
Materials You Will Need
| Item | Details | Quantity |
|---|---|---|
| Yarn | Worsted Weight (4), Cranberry shade | 1200 (1350, 1500, 1650, 1800, 1950) yards / 1100 (1235, 1375, 1510, 1645, 1785) meters |
| Crochet Hook | 5.5 mm (US I-9) | 1 |
| Notions | Yarn needle, locking stitch markers (4–6), measuring tape | Assorted |
Yarn Suggestions
| Yarn Line | Weight | Skein Yardage | Notes |
|---|---|---|---|
| Lion Brand Wool-Ease | Worsted (4) | 197 yds / 180 m | Excellent stitch definition for cables, durable blend. |
| Caron One Pound | Worsted (4) | 812 yds / 742 m | Budget-friendly acrylic with rich holiday color options. |
| Paintbox Yarns Simply Aran | Aran (4) | 201 yds / 184 m | Great range of deep reds, smooth finish. |
Gauge
- Main Stitch (HDC): 13 sts x 10 rows = 4 in / 10 cm square using a 5.5 mm hook.
- Cable Panel Width: Central 16-stitch cable panel measures approximately 3.5 inches wide.
Abbreviations
| Abbreviation | Term | Abbreviation | Term |
|---|---|---|---|
| ch | chain | sc | single crochet |
| hdc | half double crochet | dc | double crochet |
| tr | treble crochet | sl st | slip stitch |
| st(s) | stitch(es) | sk | skip |
| sp | space | rep | repeat |
| RS | right side | WS | wrong side |
| FPtr | front post treble crochet | BPtr | back post treble crochet |
| FPdc | front post double crochet | BPdc | back post double crochet |
| fphdc | front post half double crochet | bphdc | back post half double crochet |
UK conversion note: UK: sc = dc, hdc = htr, dc = tr.
Special Stitches Explained
- Front Post Treble Crochet (FPtr): Yarn over twice, insert hook from front to back to front around the post of the indicated stitch from the row below, yarn over, pull up a loop, (yarn over, pull through 2 loops) 3 times.
- Back Post Treble Crochet (BPtr): Yarn over twice, insert hook from back to front to back around the post of the indicated stitch from the row below, yarn over, pull up a loop, (yarn over, pull through 2 loops) 3 times.
- Post Ribbing (FPhdc / BPhdc): Work a half double crochet by inserting the hook around the post of the stitch from front-to-back (FPhdc) or back-to-front (BPhdc).
Pattern Instructions
Pattern Notes
- Turning chains (ch 1 for sc, ch 2 for hdc) do NOT count as stitches unless specifically noted.
- Work flat pieces in rows, turning at the end of each row.
Section 1: Ribbed Bottom Hem (Make 1 for Front, 1 for Back)
Foundation: Ch 9.
Row 1: Working in back bumps of chain, sc in 2nd ch from hook and in each ch across, turn (8 sc).
Row 2: Ch 1, working in BLO, sc in each st across, turn (8 sc).
Rows 50 (56, 62, 68, 74, 80): Rep Row 2. Do not fasten off; turn to work along the long edge of the ribbing for the body foundation.
Section 2: Front Panel
Row 1 (RS): Ch 2 (does not count as st here and throughout), work 52 (58, 64, 70, 76, 82) hdc evenly across the long edge of the bottom ribbing, turn (52 (58, 64, 70, 76, 82) hdc).
Note: The central 16 stitches will form the cable panel. Place stitch markers around these 16 sts.
Row 2 (WS): Hdc in each st to the 16-st cable marker, work cable setup (see chart/instructions below), hdc to end, turn (52 (58, 64, 70, 76, 82) sts).
Rows 3 to 50: Continue working hdc on side panels and maintaining the 16-stitch cable pattern in the center (crossing FPtr every 4th row), turn (52 (58, 64, 70, 76, 82) sts).
Fasten off, leaving a long tail for shoulder seaming.
Section 3: Back Panel
Foundation & Row 1: Repeat Bottom Hem and Row 1 of Front Panel in plain hdc without the cable panel (52 (58, 64, 70, 76, 82) hdc).
Rows 2 to 50: Hdc in each st across, turn (52 (58, 64, 70, 76, 82) hdc).
Fasten off, leaving a long tail for shoulder seaming.
Section 4: Sleeves (Make 2)
Foundation: Ch 21.
Row 1: Working in back bumps, sc in 2nd ch from hook and across, turn (20 sc).
Rows 1 to 10: Work ribbed cuff in BLO sc (20 sc). Turn to work along long edge.
Row 11 (RS): Ch 2, work 36 (38, 40, 42, 44, 46) hdc evenly across the cuff edge, turn (36 (38, 40, 42, 44, 46) hdc).
Row 12: Hdc in each st across, turn (36 (38, 40, 42, 44, 46) hdc).
Rows 13 to 45: Continue in hdc, increasing 1 st at each end every 5 rows to shape the sleeve (48 (50, 52, 54, 56, 58) hdc).
Fasten off, leaving a long tail for seaming.
Section 5: Assembly
- Lay Front and Back panels flat with Right Sides facing together.
- Seam shoulder shoulders for 5 (5.5, 6, 6.5, 7, 7.5) inches from each outer edge, leaving the center open for the neckline.
- Align the center of the sleeve top with the shoulder seam and mattress stitch the sleeve to the armhole opening.
- Fold sweater at shoulders and seam side edges from wrist up to underarm, then down to bottom hem.
Section 6: Collar
Rnd 1: Join yarn at back neck seam. Ch 2, work hdc evenly around the neckline opening, join with sl st to first hdc (60 hdc).
Rnds 2 to 4: Ch 2, working in post ribbing, alternating FPhdc and BPhdc around, join with sl st (60 sts).
Fasten off and weave in all ends.
Size Customization Tips
- To adjust length: Add or subtract rows on the Front and Back panels before shaping the shoulders. Each 2 rows add approximately 0.8 inches of length.
- To adjust sleeve width: Increase or decrease your starting cuff chain in multiples of 2, ensuring your sleeve base matches your arm circumference plus ease.
Care Instructions
- Hand wash cold with mild wool detergent, or machine wash on a delicate wool cycle inside out.
- Do not bleach.
- Dry flat in shade; do not tumble dry to protect cable definition and yarn integrity.
- Cool iron if needed.
FAQ
Can I substitute wool for a different yarn fiber?
Yes! Cotton, bamboo, or acrylic blends work wonderfully as long as you match the gauge and check that the yarn has good stitch definition for the cables.
How do I make this sweater oversized?
Simply select one size up from your standard body measurements in the finished measurements table to achieve a comfortable, relaxed fit with extra positive ease.
Is this pattern suitable for confident beginners?
If you are comfortable trying post stitches for the first time, yes! Take it one step at a time, use stitch markers, and reference the special stitch explanations.