
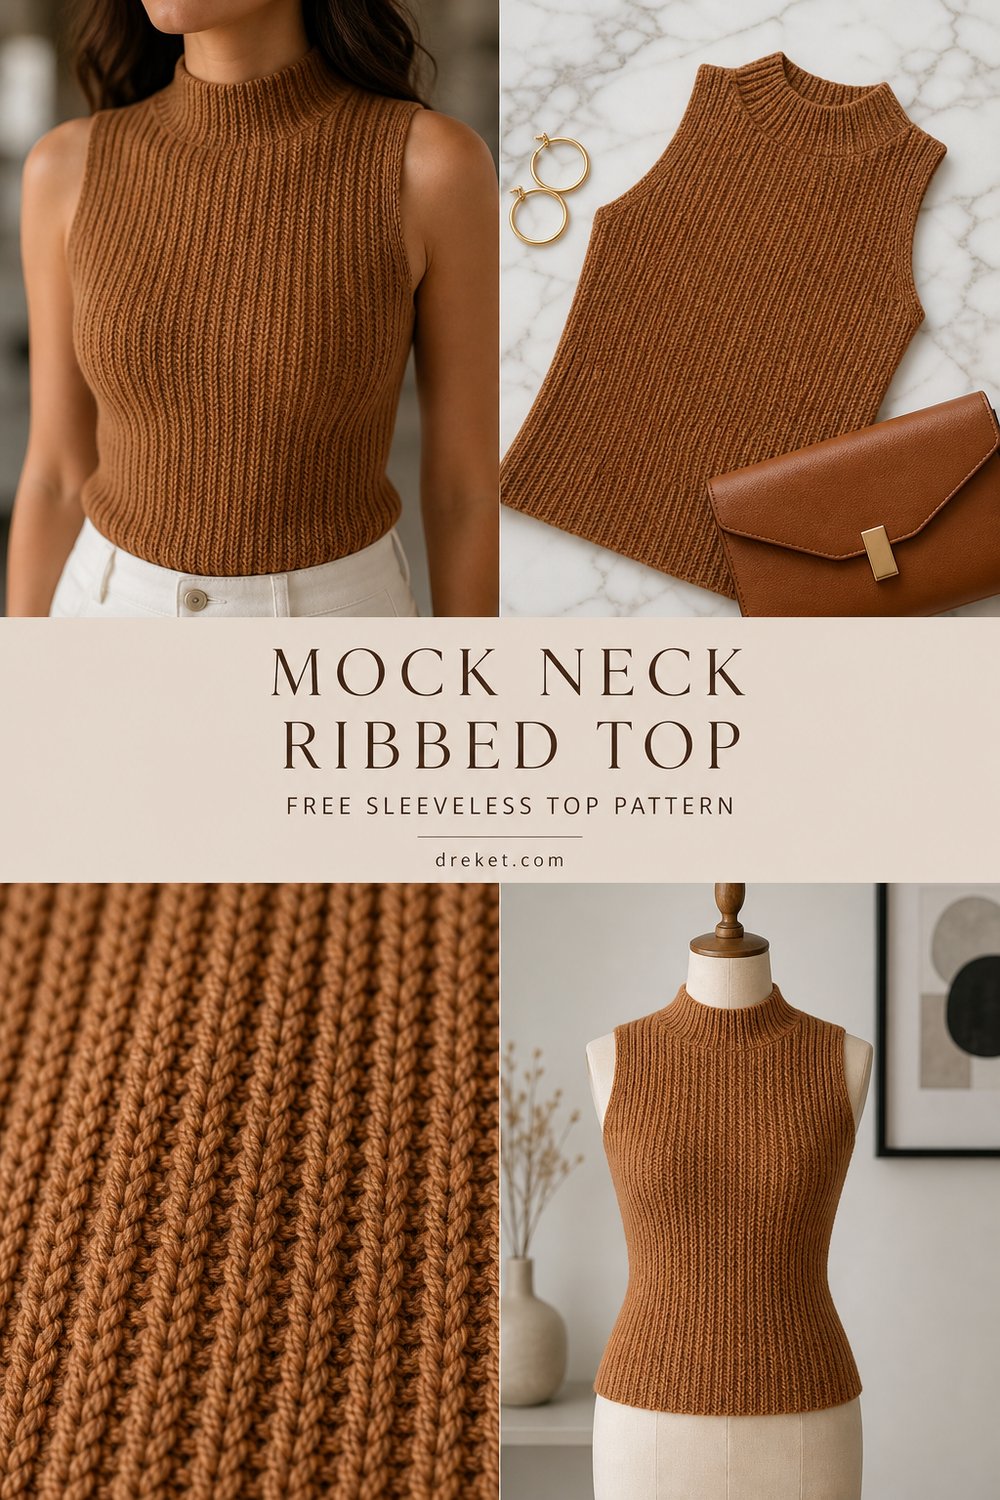
Step into sophisticated minimalism with a handmade garment that blurs the line between high-end boutique fashion and cozy crochet craftsmanship. Designed to hug your silhouette with refined elegance, this sleeveless top transitions effortlessly from a professional desk setting paired with a tailored blazer to an intimate evening flat-lay styled alongside your favorite gold hoops and leather clutch.
Chic Mock Neck Ribbed Sleeveless Top Free Sleeveless Top Pattern
Quick Facts
- Stitches Used: Slip Stitch (sl st), Back Loop Only (blo), Half Double Crochet (hdc)
- Size Fit: Inclusive sizing from XS to 2XL (customizable length and ease)
- Estimated Hours to Complete: 10–14 hours depending on experience
- Gift-Appeal: An exceptional, trend-forward gift for the fashion-forward creator or stylish friend who appreciates timeless wardrobe staples.
Sizing customization tips are included later in this article to help you achieve a personalized fit.
What Makes This Chic Mock Neck Ribbed Sleeveless Top Special
The secret to this top’s high-end, knit-like appearance lies in its vertical slip-stitch construction worked strictly in the back loops. Unlike traditional bulky crochet fabrics, this dense slip-stitch ribbing offers incredible horizontal stretch and structural recovery, allowing the garment to mold seamlessly to your body curves without sagging. Worked from side to side in one continuous panel for the front and back, it eliminates awkward shoulder seams while creating a sleek, vertical line that elongates the silhouette. The structured mock neck is built right into the upper edge, offering a polished finish that stands proudly without collapsing.
Skill Level
- Intermediate: Comfortable working consistent tension with slip stitches.
- Confident Beginner: Willing to practice tension control and counting short-rows or ribbed rows.
💡 Designer Tip: Slip stitch crochet naturally has a tighter tension than standard stitches. Relax your grip and use a slightly larger hook than recommended for your yarn weight if you tend to crochet tightly.
Finished Measurements
| Size | Bust Circumference (Inches) | Bust Circumference (cm) | Length (Inches) | Length (cm) |
|---|---|---|---|---|
| XS | 30–32″ | 76–81 cm | 20″ | 51 cm |
| S | 34–36″ | 86–91 cm | 20.5″ | 52 cm |
| M | 38–40″ | 96–102 cm | 21″ | 53.5 cm |
| L | 42–44″ | 107–112 cm | 22″ | 56 cm |
| XL | 46–48″ | 117–122 cm | 23″ | 58.5 cm |
| 2XL | 50–52″ | 127–132 cm | 24″ | 61 cm |
Materials You Will Need
- Yarn: Fingering to sport weight yarn with excellent drape and stitch definition (approx. 1100–1600 yards total depending on size).
- Exact Colorway Sequence (as featured in product photography):
- Rich Camel Brown (Primary Body)
- Accent Neutral (Optional subtle striping, not required for solid look)
- Hook: US Size E/4 (3.5 mm) or size needed to obtain gauge.
- Notions: Tapestry needle, locking stitch markers (4), measuring tape.
| Color Name | Yarn Weight | Total Yardage Needed (All Sizes) |
|---|---|---|
| Rich Camel Brown | Sport (2) / Fine | 1,100 – 1,600 yds (1,005 – 1,463 m) |
Yarn Suggestions
| Brand & Line Name | Yarn Weight | Yardage per Skein | Notes |
|---|---|---|---|
| Hobbii Friends Cotton 8/6 | Sport (2) | 115 yds / 50 g | Incredible stitch definition and range of neutral shades. |
| Lion Brand Coboo | DK/Sport (3) | 232 yds / 100 g | Cotton-bamboo blend offering sublime drape and luxury feel. |
| Knit Picks Comfy Sport | Sport (2) | 136 yds / 50 g | Breathable pima cotton and acrylic blend with natural stretch. |
⚠️ Note: Avoid heavy 100% wool yarns with fuzzy halos (like mohair or single-ply roving), as they obscure the crisp vertical slip-stitch ribs and can trap too much heat for a sleeveless garment.
Gauge
- Stitch Gauge: 22 sts x 24 rows = 4 inches (10 cm) in blo sl st using US E/4 (3.5 mm) hook.
- Row Gauge: 24 rows = 4 inches (10 cm).
| Gauge Type | Measurement over 4″ (10 cm) |
|---|---|
| Stitch Count | 22 slip stitches |
| Row Count | 24 ribbed rows |
💡 Designer Tip: Always make a swatch that is at least 5×5 inches, wash and block it, then measure from the center. Slip-stitch crochet can behave differently after blocking!
Abbreviations
| Abbreviation | Full Meaning |
|---|---|
| ch | Chain |
| sl st | Slip Stitch |
| blo | Back Loop Only |
| st(s) | Stitch(es) |
| rnd | Round |
| sk | Skip |
| RS | Right Side |
| WS | Wrong Side |
| rep | Repeat |
| yo | Yarn Over |
Special Stitches Explained
- Back Loop Only Slip Stitch (blo sl st): Insert hook under the back loop only of the specified stitch, yo, pull yarn through both the stitch and the loop on your hook. Keep your tension loose to ensure easy working on the return row.
- Short Row Shaping for Armhole Curves: Leaving specified unworked stitches at the bottom edge of the ribbed panel, turn work without completing the full row, working back down the panel to create anatomical curves.
Pattern Instructions
Section 1: Front Bodice Panel
The front panel is worked horizontally from side seam to side seam in vertical rows of slip-stitch ribbing.
- Row 1: Ch 125, working in the second ch from hook, 1 sl st in each ch across, turn. (124 sl st)
- Row 2 (RS): Ch 1, working in blo, 1 sl st in each st across, turn. (124 sl st)
- Rows 3 through 48 (52, 56, 60, 64, 68): Rep Row 2, maintaining consistent tension. (124 sl st per row)
✅ Checkpoint: Measure the width of your panel across the ribbed rows. It should match half of your desired bust circumference with slight negative ease for a fitted look.
Section 2: Shaping the Armholes and Neckline
- Row 49 (Armhole Split): Work blo sl st across first 85 sts, turn leaving remaining sts unworked for armhole opening. (85 sl st)
- Row 50: Ch 1, 1 blo sl st in each st across, turn. (85 sl st)
- Rows 51–56: Rep Row 50. (85 sl st)
- Fasten off yarn, leaving a 12-inch tail for seaming. Reattach yarn at the opposite shoulder edge to work the back panel neckline mirror image.
Section 3: Back Bodice Panel
Work identical to the front panel (Sections 1 and 2) to ensure a symmetrical fit across the shoulders and back.
Section 4: Mock Neck Collar
- Rnd 1: With front and back panels joined at shoulder seams using mattress stitch, reattach yarn at left shoulder seam. Work evenly spaced slip stitches around the entire neck opening, join with sl st to first st. (72 sl st)
- Rnd 2: Ch 1, working in blo, 1 sl st in each st around, join. (72 sl st)
- Rnds 3–8: Rep Rnd 2 to build a structured 1.25-inch mock neck height. (72 sl st)
- Fasten off and weave in all ends securely.
Section 5: Final Assembly & Finishing
- Block both panels and the assembled collar lightly with steam or wet blocking, pinning to final measurements.
- Seam side edges from the bottom hem up to the base of the armhole using an invisible mattress stitch.
- Weave in any remaining tails on the wrong side.
Size Customization Tips
- To Adjust Length: Add or subtract chains at the beginning of Row 1 of the front and back panels. Each 10 chains equals approximately 1.5 inches of vertical length.
- To Adjust Width/Bust Ease: Work more or fewer total rows before shaping the armholes. Each set of 4 rows adds approximately 0.75 inches of horizontal stretch width.
Care Instructions
- Hand wash gently in cool water using a mild wool-safe detergent.
- Do not wring or twist the fabric; gently press out excess water in a clean towel.
- Dry flat in shade, reshaping gently to original measurements.
- Do not iron directly; use steam cautiously if blocking adjustments are needed.
Closing
Thank you for creating along with this Chic Mock Neck Ribbed Sleeveless Top Free Sleeveless Top Pattern! I hope styling this piece brings as much joy to your handmade wardrobe as designing it brought to mine. Be sure to share your finished top on social media by tagging @dreket and using #ChicMockNeckTop, pin this post to your favorite crochet boards on Pinterest for easy future access, and leave a comment below letting me know which colorway you chose!