
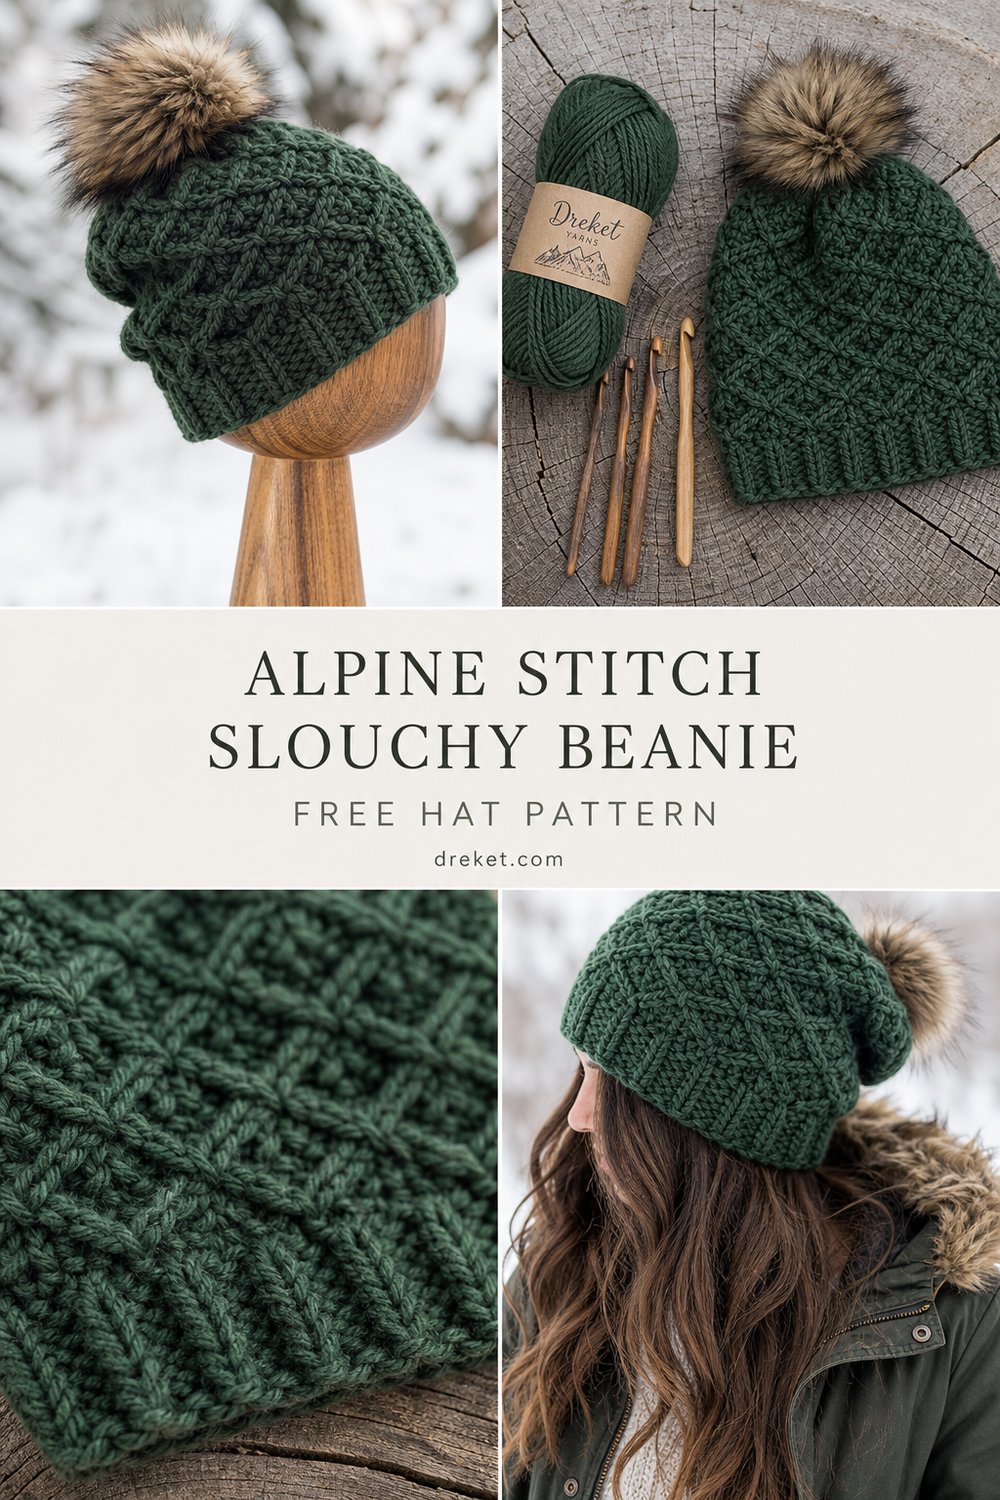
There is nothing quite like pulling on a tactile, wool-rich hat on a crisp snowy morning to keep the winter chill completely at bay. Crafted with rich, interlocking textures and finished with an oversized faux-fur pompom, this piece brings effortless alpine style to your everyday cold-weather wardrobe.
Warm Alpine Stitch Slouchy Beanie Free Hat Pattern
Quick Facts
- Stitches used: Foundation Single Crochet, Single Crochet, Front Post Double Crochet, Alpine Stitch (interlocking FPdc and sc rows)
- Size fit: Adult Standard (fits heads 21″–23″ / 53–58 cm circumference)
- Estimated hours to complete: 4 to 6 hours
- Gift-appeal framing: A luxurious, boutique-quality handmade gift that works up quickly for friends, family, or holiday markets.
Easy-to-follow sizing customization tips are included later in this post so you can adjust the fit for any head size.
What Makes This Warm Alpine Stitch Slouchy Beanie Special
This beanie achieves its signature look through the stunning Alpine Stitch, a textured crochet pattern created by working alternating rows of single crochet and descending Front Post Double Crochets (FPdc) that lock over the stitches of the rows below. This technique produces dense, raised diamond-shaped ridges with incredible depth and warmth, perfectly mimicking a knit-like alpine texture. Built with a snug ribbed folded brim and a relaxed, slouchy crown, it balances structure and comfort while keeping the biting wind entirely out.
Skill Level
- Intermediate
- Comfortable working in the round
- Familiarity with post stitches (FPdc)
- Ability to read stitch placement across textured rows
💡 Designer Tip: If you have never worked post stitches before, practice a small swatch of the alpine stitch first to get comfortable finding the post two rows below.
Finished Measurements
| Measurement | Inches | Centimeters |
|---|---|---|
| Hat Circumference (unstretched) | 20 inches | 51 cm |
| Brim Depth (folded) | 2.5 inches | 6.5 cm |
| Total Height (crown to brim) | 11 inches | 28 cm |
Materials You Will Need
- Yarn: Worsted weight (Medium #4) wool or wool-blend yarn
- Hook: US H/8 (5.0 mm) crochet hook (or size needed to obtain gauge)
- Notions: Tapestry needle for weaving ends, stitch markers, 1x oversized fluffy faux-fur pompom with snap or cord tie
| Color Name | Yarn Weight / Type | Yardage Needed |
|---|---|---|
| Forest Green | Worsted Weight / 100% Wool | 210 yards (192 meters) |
Yarn Suggestions
| Brand & Line Name | Yarn Weight | Yardage per Skein | Notes |
|---|---|---|---|
| Lion Brand Wool-Ease | Worsted (#4) | 197 yds / 180 m per skein | Excellent stitch definition, durable wool-acrylic blend. (Requires 2 skeins) |
| Knit Picks Wool of the Andes Worsted | Worsted (#4) | 110 yds / 100 m per skein | 100% Peruvian wool for maximum warmth and rich alpine texture. (Requires 2 skeins) |
| Caron Simply Soft | Aran / Worsted (#4) | 315 yds / 288 m per skein | A budget-friendly acrylic option with lovely drape. (Requires 1 skein) |
⚠️ Note: Avoid extremely slippery novelty yarns or novelty eyelash yarns for this pattern, as they will obscure the intricate raised texture of the alpine stitches.
Gauge
- Stitch Gauge: 16 sts and 12 rows = 4 inches (10 cm) in Alpine Stitch pattern using a 5.0 mm hook.
| Measurement Type | Stitches / Rows | Imperial | Metric |
|---|---|---|---|
| Stitch Gauge | 16 sts | 4 inches | 10 cm |
| Row Gauge | 12 rows | 4 inches | 10 cm |
⚠️ Note: Be sure to check your gauge before starting. Adjust your hook size up if your stitches are too tight, or down if your fabric is too loose.
Abbreviations
| Abbreviation | Full Term |
|---|---|
| ch | chain |
| sl st | slip stitch |
| sc | single crochet |
| dc | double crochet |
| FPdc | front post double crochet |
| st(s) | stitch(es) |
| rnd(s) | round(s) |
| rep | repeat |
| RS | right side |
| WS | wrong side |
Special Stitches Explained
- Front Post Double Crochet (FPdc): Yarn over, insert hook from the front to the back to the front around the post of the indicated stitch two rows below, yarn over, pull up a loop, (yarn over, draw through 2 loops) twice.
- Alpine Stitch Pattern Sequence:
- Row (or Rnd) A (WS): Work 1 sc in each st around.
- Row (or Rnd) B (RS): *1 dc in next st, 1 FPdc around the dc directly two rows below the current working row; rep from * around.
- Row (or Rnd) C (RS): *1 FPdc around the dc directly two rows below, 1 dc in next st; rep from * around.
Pattern Instructions
Section 1: The Ribbed Brim
Working in rows to create a horizontal ribbed band that will be seamed into a loop.
– Row 1: Ch 10, working in the back bumps of the foundation chain, sc in 2nd ch from hook and in each ch across, turn. (9 sc)
– Row 2: Ch 1 (does not count as st here and throughout), working in back loops only (BLO), sc in each st across, turn. (9 sc)
– Rows 3–72: Rep Row 2. (9 sc)
– Assembly: Bring the first and last rows together, working through both thicknesses with slip stitches across to join into a solid ribbed band. Do not fasten off; rotate your work to begin working along the edge of the brim.
Section 2: Body of the Beanie (Alpine Stitch Foundation)
- Rnd 1 (Setup Rnd): Ch 1, evenly work 72 sc around the top edge of the ribbed brim, join with a sl st to the first sc. (72 sc)
- Rnd 2 (WS): Ch 1, sc in each st around, join with a sl st to first sc. (72 sc)
- Rnd 3 (RS): Ch 1, dc in first st, FPdc around the sc two rows below (Rnd 1); rep from * around, join with a sl st to first dc. (36 dc, 36 FPdc)
- Rnd 4: Ch 1, sc in each st around, join with a sl st to first sc. (72 sc)
- Rnd 5: Ch 1, FPdc around the dc two rows below (Rnd 3), dc in next st; rep from * around, join with a sl st to first FPdc. (36 FPdc, 36 dc)
- Rnd 6: Rep Rnd 4. (72 sc)
✅ Checkpoint: At this stage, your alpine stitch diamonds should be clearly forming with a crisp, raised texture. Verify you have exactly 72 stitches around.
- Rnds 7–22: Rep Rnds 3–6 four more times, maintaining the alternating alpine stitch sequence. (72 sts)
Section 3: Crown Decreases & Closing
- Rnd 23: Ch 1, sc in next 6 sts, sc2tog; rep from * around, join with a sl st. (63 sc)
- Rnd 24: Ch 1, sc in next 5 sts, sc2tog; rep from * around, join with a sl st. (54 sc)
- Rnd 25: Ch 1, sc in next 4 sts, sc2tog; rep from * around, join with a sl st. (45 sc)
- Rnd 26: Ch 1, sc in next 3 sts, sc2tog; rep from * around, join with a sl st. (36 sc)
✅ Checkpoint: Your hat should now be tapering nicely into a slouchy crown shape with (36 sts) remaining.
- Rnd 27: Ch 1, sc2tog around, join with a sl st. (18 sc)
- Fasten off, leaving a long 12-inch tail. Thread the tail onto a tapestry needle, weave it in and out of the remaining 18 stitches, and pull tightly to cinch the top of the crown securely closed. Secure and weave in all loose ends.
Section 4: Finishing Touches
- Fold the 2.5-inch brim upward on the right side of the hat.
- Attach your oversized faux-fur pompom securely to the top cinched crown using its cord or snap through the interior stitches.
Size Customization Tips
To adjust the fit of your beanie, simply modify the initial brim length:
– To make it smaller (Child/Teen): Work fewer rows in Section 1 (e.g., 60–64 rows total), ensuring your total stitch count for Rnd 1 of the body is a multiple of 4.
– To make it larger (XL Adult): Work additional rows in Section 1 (e.g., 80 rows total), ensuring your body setup round is a multiple of 4 to keep the alpine stitch repeat accurate.
Care Instructions
- Remove the faux-fur pompom before washing.
- Hand wash gently in cool water using a mild wool detergent.
- Do not wring or twist. Lay flat on a clean towel, reshape to original dimensions, and allow to air dry completely away from direct heat sources.
Warm Alpine Stitch Slouchy Beanie Free Hat Pattern
Thank you so much for joining me to make this cozy winter staple! I would love to see your finished beanies. Be sure to snap a picture, tag me on social media, save this project to your favorite Pinterest boards, and leave a comment below letting me know what color yarn you chose for yours!