
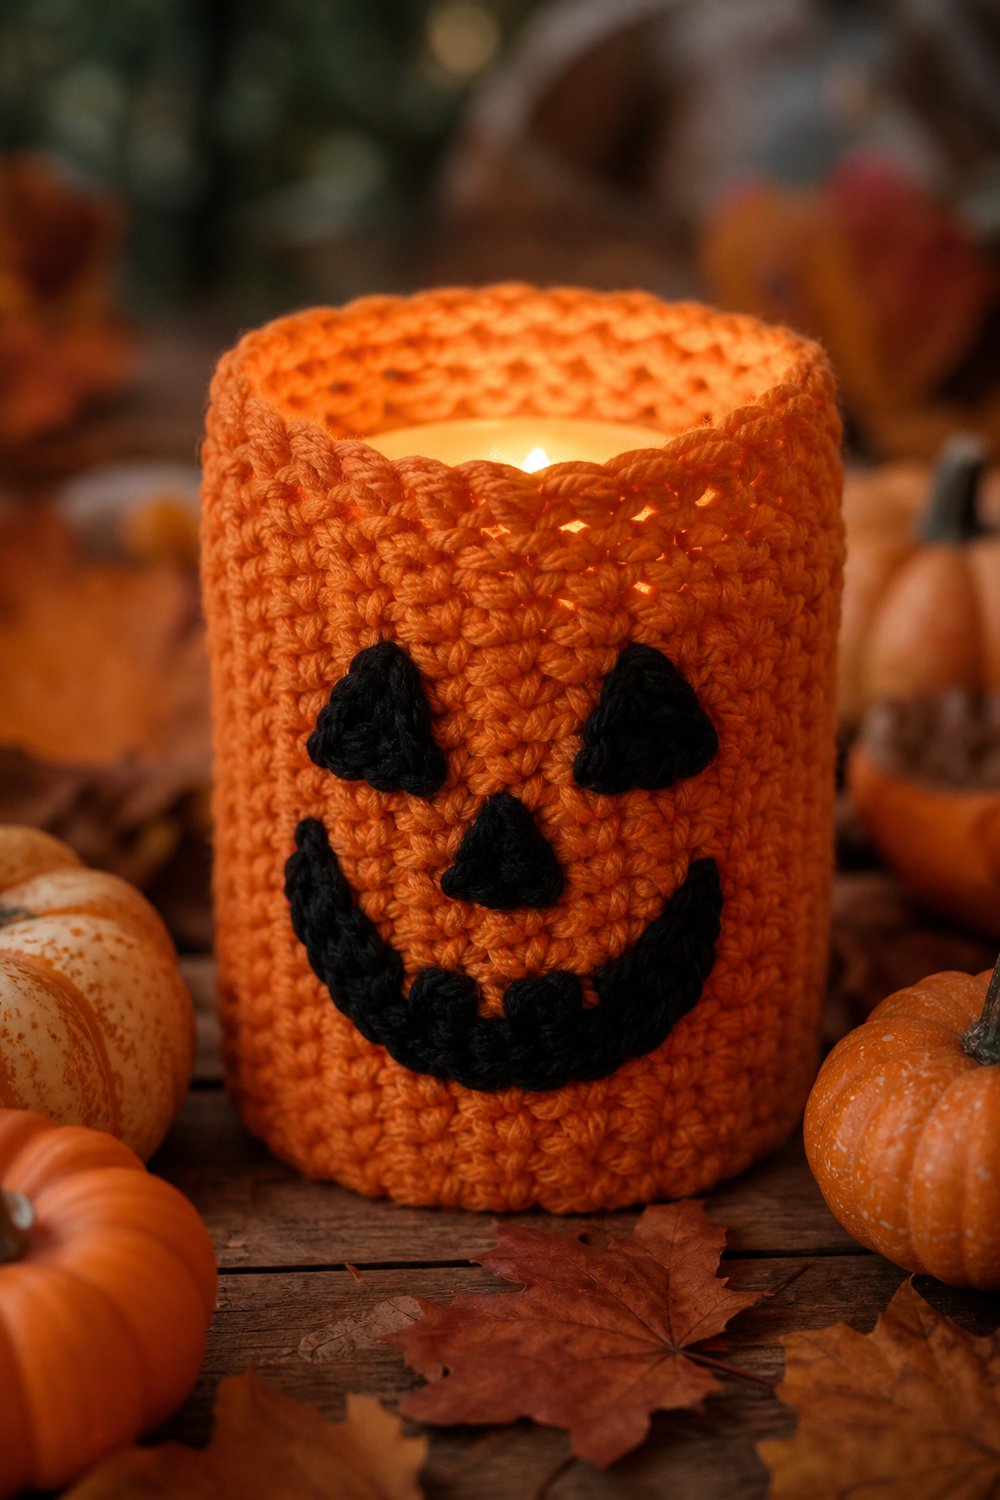
Bring the magic of the harvest season into your home with a cozy, handcrafted accessory designed to hug your favorite battery pillar candles. As the soft autumn evenings settle in, this textured wrap casts a warm, flickering glow across your rustic table amidst scattered mini pumpkins and dried leaves.
Flickering Pumpkin Candle Wrap Free Crochet Pattern
Quick Facts: This project utilizes textured front-post stitches and simple surface slip stitches to create a friendly jack-o-lantern face. It is designed to fit a standard 3-inch diameter battery pillar candle, taking approximately 2 to 3 hours to complete. It makes a wonderful, quick seasonal hostess gift or autumn table decor piece.
Sizing customization tips are included later in this article so you can easily adapt this wrap for wider candles or jars.
What Makes This Flickering Pumpkin Candle Wrap Special
This design achieves its tactile, three-dimensional relief through a clever combination of front-post double crochets and dense single crochet foundations. Instead of flat colorwork, the jack-o-lantern face is integrated using surface slip-stitching and post-stitch shaping that pops off the fabric. The wrap is worked flat in rows with a seamless final join, ensuring a snug fit around your candle without adding bulk at the base.
Skill Level
- Intermediate (Comfortable working in rows, basic post stitches, and simple surface embellishments)
- Required Skills:
- Working in standard rows and counting stitches accurately.
- Front-Post Double Crochet (FPdc).
- Basic surface slip stitching (sl st across fabric).
- Seaming edges with a yarn needle.
💡 Designer Tip: If you are new to post stitches, take your time on the first row of texture; keeping your tension relaxed will help your hook glide smoothly through the post loops.
Finished Measurements
| Size | Fits Candle Diameter | Circumference | Height |
|---|---|---|---|
| Standard Pillar | 3 inches (7.6 cm) | 10 inches (25.4 cm) | 4.5 inches (11.4 cm) |
| Wide Pillar | 4 inches (10.2 cm) | 13 inches (33.0 cm) | 4.5 inches (11.4 cm) |
Materials You Will Need
- Yarn Weight: Worsted weight (Category 4)
- Crochet Hook: US H/8 (5.0 mm)
- Additional Tools: Tapestry needle for weaving ends, locking stitch markers, standard 3-inch battery pillar candle.
| Color Name | Color Description | Yarn Weight | Yardage Needed |
|---|---|---|---|
| Worsted-Orange | Soft Autumn Pumpkin Orange | Worsted (Cat 4) | 45 yds (41 m) |
| Charcoal-Black | Deep Charcoal for Facial Features | Worsted (Cat 4) | 5 yds (4.5 m) |
Yarn Suggestions
| Brand & Line Name | Yarn Weight | Yardage per Skein | Notes |
|---|---|---|---|
| Lion Brand Vanna’s Choice | Worsted (Cat 4) | 170 yds (156 m) / 100g | Excellent stitch definition for post textures. |
| Carissa Simply Soft | Worsted (Cat 4) | 315 yds (288 m) | Provides a soft sheen; handle post stitches gently. |
| Red Heart Super Saver | Worsted (Cat 4) | 364 yds (333 m) | Durable, highly accessible, holds its shape well. |
⚠️ Note: Avoid novelty eyelash yarns or overly fluffy roving yarns for this project, as they obscure the textured stitch relief and make the jack-o-lantern face difficult to define.
Gauge
| Measurement Type | Stitch / Row Count | Over Area |
|---|---|---|
| Pattern Gauge | 14 sts x 12 rows | 4 x 4 inches (10 x 10 cm) in textured pattern |
⚠️ Note: Always check your gauge before beginning to ensure your finished wrap fits your pillar candle snugly without stretching or buckling.
Abbreviations
| Abbreviation | Full Term |
|---|---|
| ch | chain |
| sc | single crochet |
| hdc | half double crochet |
| dc | double crochet |
| FPdc | front-post double crochet |
| sl st | slip stitch |
| st(s) | stitch(es) |
| rep | repeat |
| RS | right side |
| WS | wrong side |
Special Stitches Explained
- Front-Post Double Crochet (FPdc): Yo, insert hook from front to back to front around the post of the indicated st below, yo, pull up a loop, [yo, pull through 2 loops] twice.
- Surface Slip Stitch (Surface sl st): With working yarn held to the WS of the fabric, insert hook from RS to WS through the target st, yo with working yarn on WS, pull loop through fabric and straight through the loop on your hook. Move to the next designated st and repeat.
Pattern Instructions
Section 1: Main Wrap Body (Worsted-Orange)
Row 1 (RS): Ch 36, sc in 2nd ch from hook and in each ch across, turn. (35 sc)
Row 2 (WS): Ch 1, sc in first st, hdc in next st, sc in next st; rep from * across, turn. (35 sts)*
Row 3: Ch 2 (counts as hdc here and throughout), dc in next st, FPdc around the post of the st 2 rows below (skipping the stitch directly behind the post), dc in next 2 sts; rep from * to last 3 sts, FPdc around post 2 rows below, dc in last 2 sts, turn. (35 sts)*
Row 4: Ch 1, sc in each st across, turn. (35 sc)
Row 5: Ch 2, dc in next st, dc in next st, FPdc around the post of the st 2 rows below, dc in next st; rep from * to last 3 sts, dc in last 3 sts, turn. (35 sts)*
Row 6: Ch 1, sc in each st across, turn. (35 sc)
Rows 7–12: Repeat Rows 3–6 sequentially one and a half times.
✅ Checkpoint: At the end of Row 12, your piece should measure approximately 4.5 inches (11.4 cm) in height and 10 inches (25.4 cm) in width. Verify you have 35 sts across the final row. Fasten off Worsted-Orange, leaving a 12-inch tail for seaming.
Section 2: Jack-O-Lantern Facial Features (Charcoal-Black)
Using your tapestry needle and Charcoal-Black yarn, or by working surface slip stitches directly onto the RS of the wrap centered across Rows 5–9:
- Left Eye: Surface sl st a small triangle shape spanning 2 sts wide across Row 7 and Row 8.
- Right Eye: Surface sl st a matching triangle shape symmetrical to the left eye, leaving 3 unworked sts between the eyes.
- Smile: Surface sl st a gentle curved smile spanning 7 sts wide across Row 5 and Row 6, adding small vertical tick marks for teeth if desired.
Section 3: Assembly and Finishing
- Wrap the finished piece around your battery pillar candle with the RS facing outward.
- Align the short starting edge with the final row edge.
- Using the 12-inch tail of Worsted-Orange and a tapestry needle, whipstitch the two short ends together securely.
- Weave in all remaining loose ends on the WS of the fabric.
Size Customization Tips
To adjust this wrap for a wider candle or a glass jar, you can easily modify your foundation chain.
– Sizing Up: Chain in multiples of 3 + 2 (e.g., ch 44 for a 13-inch circumference wide pillar). This adds approximately 3 inches (7.6 cm) to the finished wrap width.
– Sizing Down: Chain in multiples of 3 + 2 minus 9 stitches (e.g., ch 26 for a smaller tea light jar).
Care Instructions
Spot clean your Flickering Pumpkin Candle Wrap with a damp cloth and mild soap as needed. Do not submerge fully in water if surface embroidery yarns are prone to bleeding. Lay flat to dry away from direct heat. Always use with battery-operated LED pillar candles—never use with an open flame.
Closing
Thank you so much for crafting along with me on this Flickering Pumpkin Candle Wrap Free Crochet Pattern! I hope this cozy little project brings warmth and handmade charm to your autumn home decor.
If you make one, I would love to see it! Please share your photos on social media, tag me, save this project to your Pinterest boards for later, and leave a comment below to let me know how your cute little pumpkin turned out. Happy crocheting!