
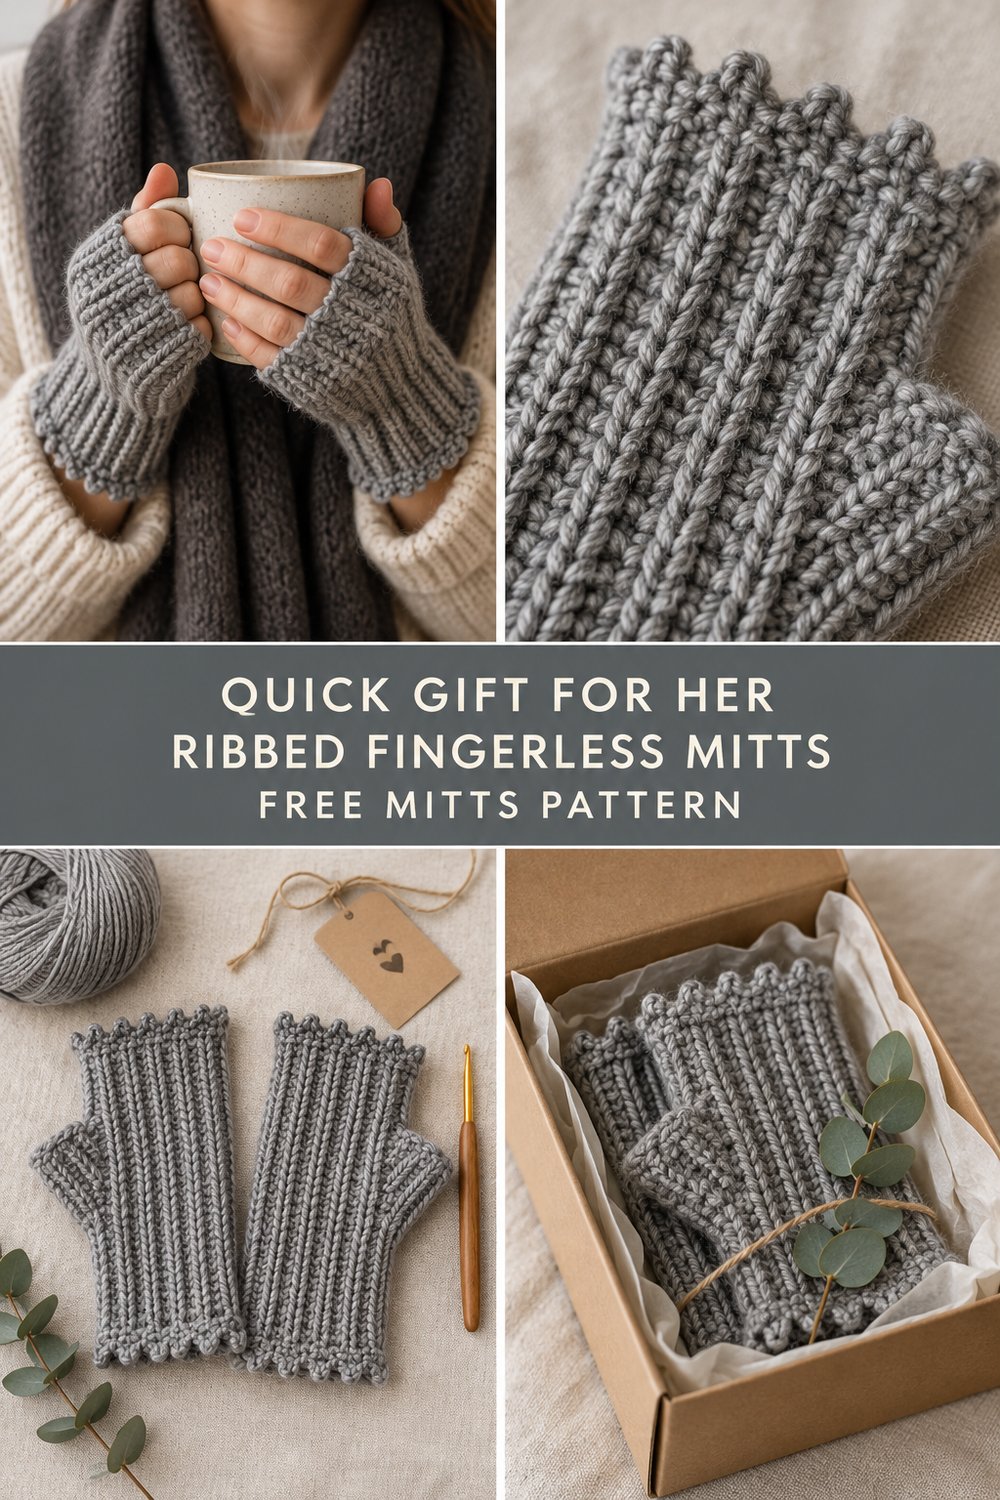
There is something deeply satisfying about wrapping freezing hands around a steaming ceramic mug on a crisp autumn morning, especially when those hands are tucked into a handmade layer that actually fits. Skip the generic candle set this year and gift the woman in your life a practical, tactile accessory she will reach for daily, whether she is typing away at a cold desk or running early-morning errands. These ribbed fingerless mitts work up in a single quiet afternoon, combining thoughtful shaping with a luxurious drape that looks anything but rushed.
Quick Crochet Gift for Her — Free Pattern She’ll Actually Use
Quick Facts
- Stitches Used: Chain (ch), single crochet (sc), front post double crochet (fpdc), back post double crochet (bpdc), slip stitch (sl st), picot stitch
- Size Fit: Women’s Small, Medium, and Large (Instructions cover Medium primarily with S/L adjustments)
- Estimated Time to Complete: 3 to 4 hours total
- Gift Appeal: High-end boutique look with beginner-friendly construction; pairs effortlessly with a kraft gift box, tissue paper, and a sprig of fresh eucalyptus
💡 Designer Tip: If you are gifting these, tuck them into an open kraft box with a small handwritten tag tied with twine for an instant presentation that feels entirely bespoke.
Clear sizing customization tips are included later in this guide so you can tailor the fit perfectly to her hands.
What Makes This Quick Crochet Gift for Her Special
This design strikes the rare balance between sophisticated texture and approachable construction. The magic lies in the tactile details: deep, stretchy front-post and back-post ribbing that hugs the wrist without pinching, a structured thumb gusset built seamlessly into the side so the mitts never pull sideways across the palm, and a delicate, narrow picot cuff that adds just a whisper of feminine detail along the edge. Working with a smooth merino wool gives you crisp, three-dimensional stitch definition that showcases every single post stitch like a high-end department store purchase.
Skill Level
- Intermediate: Comfortable working in the round, identifying post stitches, and following basic shaping.
- Required Skills:
- Working in the round (joining with a slip stitch or working in continuous spirals)
- Front-post and back-post double crochet ribbing
- Increasing stitches for a thumb gusset
- Skipping stitches to create a thumb opening
- Simple picot edging
⚠️ Note: If you are a confident beginner who has mastered basic post stitches, you will find this pattern entirely manageable thanks to the step-by-step guidance below.
Finished Measurements
| Size | Palm Circumference | Total Length | Cuff Width |
|---|---|---|---|
| Small | 6.5 inches / 16.5 cm | 6.5 inches / 16.5 cm | 2.5 inches / 6.5 cm |
| Medium | 7.5 inches / 19.0 cm | 7.0 inches / 17.5 cm | 3.0 inches / 7.5 cm |
| Large | 8.5 inches / 21.5 cm | 7.5 inches / 19.0 cm | 3.5 inches / 9.0 cm |
Materials You Will Need
| Colorway / Shade | Yarn Weight & Fiber | Yardage Needed |
|---|---|---|
| Soft Heather Grey | DK / Sport Weight (100% Superwash Merino Wool) | 160 – 200 yds / 145 – 185 m |
- Hook: 4.0 mm (US G/6) crochet hook (or size needed to obtain gauge)
- Notions: Tapestry needle for weaving in ends, 2 stitch markers, measuring tape
Yarn Suggestions
| Brand & Line Name | Yarn Weight | Skein Yardage | Notes |
|---|---|---|---|
| Malabrigo Arroyo | DK (100% Superwash Merino) | 335 yds / 306 m per skein | Exceptional stitch definition; one skein makes a full pair with yarn to spare. |
| Knit Picks Swish DK | DK (100% Superwash Merino) | 123 yds / 112 m per skein | Soft, machine-washable merino that feels wonderful against bare skin. You will need 2 skeins. |
| Berroco Vintage DK | DK (50% Acrylic, 40% Wool, 10% Nylon) | 290 yds / 265 m per skein | A budget-friendly, durable alternative with great stretch and easy care. |
⚠️ Note: Avoid stiff 100% synthetic acrylic yarns that lack memory or drape, as they will prevent the ribbed cuff from snapping back into shape around the wrist.
Gauge
- Ribbing Gauge: 20 sts and 14 rows = 4 inches (10 cm) in fpdc/bpdc ribbing pattern using a 4.0 mm hook.
- Stockinette / Base Gauge: 18 sts and 20 rows = 4 inches (10 cm) in sc.
💡 Designer Tip: Always take the time to swatch your ribbing before starting. Because these mitts rely on negative ease to stay snug on the hand, getting your stitch count per inch right ensures they won’t slide off or cut off circulation.
Abbreviations
| Abbreviation | Full Term |
|---|---|
| ch | Chain |
| sc | Single crochet |
| hdc | Half double crochet |
| dc | Double crochet |
| fpdc | Front post double crochet |
| bpdc | Back post double crochet |
| sl st | Slip stitch |
| st(s) | Stitch(es) |
| rep | Repeat |
| inc | Increase (work 2 sts into the same st) |
| sk | Skip |
| pm | Place marker |
| rm | Remove marker |
Special Stitches Explained
- Front Post Double Crochet (fpdc): Yarn over, insert hook from front to back to front around the post of the indicated stitch from the previous row, yarn over, pull up a loop, (yarn over, pull through 2 loops) twice.
- Back Post Double Crochet (bpdc): Yarn over, insert hook from back to front to back around the post of the indicated stitch from the previous row, yarn over, pull up a loop, (yarn over, pull through 2 loops) twice.
- Picot Stitch: Ch 3, insert hook into the back bump and front vertical loop of the first ch made, yarn over, pull through loop and pull through loop on hook (sl st made).
- Thumb Gusset Increase (M1-sc): Work 2 sc into the designated gusset stitch to expand the shaping for the thumb opening seamlessly.
Pattern Instructions
Section 1: The Cuff and Lower Hand
Working in joined rounds. Do not turn at the end of rounds unless specified; all rounds are worked with the right side facing.
- Round 1: Ch 32 (ensure chain is not twisted), join with sl st to first ch to form a ring. Ch 2 (does not count as st here and throughout), working into the back bumps of the foundation chain, work 1 hdc in each ch around. Join with sl st to top of first hdc. (32 hdc)
- Round 2: Ch 2, 1 fpdc around next st, 1 bpdc around next st; rep from * around. Join with sl st to first fpdc. (32 sts)*
- Rounds 3–5: Rep Round 2 three more times to establish the deep ribbed cuff. (32 sts)
✅ Checkpoint: At the end of Round 5, your cuff should measure roughly 1.5 inches in height and have a strong, elastic stretch when pulled gently.
Section 2: The Thumb Gusset
We will now transition out of the ribbing into the palm while simultaneously expanding stitches for the thumb gusset.
- Round 6: Ch 1, sc in first 14 sts, pm in next st, work 2 sc in next st (gusset inc), pm in second of these new sts, sc in remaining 16 sts. Join with sl st to first sc. (33 sc)
- Round 7: Ch 1, sc in each st to marker, work 2 sc in marked st (moving marker to the second new st), sc in each st around. Join with sl st. (34 sc)
- Rounds 8–11: Rep Round 7 four more times, increasing 1 st at the gusset marker every round. (38 sc including 7 gusset sts)
Section 3: Thumb Opening and Hand Body
- Round 12: Ch 1, sc in each st up to the first gusset marker, sk all gusset sts (remove markers), ch 6, skip the skipped gusset sts, sc in remaining sts to end of round. Join with sl st. (37 sts including 6 chs for the bridge)
- Round 13: Ch 1, sc in each sc and 1 sc in each of the 6 chs across the thumb bridge, sc to end. Join with sl st. (37 sc)
- Rounds 14–17: Ch 1, sc in each st around. Join with sl st. (37 sc)
- Round 18: Transition to top ribbing: Ch 2, 1 fpdc, 1 bpdc; rep from * around, adjusting by working one decrease if needed to match an even stitch count for the final edge. Join with sl st. (36 sts)*
Section 4: Picot Edge and Finishing
- Round 19: Ch 1, working a crab stitch (reverse single crochet) or standard sc edge: sc in next st, work picot stitch, sk next st; rep from * around. Join with sl st, fasten off, and weave in all ends securely using a tapestry needle. (18 picots)*
Repeat the entire process to create the second matching mitt.
Size Customization Tips
- To make it smaller (Size Small): Start with a foundation chain of 28 sts in Section 1, and work one fewer increase round in the thumb gusset section before creating the thumb bridge.
- To make it larger (Size Large): Start with a foundation chain of 36 sts in Section 1, and work two extra rounds of thumb gusset increases before jumping the thumb opening, adding an extra chain to the thumb bridge (ch 7 instead of ch 6).
Care Instructions
To keep your handmade merino wool mitts soft and prevent felting, hand wash gently in lukewarm water with a mild wool wash. Do not wring or twist. Lay flat on a clean towel, shape to original dimensions, and allow to air dry completely away from direct heat sources.
Closing
There is truly nothing quite like finishing a quick, beautiful project that gets worn right away. I hope this free pattern becomes your new favorite go-to when you need a thoughtful handmade gift in a pinch.
If you make a pair of these ribbed fingerless mitts, I would love to see them! Save this project to your Pinterest boards, tag your photos with #QuickCrochetGift and #FreeCrochetPattern on social media, and leave a comment below to let me know how your project turned out. Happy crocheting!