
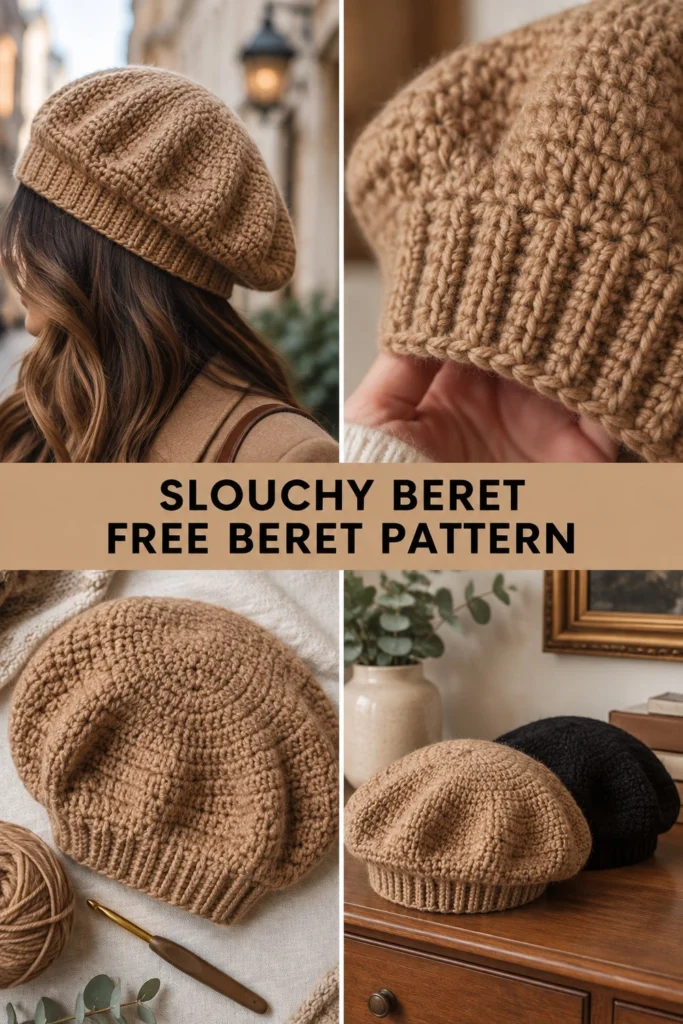
Add a touch of Parisian chic to your everyday outerwear with this slouchy crochet beret pattern! Worked from the flat round top down to a snug ribbed band, this classic accessory sits effortlessly on your head without slipping.
Slouchy Crochet Beret Free Pattern
Quick Facts
- Skill level: Intermediate
- Finished size: Adult (fits head circumference 21 to 23 inches / 53 to 58 cm)
- Yarn: Worsted weight (approx. 220 yards / 200 meters)
- Hook: US H/8 (5.0 mm) crochet hook
- Stitches used: Ch, sl st, hdc, hdc2tog, blo hdc, fpdc, bpdc
- Time to make: 4 to 6 hours
What Makes This Slouchy Beret Special
This beret relies on classic half double crochet circles to build the wide, flat crown, which then gently decreases to create the characteristic slouch. The brim finishes with a textured ribbed band worked directly from the body, ensuring the hat hugs the forehead securely while keeping the slouchy top soft and voluminous.
Skill Level
- Working in the round and joining with slip stitches
- Increasing and decreasing half double crochet stitches
- Working post stitches for ribbed brims
- Managing gauge to achieve the right drape
Don’t worry if you haven’t made a hat this way before—the steps below break down every round so you can follow along easily.
Finished Measurements
| Measurement | Inches | Centimeters |
|---|---|---|
| Crown Diameter | 10.5 in | 26.5 cm |
| Total Height | 8.5 in | 21.5 cm |
| Brim Circumference (unstretched) | 18 in | 46 cm |
Materials You Will Need
| Item | Details | Quantity |
|---|---|---|
| Yarn | Worsted weight wool or acrylic blend (Camel or Black) | 220 yds / 200 m |
| Crochet Hook | US H/8 (5.0 mm) | 1 |
| Notions | Tapestry needle, stitch markers, measuring tape | As needed |
Yarn Suggestions
| Yarn Line | Skein Yardage | Notes |
|---|---|---|
| Lion Brand Wool-Ease | 197 yds / 180 m per skein | Great stitch definition and warmth (buy 2 skeins) |
| Caron Simply Soft | 315 yds / 288 m per skein | Soft drape with a subtle sheen (buy 1 skein) |
| Patons Classic Wool Worsted | 210 yds / 192 m per skein | 100% wool for traditional warmth (buy 2 skeins) |
Gauge
14 hdc x 11 rows = 4 x 4 inches (10 x 10 cm) using a 5.0 mm hook.
Rnds 1 to 5 of the crown measure approx. 4.5 inches (11.5 cm) across.
Abbreviations
- ch – chain
- sl st – slip stitch
- hdc – half double crochet
- hdc2tog – half double crochet 2 stitches together (decrease)
- blo hdc – half double crochet in the back loop only
- fpdc – front post double crochet
- bpdc – back post double crochet
- st(s) – stitch(es)
- rep – repeat
- rnd(s) – round(s)
(UK terms note: sc = dc, hdc = htr, dc = tr)
Special Stitches Explained
- hdc2tog (Half double crochet 2 together): Yarn over, insert hook into next stitch, yarn over and pull up a loop. Yarn over, insert hook into following stitch, yarn over and pull up a loop. Yarn over and draw through all 5 loops on the hook.
- Post Stitches (fpdc / bpdc): Yarn over, insert hook around the post of the indicated stitch from front to back to front (fpdc) or back to front to back (bpdc), yarn over, pull up a loop, complete as a standard double crochet.
Pattern Instructions
Pattern Notes:
* The starting chain-2 at the beginning of a round does not count as a stitch unless stated otherwise.
* Join each round with a slip stitch to the first true hdc of the round.
* Use a stitch marker in the first stitch of each round to keep your place.
Section 1: The Crown
Rnd 1: Start with a magic ring, ch 2, work 10 hdc into the ring, join with sl st to first hdc (10 hdc)
Rnd 2: Ch 2, work 2 hdc in each st around, join (20 hdc)
Rnd 3: Ch 2, 1 hdc in next st, 2 hdc in next st rep from * around, join (30 hdc)
Rnd 4: Ch 2, 1 hdc in each of next 2 sts, 2 hdc in next st rep from * around, join (40 hdc)
Rnd 5: Ch 2, 1 hdc in each of next 3 sts, 2 hdc in next st rep from * around, join (50 hdc)
Rnd 6: Ch 2, 1 hdc in each of next 4 sts, 2 hdc in next st rep from * around, join (60 hdc)
Rnd 7: Ch 2, 1 hdc in each of next 5 sts, 2 hdc in next st rep from * around, join (70 hdc)
Rnd 8: Ch 2, 1 hdc in each of next 6 sts, 2 hdc in next st rep from * around, join (80 hdc)
Rnd 9: Ch 2, 1 hdc in each of next 7 sts, 2 hdc in next st rep from * around, join (90 hdc)
Section 2: The Slouch Body
Rnd 10: Ch 2, hdc in each st around, join (90 hdc)
Rnd 11: Ch 2, hdc in each st around, join (90 hdc)
Rnd 12: Ch 2, 1 hdc in each of next 7 sts, hdc2tog rep from * around, join (80 hdc)
Rnd 13: Ch 2, hdc in each st around, join (80 hdc)
Rnd 14: Ch 2, 1 hdc in each of next 6 sts, hdc2tog rep from * around, join (70 hdc)
Rnd 15: Ch 2, hdc in each st around, join (70 hdc)
Rnd 16: Ch 2, 1 hdc in each of next 5 sts, hdc2tog rep from * around, join (60 hdc)
Section 3: The Ribbed Band
Rnd 17: Ch 2, work blo hdc in each st around, join (60 blo hdc)
Rnd 18: Ch 2 (counts as first st option or skip and start post sts), work 1 fpdc around next st, work 1 bpdc around next st rep from * around, join with sl st to top of first st (60 sts)
Rnds 19 to 21: Rep Rnd 18 for 3 more rounds.
Fasten off, leaving a 10-inch (25 cm) tail.
Finishing
- Weave in all loose ends securely on the wrong side using your tapestry needle.
- Block lightly with steam if desired to relax the stitches and define the ribbing, taking care not to flatten the slouchy body.
Size Customization Tips
To adjust the fit for smaller or larger heads, modify the crown diameter before starting the body decreases. Each increase round adds about 10 stitches to the total circumference. Ensure that when you reach the final body decrease round, your stitch count divides evenly by 2 so the alternating fpdc/bpdc ribbing pattern aligns correctly.
Care Instructions
- Hand wash in cool water with mild wool detergent.
- Do not bleach or wring.
- Lay flat on a towel in the shade to dry, shaping the beret into a flat circle while damp.
- Do not iron.
FAQ
Can I use cotton yarn instead of wool?
Yes, but keep in mind that 100% cotton has less bounce and memory than wool or acrylic, so the ribbed band may stretch out faster over time. A wool blend offers the best drape and elasticity for this style.
How do I make the beret slouchier?
To add more slouch, work 2 to 3 extra straight rounds of half double crochet (repeating Rnd 10) before beginning the decrease sequence in Section 2.
Is this pattern suitable for complete beginners?
While the stitches themselves are basic, working in the round with regular decreases requires counting your stitches carefully. If you are brand new to crochet, practicing a flat circle first will make this project much easier!