
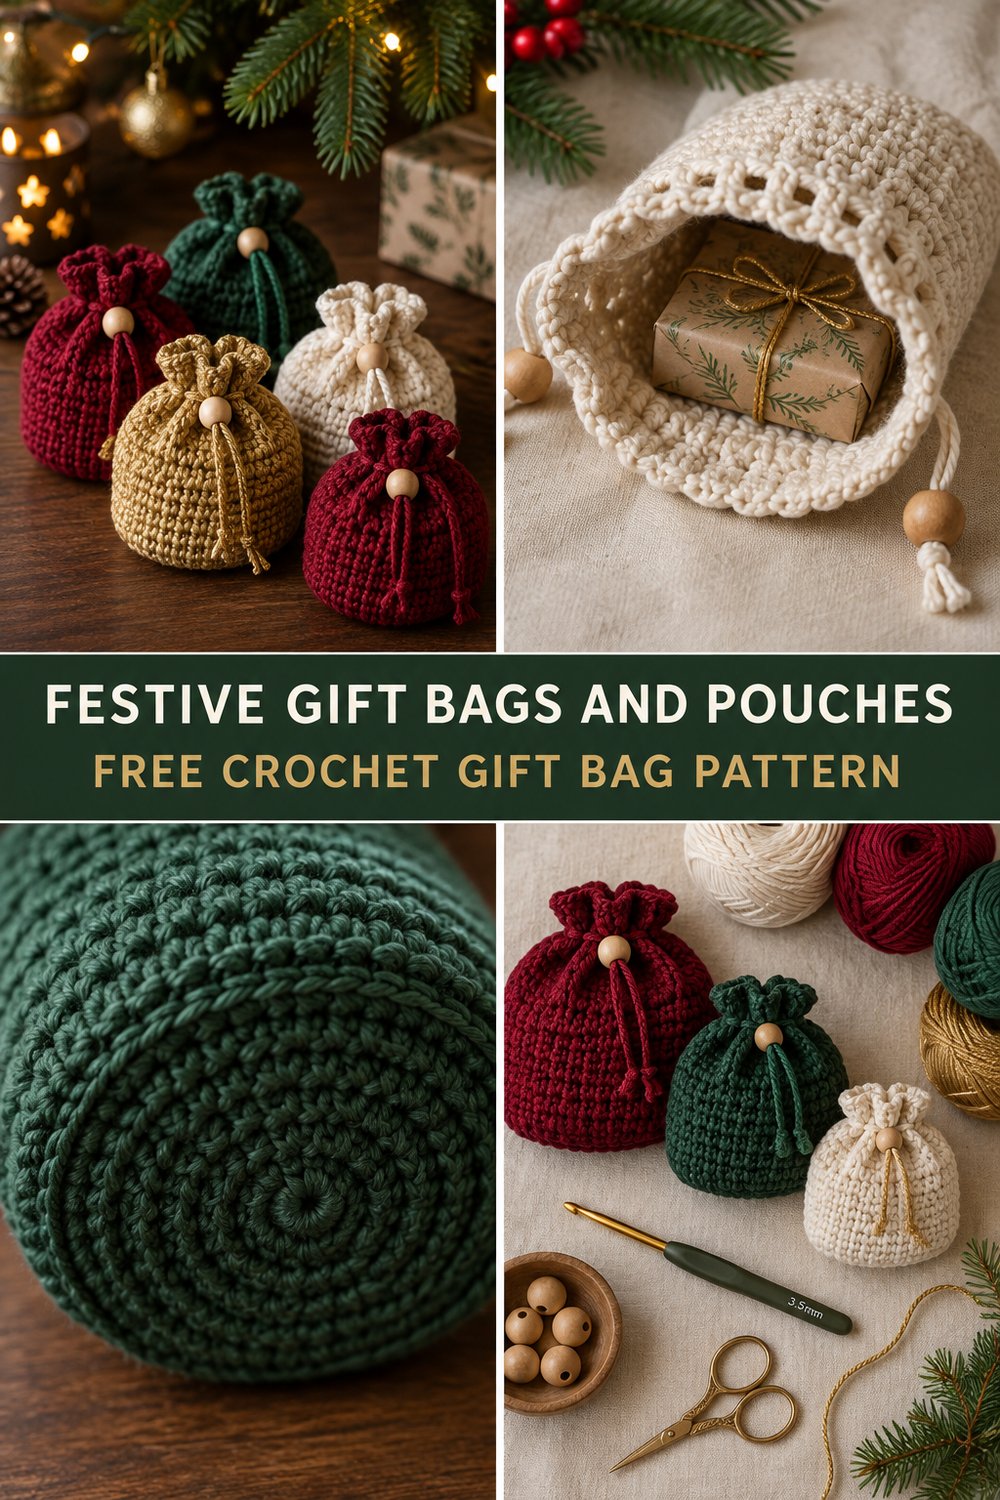
Infuse your holiday giving with handmade charm and sustainability this year! Imagine presenting gifts nestled in beautifully crafted, reusable crochet gift bags and pouches, each one a thoughtful treasure in itself. These quick-to-make drawstring bags are perfect for everything from small trinkets to festive treats, adding a touch of cozy elegance under the tree.
Festive Crochet Gift Bags & Pouches Free Tutorial
Quick Facts
This versatile crochet gift bag pattern uses basic stitches like single crochet and half double crochet to create sturdy, shape-holding pouches. Designed to be a reusable gift wrap, these bags are perfect for gifting to anyone and everyone. Each bag can be completed in approximately 1-3 hours, making them ideal for last-minute holiday crafting or batch making.
💡 Designer Tip: You’ll find tips on how to customize the size of your bags later in the pattern!
What Makes This Festive Crochet Gift Bag Special
These drawstring crochet bags stand out thanks to a clever combination of techniques that ensure both beauty and functionality. The journey begins with a sturdy flat circular base, worked in continuous rounds of single crochet, providing a firm foundation for the bag. The sides are then worked using back loop only single crochet (blo sc), which creates a subtly ribbed texture and helps the bag stand upright with excellent structure. This technique gives the bag its signature firm sidewall, as seen in the product image. The eyelet row, created with chain spaces, is perfectly positioned for the drawstring, allowing for a smooth and secure closure. This elegant construction ensures your christmas gift bag crochet project will be both durable and delightful.
Skill Level
Easy.
* Magic Ring (or adjustable ring)
* Single Crochet (sc)
* Half Double Crochet (hdc)
* Chain (ch)
* Slip Stitch (sl st)
* Working in continuous rounds
* Working in back loop only (blo)
This pattern is suitable for adventurous beginners and experienced crocheters alike.
Finished Measurements
| Size | Base Diameter (in) | Base Diameter (cm) | Height (in) | Height (cm) |
|---|---|---|---|---|
| Small | 3 | 7.5 | 4 | 10 |
| Medium | 4 | 10 | 5.5 | 14 |
| Large | 5 | 12.5 | 7 | 18 |
Materials You Will Need
- Worsted weight (Category 4) cotton or cotton blend yarn.
- 3.5mm (E) crochet hook
- Stitch marker
- Yarn needle
- Scissors
- Small wooden beads (approx. 10-15mm diameter, with a hole large enough for your cord)
- Cord for drawstring (e.g., gold metallic cord, twisted cotton cord, or a crocheted chain)
| Color | Small (yds/m) | Medium (yds/m) | Large (yds/m) |
|---|---|---|---|
| Cranberry | 35 / 32 | 60 / 55 | 90 / 82 |
| Forest Green | 35 / 32 | 60 / 55 | 90 / 82 |
| Cream | 35 / 32 | 60 / 55 | 90 / 82 |
| Gold | 35 / 32 | 60 / 55 | 90 / 82 |
Yarn Suggestions
I love using cotton or cotton blend yarns for these pouches as they provide excellent stitch definition and a lovely sturdy finish.
| Brand/Line | Weight | Yardage per Skein | Notes |
|---|---|---|---|
| WeCrochet Dishie | Worsted (4) | 190 yds / 174 m | 100% Cotton, great stitch definition, wide color range |
| Lion Brand 24/7 Cotton | Worsted (4) | 186 yds / 170 m | Mercerized cotton, very sturdy, slight sheen |
| Paintbox Yarns Cotton DK | DK (3) | 137 yds / 125 m | (Hold double for worsted weight) Soft, matte finish |
⚠️ Note: Avoid superwash wool or very stretchy acrylic yarns for this project. They may not hold the defined shape as well, particularly for the base and side walls.
Gauge
Your gauge should be consistent for a firm fabric that holds its shape well.
| Stitch Count (4 in / 10 cm) | Row Count (4 in / 10 cm) |
|---|---|
| 16 sc | 18 rows |
💡 Designer Tip: Always make a gauge swatch! Adjust your hook size up or down as needed to meet the gauge. A consistent gauge is crucial for the bags to hold their intended shape.
Abbreviations
| Abbreviation | Full Meaning |
|---|---|
| ch | chain |
| sl st | slip stitch |
| sc | single crochet |
| hdc | half double crochet |
| blo | back loop only |
| inc | increase (2 stitches in one) |
| rep | repeat |
| rnd | round |
| st(s) | stitch(es) |
| fo | fasten off |
Special Stitches Explained
There are no complex special stitches in this pattern beyond working in the back loop only, which will be explained within the pattern instructions.
Pattern Instructions
We’ll start with the Small size and I’ll include notes for adjusting to Medium and Large. Choose your desired yarn color to begin.
### Section 1: Base (Worked in continuous rounds)
The base is worked in a spiral, do not join rounds unless specified. Use a stitch marker to keep track of the first stitch of each round.
Rnd 1: Make a magic ring, ch 1, 6 sc in ring. (6 sc)
💡 Designer Tip: If you’re not comfortable with a magic ring, ch 2, then work 6 sc in the second ch from hook.
Rnd 2: 2 sc in each st around. (12 sc)
Rnd 3: (1 sc, inc) rep 6 times. (18 sc)
Rnd 4: (2 sc, inc) rep 6 times. (24 sc)
Rnd 5: (3 sc, inc) rep 6 times. (30 sc)
Rnd 6: (4 sc, inc) rep 6 times. (36 sc)
✅ Checkpoint: For the Small bag, your base should now measure approximately 3 inches (7.5 cm) in diameter. You should have 36 sc.
For Medium Bag: Continue increasing:
Rnd 7: (5 sc, inc) rep 6 times. (42 sc)
Rnd 8: (6 sc, inc) rep 6 times. (48 sc)
✅ Checkpoint: For the Medium bag, your base should now measure approximately 4 inches (10 cm) in diameter. You should have 48 sc.
For Large Bag: Continue increasing:
Rnd 9: (7 sc, inc) rep 6 times. (54 sc)
Rnd 10: (8 sc, inc) rep 6 times. (60 sc)
✅ Checkpoint: For the Large bag, your base should now measure approximately 5 inches (12.5 cm) in diameter. You should have 60 sc.
Continue to Section 2 with the final stitch count for your chosen size.
### Section 2: Sidewalls (Worked in continuous rounds)
This section creates the sturdy sides of your bag using back loop only single crochet (blo sc).
Rnd 1 (Transition Round): Sc in the blo of each st around. This round creates a defined edge for the base. (36 sc for Small / 48 sc for Medium / 60 sc for Large)
Rnd 2 – 12 (Small): Sc in each blo around. (36 sc)
✅ Checkpoint: For the Small bag, after Rnd 12 of the sidewalls, the bag should measure approx. 3.5 inches (9 cm) from the base.
Rnd 2 – 16 (Medium): Sc in each blo around. (48 sc)
✅ Checkpoint: For the Medium bag, after Rnd 16 of the sidewalls, the bag should measure approx. 5 inches (12.5 cm) from the base.
Rnd 2 – 20 (Large): Sc in each blo around. (60 sc)
✅ Checkpoint: For the Large bag, after Rnd 20 of the sidewalls, the bag should measure approx. 6.5 inches (16.5 cm) from the base.
### Section 3: Eyelet Row & Rim
This section creates the drawstring channel.
For All Sizes:
Rnd 1 (Eyelet Row): (Hdc in next st, ch 1, skip next st) rep around. Join with a sl st to the first hdc. (18 hdc, 18 ch-1 sps for Small / 24 hdc, 24 ch-1 sps for Medium / 30 hdc, 30 ch-1 sps for Large)
Rnd 2 (Rim): Ch 1 (does not count as st), 2 hdc in each ch-1 space and 1 hdc in each hdc around. Join with a sl st to the first hdc. (54 hdc for Small / 72 hdc for Medium / 90 hdc for Large)
Rnd 3 (Rim): Ch 1 (does not count as st), sc in each st around. Join with a sl st to the first sc. (54 sc for Small / 72 sc for Medium / 90 sc for Large)
Fo, leaving a long tail for weaving in. Weave in all ends securely.
### Section 4: Drawstring
You can use a purchased cord, ribbon, or crochet your own. For a crocheted cord:
Ch a length approximately 2 times the circumference of your bag, plus a few extra inches for tying. (e.g., Small: 36 inches / 90 cm; Medium: 48 inches / 120 cm; Large: 60 inches / 150 cm). Sl st in the second ch from hook and each ch across. Fo, leaving a tail.
Using your yarn needle, weave the drawstring through the eyelet holes created in Section 3, Rnd 1. Start from the front center of the bag, going in and out, and ending back at the starting point. Thread a wooden bead onto each end of the drawstring and knot to secure, trimming any excess.
Size Customization Tips
To adjust the size of your easy crochet pouch:
* To make a wider bag: Continue increasing the base (Section 1) by adding more rounds using the (X sc, inc) pattern, increasing X by 1 for each new round. Remember to keep your increases evenly spaced. Each additional increase round will add approximately 1 inch (2.5 cm) to the diameter of your base and 6 stitches to your stitch count.
* To make a taller bag: Add or subtract rounds in Section 2 (Sidewalls). Each additional round of blo sc will add approximately 0.5 inches (1.25 cm) to the height of the bag.
* To adjust the eyelet spacing: For a tighter or looser eyelet pattern, you could experiment with (hdc, ch 2, skip 2) for a wider gap, or (sc, ch 1, skip 1) for a less noticeable eyelet. Just be sure to adjust the following rim round to accommodate the change in stitch count.
Care Instructions
To keep your crochet gift bag looking fresh, I recommend hand washing in cool water with a mild detergent. Gently squeeze out excess water (do not wring). Reshape and lay flat to dry.
Festive Crochet Gift Bags & Pouches Free Tutorial
I truly hope you enjoy making these delightful holiday crochet pouches as much as I loved designing them! They’re such a thoughtful way to add a personal touch to your gifts, and the recipients will surely cherish them long after the holidays are over. Don’t forget to share your finished makes with me on social media – I’d love to see your color choices! Tag me, save this pattern to your Pinterest board, and leave a comment below to let me know what you think! Happy crocheting!