
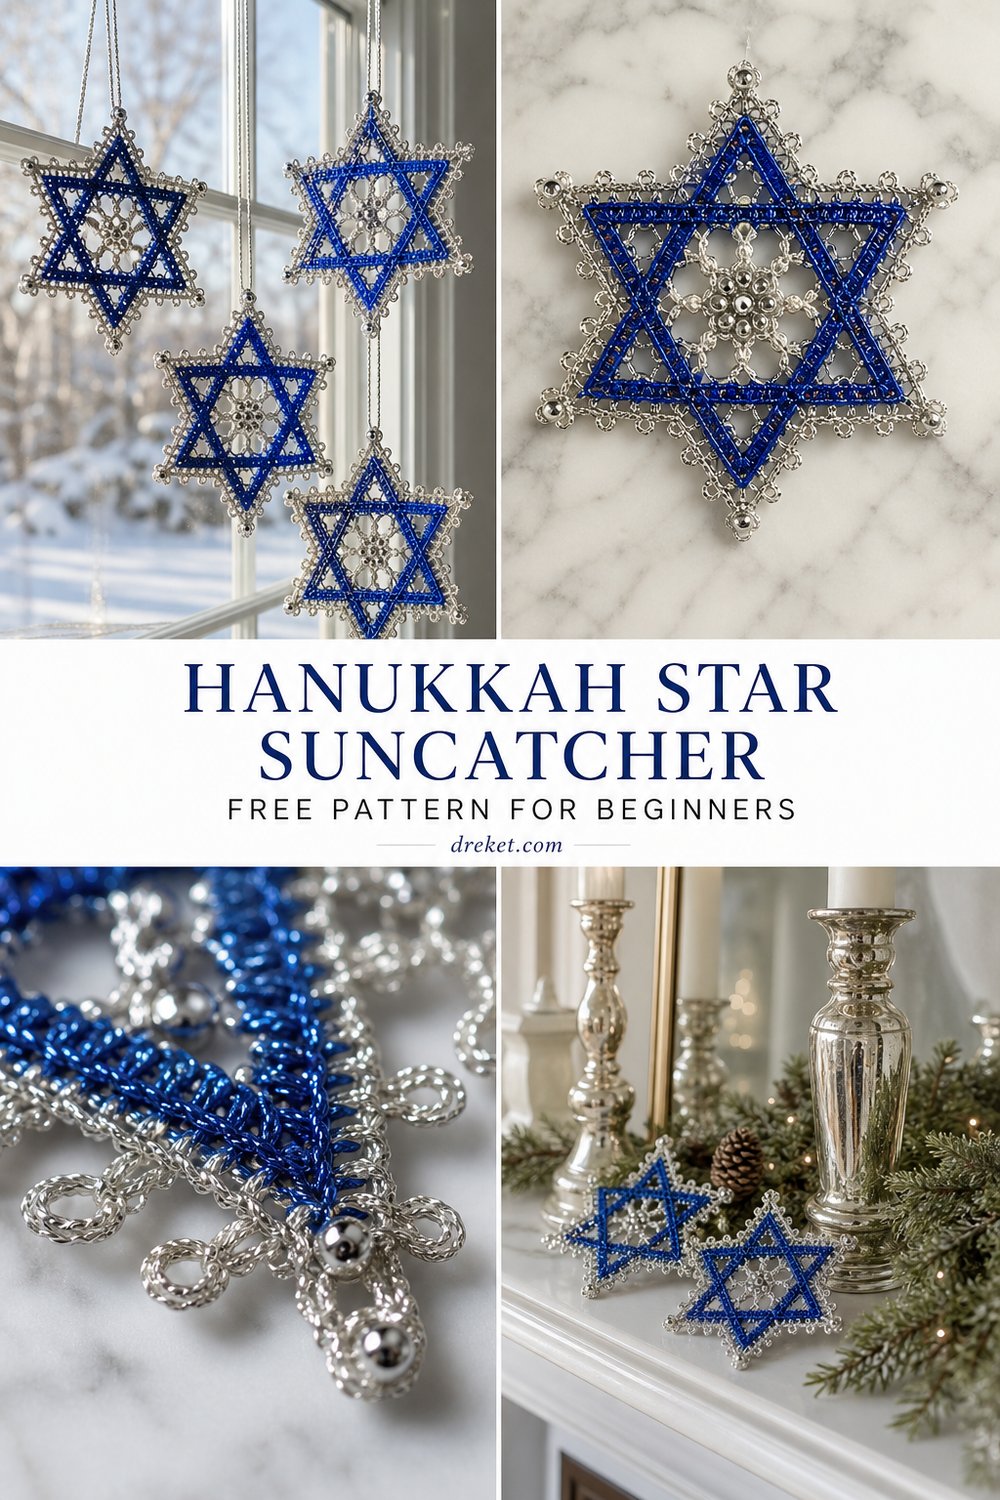
Catching the crisp afternoon winter light in the window, handcrafted holiday ornaments bring a deeply personal warmth to seasonal celebrations. This delicate project transforms simple thread into a radiant geometric emblem, perfect for hanging in your home or styling along a festive mantelpiece.
Elegant Blue Star Hanukkah Suncatcher Free Pattern for Beginners
Quick Facts
- Stitches Used: Chain, single crochet, double crochet, slip stitch, picot
- Size Fit: One size standard suncatcher / window ornament
- Estimated Time to Complete: 1 to 2 hours
- Gift-Appeal Framing: Makes a heartfelt, lightweight, and quick-to-make handmade Judaica gift for family and friends during the Festival of Lights.
Sizing customization tips are included later in this article to help you adapt the finished diameter for different display spaces.
What Makes This Elegant Blue Star Hanukkah Suncatcher Special
The beauty of this design lies in its crisp, interlaced geometry and the striking contrast between royal blue and metallic silver. By working in lightweight crochet thread with a small hook, the resulting motifs are naturally stiff yet delicate. The pattern utilizes two interlocking triangles worked separately and joined seamlessly, accented with a center silver bead and finished with tiny picot loops along the outer border to catch the light from every angle.
Skill Level
- Skill Level: Easy / Beginner-Friendly
- Required Skills:
- Working in the round
- Basic stitches (ch, sc, dc, sl st)
- Simple joining techniques
- Basic blocking and stiffening (essential for crisp metallic points)
💡 Designer Tip: Don’t let working with metallic thread intimidate you! Take it slow, keep your tension even, and use a slightly larger hook than recommended if you find the thread splits.
Finished Measurements
| Measurement | Inches | Centimeters |
|---|---|---|
| Diameter (Point to Point) | 5.5 inches | 14 cm |
| Hanging Loop Height | 3.0 inches | 7.5 cm |
| Total Height with Loop | 8.5 inches | 21.5 cm |
Materials You Will Need
- Yarn Weight: Size 10 crochet thread / Bedspread weight
- Hook: Steel crochet hook size 1.75 mm (US Steel Hook Size 4)
- Additional Tools: Tapestry needle for weaving ends, rust-proof stainless steel T-pins, blocking mat, fabric stiffener or spray starch, one 8mm silver bead for the center accent, and matching sewing thread to secure the bead.
| Color Code & Name | Yarn Type / Weight | Yardage Needed |
|---|---|---|
| Color A: Royal Blue | Size 10 Cotton Crochet Thread | 25 yards (23 meters) |
| Color B: Silver Metallic | Metallic-Blend Fingering/Thread | 15 yards (14 meters) |
Yarn Suggestions
| Brand & Line Name | Yarn Weight | Skein Yardage | Notes |
|---|---|---|---|
| Aunt Lydia’s Classic Crochet Thread Size 10 | Size 10 Cotton | 350 yards / 300m | Classic choice; holds its shape wonderfully when stiffened. |
| DMC Petra Crochet Cotton Size 10 | Size 10 Cotton | 308 yards / 282m | Mercerized cotton with a gorgeous subtle sheen. |
| Knit Picks Curio | Size 10 Cotton | 305 yards / 279m | Excellent stitch definition for geometric motifs. |
⚠️ Note: Avoid stretchy acrylic yarns for this project. Cotton or cotton-blend crochet threads are necessary to hold the crisp geometric shape required for a proper suncatcher.
Gauge
Gauge is not strictly critical for this decorative ornament, but maintaining consistent tension ensures your triangles align symmetrically.
| Gauge Type | Stitches / Rows | Measurement |
|---|---|---|
| Motif Triangle Base | 4 dc clusters across | 3 inches (7.5 cm) |
| Stitch Gauge | 8 sts and 8 rows | 1 inch (2.5 cm) in sc |
💡 Designer Tip: Always make a quick swatch if you are unsure of your thread tension before diving into the main triangles.
Abbreviations
| Abbreviation | Full Term |
|---|---|
| ch | chain |
| sl st | slip stitch |
| sc | single crochet |
| dc | double crochet |
| picot | chain 3, sl st in first chain |
| st(s) | stitch(es) |
| sp(s) | space(s) |
| rep | repeat |
| FO | fasten off |
Special Stitches Explained
- Picot: Ch 3, insert hook back into the front loop and left vertical bar of the very first chain made, yarn over, pull through loop and through loop on hook.
- Interlocking Join: Working two identical triangles, hold them overlapping at opposite angles to form the classic six-pointed star shape before securing the final round.
Pattern Instructions
Section 1: Triangle One (Royal Blue)
Using Color A (Royal Blue), ch 4, join with sl st in first ch to form a ring.
- Round 1: Ch 4 (counts as first dc and ch-1 sp here and throughout), (3 dc in ring, ch 2) 2 times, 2 dc in ring, dc in starting ring, join with sl st to 3rd ch of beginning ch-4. (9 dc, 2 ch-1 sps, 2 ch-2 sps)
- Round 2: Sl st into the first ch-1 sp, ch 4, (2 dc, ch 2, 3 dc) in same ch-1 sp, ch 1, (3 dc, ch 2, 3 dc) in next ch-2 sp, ch 1 around, join with sl st to 3rd ch of beginning ch-4. (24 dc, 3 ch-1 sps, 3 ch-2 sps)
- Round 3: Sl st into first ch-1 sp, ch 4, (2 dc, ch 2, 3 dc) in same sp, ch 1, skip 3 dc, work 1 dc in next ch-1 sp, ch 1, (3 dc, ch 2, 3 dc) in next ch-2 corner sp, ch 1, skip 3 dc, work 1 dc in next ch-1 sp, ch 1; rep from * around, join with sl st to 3rd ch of beginning ch-4. (30 dc, 6 ch-1 sps, 3 ch-2 sps)*
- Round 4: Sl st into first corner sp, ch 1, work (2 sc, picot, 2 sc) in same corner sp, sc in each st and ch-1 sp across to next corner sp, (2 sc, picot, 2 sc) in corner sp; rep from * around, join with sl st to first sc. FO. (54 sc, 3 picots)*
✅ Checkpoint: You have completed Triangle One. Block it gently before moving on to ensure crisp, sharp points.
Section 2: Triangle Two (Royal Blue)
Repeat all instructions from Section 1 to create a second identical triangle in Color A (Royal Blue). FO and weave in ends.
Section 3: Silver Metallic Border and Assembly
Take Triangle One and Triangle Two, and overlap them to form the six-pointed Star of David shape. Pin them temporarily in place.
- Round 1 (Joining & Silver Border): Join Color B (Silver Metallic) with a sl st in any outer corner picot loop of both overlapping triangles simultaneously. Ch 1, work (1 sc, picot, 1 sc) in the same corner loop. Working along the outer edge of both triangles together, evenly space sc stitches, catching both layers where they align, and working (1 sc, picot, 1 sc) in each of the 6 main star points. Join with a sl st to the first sc. (120 sc, 6 picots)
- Hanging Loop: Ch 20, sl st back into the base of the starting st to form a sturdy hanging loop. FO, weave in all remaining ends securely.
✅ Checkpoint: Verify that all 6 outer star points feature crisp silver picots and that the two royal blue layers are securely joined along the outer perimeter.
Section 4: Finishing Touches
Thread your tapestry needle with matching sewing thread and securely attach the 8mm silver bead to the exact center point where the two triangles intersect on both sides. Apply fabric stiffener or spray starch according to product instructions, pin the star out flat on your blocking mat using rust-proof T-pins, and allow it to dry completely overnight before hanging in your window.
Size Customization Tips
- To make a larger suncatcher, use Size 3 crochet thread with a 2.75 mm hook, which will increase the finished diameter by approximately 2 inches (5 cm).
- To make a smaller, delicate ornament suitable for a miniature tree or gift tag, use Size 20 crochet thread with a 1.25 mm hook, reducing the final diameter to roughly 3.5 inches (9 cm).
Care Instructions
- Gently spot clean with a damp cloth and mild soap if needed.
- Do not submerge in water if fabric stiffener was used.
- Re-block with starch if the ornament loses its stiffness over time.
Closing
Thank you for creating along with the Elegant Blue Star Hanukkah Suncatcher Free Pattern for Beginners! I hope this shimmering piece brings beauty and light to your holiday season.
If you loved making this project, please share your creations on social media and tag me so I can admire your work! Be sure to save this tutorial to your holiday crochet boards on Pinterest, and drop a comment below letting me know how your star turned out. Happy crocheting!