
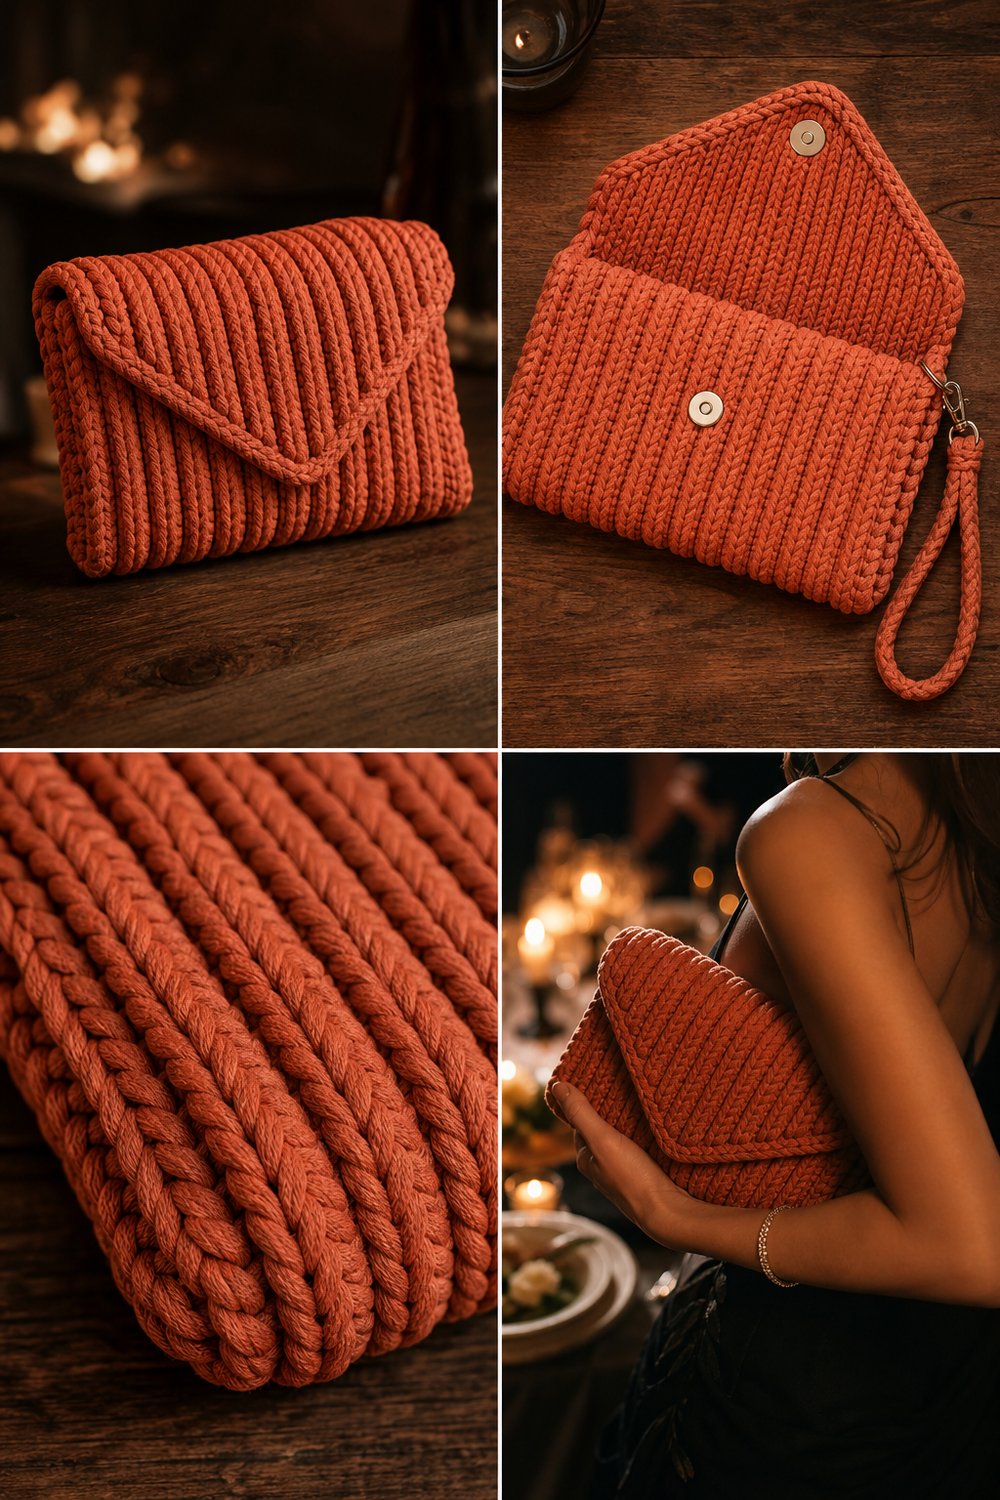
Slide this elegant, structural envelope clutch under your arm for an evening dinner setup, feeling the rich weight of its deep vertical ribs against the warm ambient glow of candlelight. Designed with a sleek silhouette and modern lines, this accessory pairs the effortless comfort of a handmade creation with the polished aesthetic of boutique designer bags.
Chunky Corduroy Stitch Clutch Purse Free Accessory Pattern
Quick Facts
- Stitches Used: Slip stitch, Single Crochet in the Back Loop Only (blo-sc), Foundation Single Crochet.
- Size Fit: One Size (Standard Evening Clutch).
- Estimated Hours to Complete: 3 to 4 hours.
- Gift-Appeal: Extremely high; works up quickly for birthdays, holidays, or bridal parties, offering an upscale look that never fails to impress.
Sizing customization tips are included later in this post if you want to scale your clutch into a larger tote or a sleek cosmetic pouch.
What Makes This Chunky Corduroy Stitch Clutch Purse Special
The secret to the unmistakable texture of this purse lies in a specialized arrangement of back-loop-only single crochets worked in tight succession, creating heavy, tactile vertical rib ridges that mimic the look of classic velvet corduroy. Unlike flat fabrics, this structural stitch pattern offers incredible stability, allowing the clutch to hold its sharp envelope shape without requiring heavy plastic inserts. Finished with a neat, seamless slip-stitched perimeter and a hidden magnetic snap, every design element is engineered for a clean, professional finish.
Skill Level
- Skill Level: Intermediate
- Required Skills:
- Working into the back loop only (blo)
- Creating and maintaining consistent tension with thick yarns
- Working clean surface slip stitches along raw edges
- Basic sewing to install a magnetic snap and optional lining
💡 Designer Tip: Because chunky t-shirt yarn has zero stretch compared to wool, focus on keeping your initial foundation chain or base row relaxed so your edges don’t curl.
Finished Measurements
| Measurement Type | Inches | Centimeters |
|---|---|---|
| Width | 11 inches | 28 cm |
| Height (Closed) | 6.5 inches | 16.5 cm |
| Depth | 2 inches | 5 cm |
| Wristlet Strap Length | 6 inches | 15 cm |
Materials You Will Need
- Yarn: Super Bulky / T-Shirt Yarn (approx. 1/2 inch width)
- Hook: US M/13 (9.0 mm) crochet hook (or size needed to obtain gauge)
- Notions: Tapestry needle for weaving ends, 1x heavy-duty magnetic snap closure, optional fabric for lining (12″ x 15″), matching sewing thread and needle.
| Color Order | Color Name | Yarn Weight | Yardage Needed |
|---|---|---|---|
| 1 | Terracotta | Super Bulky (T-Shirt Yarn) | 110 yards (100 meters) |
Yarn Suggestions
| Brand & Line Name | Yarn Weight | Skein Yardage | Notes |
|---|---|---|---|
| Hoooked RibbonXL | Super Bulky | 130 yds (120 m) per 250g | Recycled cotton blend, gives crisp vertical structural ridges. |
| Lion Brand Wool-Ease Thick & Quick (Alternative) | Super Bulky | 106 yds (97 m) per 170g | Softer texture, use a smaller hook for added stiffness. |
| WoolAndTheGang Jersey Be Good | Super Bulky | 142 yds (130 m) per 500g | Premium t-shirt yarn with a gorgeous matte finish. |
⚠️ Note: Avoid stretchy acrylic roving yarns for this project; they lack the structural integrity required to hold the envelope flap shape without slouching.
Gauge
| Measurement Type | Stitches / Rows | Dimension |
|---|---|---|
| Corduroy Stitch Gauge | 9 sts x 8 rows = 4 inches | 10 cm x 10 cm |
💡 Designer Tip: Always swatch your corduroy ribbing pattern before starting. If your gauge is too loose, the clutch will lose its crisp architectural lines.
Abbreviations
| Abbreviation | Full Term |
|---|---|
| ch | Chain |
| sl st | Slip Stitch |
| sc | Single Crochet |
| blo | Back Loop Only |
| st(s) | Stitch(es) |
| rep | Repeat |
| RS | Right Side |
| WS | Wrong Side |
Special Stitches Explained
- Corduroy Rib Single Crochet (cr-sc): Insert hook into the blo of the indicated stitch, yarn over, pull up a loop, yarn over, and pull through both loops on the hook. This creates the recessed valley that forces the front loops to pop forward into a raised corduroy ridge.
- Surface Slip Stitch (surf sl st): With the working yarn held on the wrong side of the fabric, insert your hook from front to back through the edge fabric, yarn over on the back, pull the loop through to the front and directly through the loop already on your hook.
Pattern Instructions
Section 1: Main Body Panel
The clutch body is worked in one long continuous flat panel from the bottom base up to the envelope flap tip.
- Row 1: Leaving a 6-inch tail, ch 26. Working in the back bumps of the chain, starting in the 2nd ch from hook, work 1 sc in each ch across. Turn. (25 sc)
- Row 2 (RS): Ch 1 (does not count as a st here and throughout), working in blo, work 1 cr-sc in each st across. Turn. (25 sc)
- Rows 3 through 34: Rep Row 2. At the end of Row 34, fasten off, leaving a long tail for seaming.
✅ Checkpoint: Measure your flat panel at this stage. It should measure approximately 11 inches wide by 17 inches long before folding.
Section 2: Perimeter Finishing & Edges
Before assembling the envelope shape, we clean up the raw side edges.
- Step 1: Lay your flat panel with the Right Side facing up. Attach your yarn to the bottom-left corner.
- Step 2: Working evenly up the left side edge, work a row of surf sl st along the entire vertical margin until you reach the top fold line. Fasten off and weave in ends. Repeat this process on the right side edge.
Section 3: Assembly & Construction
- Step 1: Lay the finished panel flat on a clean surface with the Wrong Side facing you.
- Step 2: Fold the bottom edge upward by 6.5 inches to form the main pocket pouch of the clutch. The remaining top section will fold downward like an envelope flap.
- Step 3: Using your tapestry needle and the matching yarn tail, whipstitch the left and right side seams of the folded pocket securely from the bottom crease up to the pocket opening. Securely weave in ends.
Section 4: Magnetic Snap & Wristlet Strap
- Step 1: Install the metallic magnetic snap. Insert the prongs of the female half through the center of the inside flap lining area, securing the backing plate firmly. Install the male half directly aligned on the front face of the clutch body pouch.
- Step 2: Wristlet Strap: Ch 15, join with a sl st to form a ring. Working in the round, work 1 sc in each ch around for 2 rounds. Fasten off, leaving a tail to securely stitch the strap loop to the upper right side seam of the clutch body.
Size Customization Tips
Want to transform your clutch into a larger everyday crossbody bag? Simply increase your foundation chain in multiples of 2 + 1 (e.g., chain 36 instead of 26 for a wider base) and add 10 to 12 rows to the main panel length. This will increase your finished width by roughly 4 inches, creating a spacious daytime tote silhouette while maintaining the exact same gorgeous corduroy stitch texture.
Care Instructions
Spot clean your chunky corduroy clutch with a damp cloth and mild soap. Do not submerge in water or machine wash, as t-shirt yarn can warp and the metallic magnetic snap may rust. Lay flat in the shade to dry completely.
Chunky Corduroy Stitch Clutch Purse Free Accessory Pattern
I had so much fun designing this chic little accessory for you, and I hope it becomes your go-to companion for dinners, date nights, and special evenings out! If you make your own Chunky Corduroy Stitch Clutch Purse, please share your creations online. Tag me on social media, save this project to your Pinterest boards so other makers can find it, and leave a comment below letting me know what color of t-shirt yarn you chose for yours! Happy crocheting!