
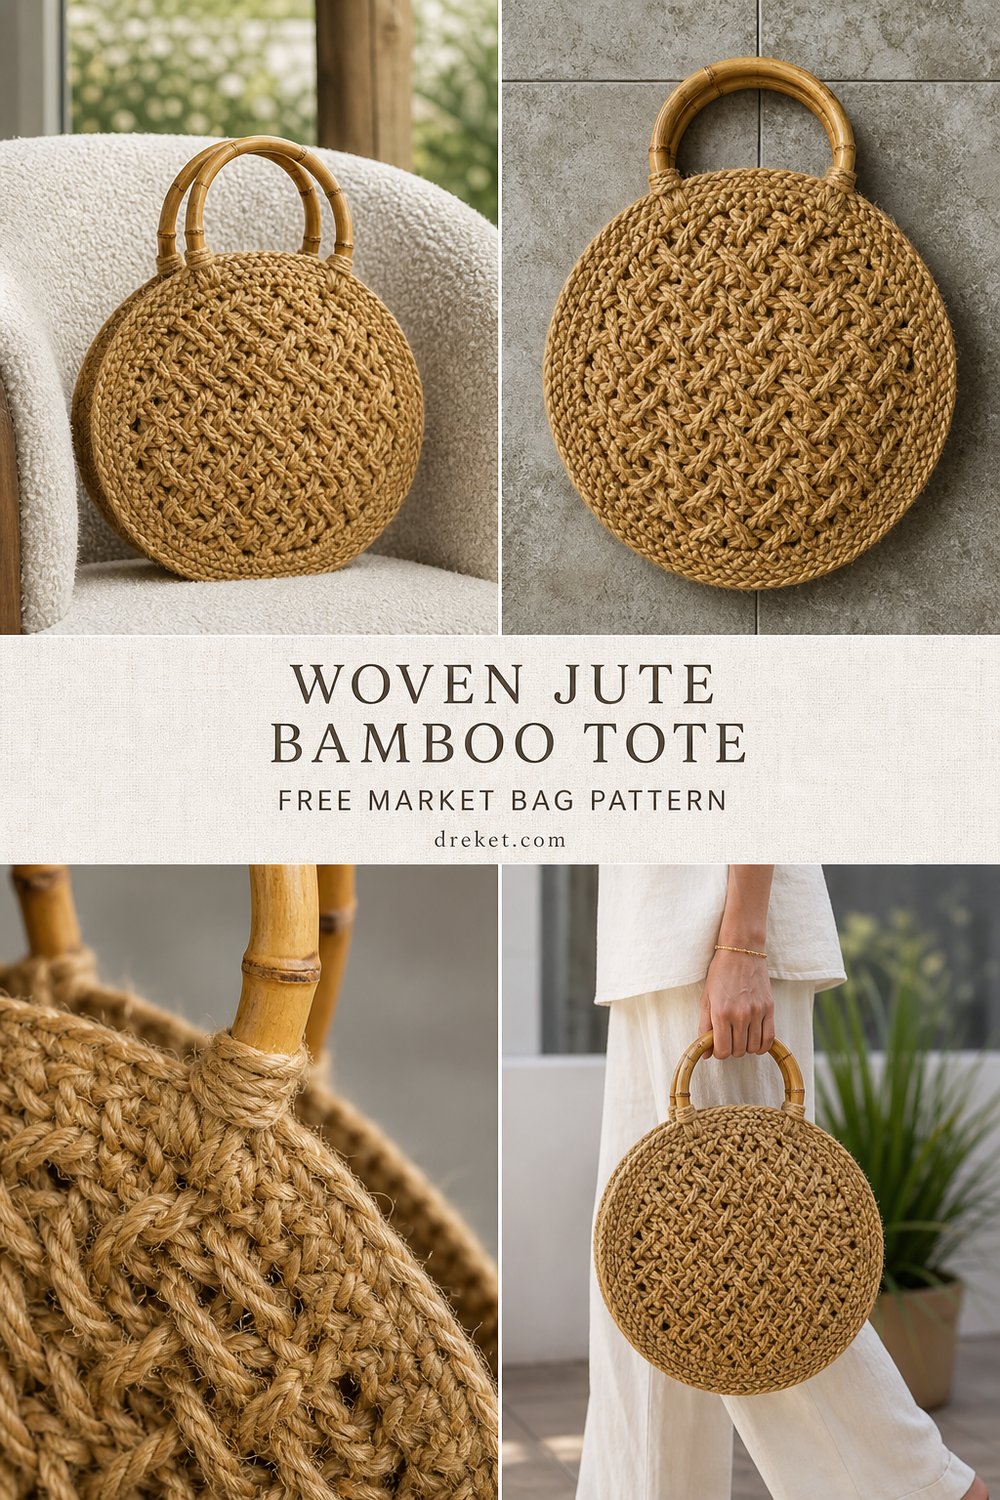
Step into the warmth of bright architectural daylight with a structured circular handbag that effortlessly blends organic texture with modern architectural lines. Styled against a cream boucle chair and captured with an 85mm f/1.4 lens, this piece brings the refined aesthetic of high-end boutique accessories straight to your handmade wardrobe. Whether you are strolling through a sun-drenched farmers market or meeting friends for coffee, this sturdy jute tote is your ultimate seasonal companion.
Woven Look Jute Handbag with Bamboo Ring Free Market Bag Pattern
Quick Facts
- Stitches Used: Single crochet, extended single crochet, herringbone stitch variations, slip stitch.
- Size Fit: One-size adult market bag (Structured Circular Silhouette).
- Estimated Hours to Complete: 6 to 8 hours.
- Gift-Appeal Framing: A stunning, boutique-quality gift for eco-conscious fashion lovers and ardent market-goers.
Sizing customization tips are included later in this article to help you modify the depth and diameter to fit your personal carrying style.
What Makes This Woven Look Jute Handbag with Bamboo Ring Special
The secret to this stunning accessory lies in the intersection of rustic natural fibers and clever structural manipulation. We use a dense woven-look herringbone crochet technique worked in the round, creating a thick, self-supporting fabric that mimics traditional basketry without requiring a plastic or wire frame. The smooth bamboo ring handles are attached securely using a reinforced single-crochet wrapping method that hugs the natural wood grain, ensuring durability while providing a chic, organic contrast to the golden jute fibers.
Skill Level
- Skill Level: Intermediate
- Required Skills: Working in the round, foundational knowledge of post stitches, managing heavy-weight plant-based fibers, and securing yarn tightly around rigid ring handles.
💡 Designer Tip: Jute yarn has very little stretch and can be tough on your hands. Take frequent breaks and use an ergonomic hook handle to keep your tension even without hand fatigue.
Finished Measurements
| Measurement | Inches | Centimeters |
|---|---|---|
| Diameter (Body Width) | 14 inches | 35.5 cm |
| Total Height (Excluding Handles) | 13 inches | 33 cm |
| Handle Diameter | 5 inches | 12.5 cm |
| Base Depth (Gusset) | 3.5 inches | 9 cm |
Materials You Will Need
- Yarn: 100% natural golden jute yarn, Heavy Aran / 10-ply weight.
- Tools: US J/10 (6.0mm) crochet hook, tapestry needle, stitch markers.
- Hardware: Two smooth 5-inch (12.5 cm) natural bamboo purse rings.
| Color | Yarn Weight | Yardage Needed |
|---|---|---|
| 1. Natural Golden Jute | Heavy Aran / Bulky (5) | 350 yards (320 meters) |
Yarn Suggestions
| Yarn Brand & Line | Weight | Yardage per Skein | Notes |
|---|---|---|---|
| DMC Nova Vita 4 (Jute blend) | Aran / Bulky | 273 yds / 250 m | Smooth to work with, excellent stitch definition. |
| Knit Picks Jute Twine (Craft Weight) | Aran | 200 yds / 183 m | Ultra-rustic, holds shape exceptionally well. |
| Hobbii Jute Craft Yarn | Bulky | 150 yds / 137 m | Softened natural fibers, easy on the hands. |
⚠️ Note: Avoid slick synthetic acrylics or superwash wools for this project; the design relies entirely on the rigid, structural nature of plant-based jute to hold its circular form.
Gauge
| Measurement Type | Stitches / Rows | Imperial | Metric |
|---|---|---|---|
| Stitch Gauge | Woven herringbone pattern | 12 sts = 4 inches | 10 cm = 12 sts |
| Row Gauge | Working in the round | 14 rows = 4 inches | 10 cm = 14 rows |
💡 Designer Tip: Always swatch using your chosen jute fiber. Because plant fibers lack elasticity, hitting exact gauge ensures your bag maintains its structured silhouette.
Abbreviations
| Abbreviation | Full Term |
|---|---|
| ch | Chain |
| sc | Single crochet |
| hdc | Half double crochet |
| sl st | Slip stitch |
| st(s) | Stitch(es) |
| rnd(s) | Round(s) |
| esc | Extended single crochet |
| blo | Back loop only |
| pm | Place marker |
| rep | Repeat |
Special Stitches Explained
- Extended Single Crochet (esc): Insert hook into indicated stitch, yarn over, pull up a loop (2 loops on hook), yarn over, draw through first loop on hook, yarn over, draw through remaining 2 loops on hook.
- Woven Herringbone Stitch (whs): Insert hook into front vertical bar of previous stitch and the designated stitch simultaneously, yarn over, pull up a loop, yarn over, draw through both loops on hook.
- Bamboo Ring Wrap (brw): Hold bamboo ring parallel to the working edge, insert hook from front to back through the center of the ring, under the working edge of the bag, yarn over, pull up a loop, and complete a standard single crochet over the ring wire.
Pattern Instructions
Section 1: Front and Back Circular Panels (Make 2)
Rnd 1: Magic ring, work 6 sc into the ring, join with a sl st to the first sc. (6 sc)
Rnd 2: Ch 1, 2 sc in each st around, join. (12 sc)
Rnd 3: Ch 1, 1 sc in next st, 2 sc in next st; rep from * around, join. (18 sc)
Rnd 4: Ch 1, 1 sc in next 2 sts, 2 sc in next st; rep from * around, join. (24 sc)
Rnd 5: Ch 1, 1 sc in next 3 sts, 2 sc in next st; rep from * around, join. (30 sc)
Rnd 6: Ch 1, 1 sc in next 4 sts, 2 sc in next st; rep from * around, join. (36 sc)
Rnd 7: Ch 1, 1 sc in next 5 sts, 2 sc in next st; rep from * around, join. (42 sc)
Rnd 8: Ch 1, 1 sc in next 6 sts, 2 sc in next st; rep from * around, join. (48 sc)
Rnd 9: Ch 1, 1 sc in next 7 sts, 2 sc in next st; rep from * around, join. (54 sc)
Rnd 10: Ch 1, 1 sc in next 8 sts, 2 sc in next st; rep from * around, join. (60 sc)
Rnd 11: Ch 1, 1 sc in next 9 sts, 2 sc in next st; rep from * around, join. (66 sc)
Rnd 12: Ch 1, 1 sc in next 10 sts, 2 sc in next st; rep from * around, join. (72 sc)
Rnd 13: Ch 1, 1 sc in next 11 sts, 2 sc in next st; rep from * around, join. (78 sc)
Rnd 14: Ch 1, 1 sc in next 12 sts, 2 sc in next st; rep from * around, join. (84 sc)
Rnd 15: Ch 1, 1 sc in next 13 sts, 2 sc in next st; rep from * around, join. (90 sc)
Rnd 16: Ch 1, working in blo, work 1 esc in each st around, join. (90 esc)
Rnd 17: Ch 1, work 1 whs in each st around, join. Fasten off on Panel 1 only. Do not fasten off Panel 2; we will join them in the next section. (90 sts)*
✅ Checkpoint: Both circular panels should measure exactly 14 inches (35.5 cm) across and lie completely flat before proceeding to the gusset joining round.
Section 2: Gusset and Joining
Rnd 18: Place Panel 1 and Panel 2 wrong sides together. Join jute through both panels at the base marker, ch 1, working through both thicknesses simultaneously, work sc across 65 sts of the lower circumference to form the flat base gusset, leaving the top 25 sts open on each side for the bag opening. (65 sc)
Rnd 19: Working along the open top edges only, ch 1, work 1 sc in each st around the perimeter of the opening, join. (50 sc)
Section 3: Bamboo Ring Attachment and Finishing
Rnd 20: Work along the front top edge of the bag opening where the handle will sit. Align the 5-inch bamboo ring against the interior edge. Working over the ring, evenly space 22 brw stitches to secure the ring firmly to the fabric. Repeat this process on the back panel with the second bamboo ring. (44 brw total across both handles)
Rnd 21: Ch 1, work 1 slip stitch in every stitch around the entire bag opening rim for a polished, reinforced edge. Fasten off. (50 sl st)
✅ Checkpoint: Ensure both bamboo rings are centered symmetrically and the wrapping stitches are pulled taut so the handles remain rigid and upright.
Size Customization Tips
- Scaling Up: To make a larger market tote, continue increasing the circular panels in pattern for an additional 2 to 3 rounds before starting the esc transition round, ensuring your stitch counts remain divisible by your stitch pattern.
- Scaling Down: Stop circular panel increases 2 rounds early for a chic, miniature evening purse variant.
Care Instructions
Spot clean gently with a damp cloth and mild plant-based soap. Do not submerge completely in water, as natural unspun jute fibers can swell and lose their structural rigidity. Dry flat in natural sunlight.
Woven Look Jute Handbag with Bamboo Ring Free Market Bag Pattern
Thank you so much for joining me in making this gorgeous, tactile market bag! I hope crafting this piece brings a touch of organic serenity to your handmade routine.
I would love to see your finished jute handbags! Please share your photos on social media, tag me, save this project to your Pinterest boards for later, and leave a comment below to let me know how your project turned out. Happy crocheting!