
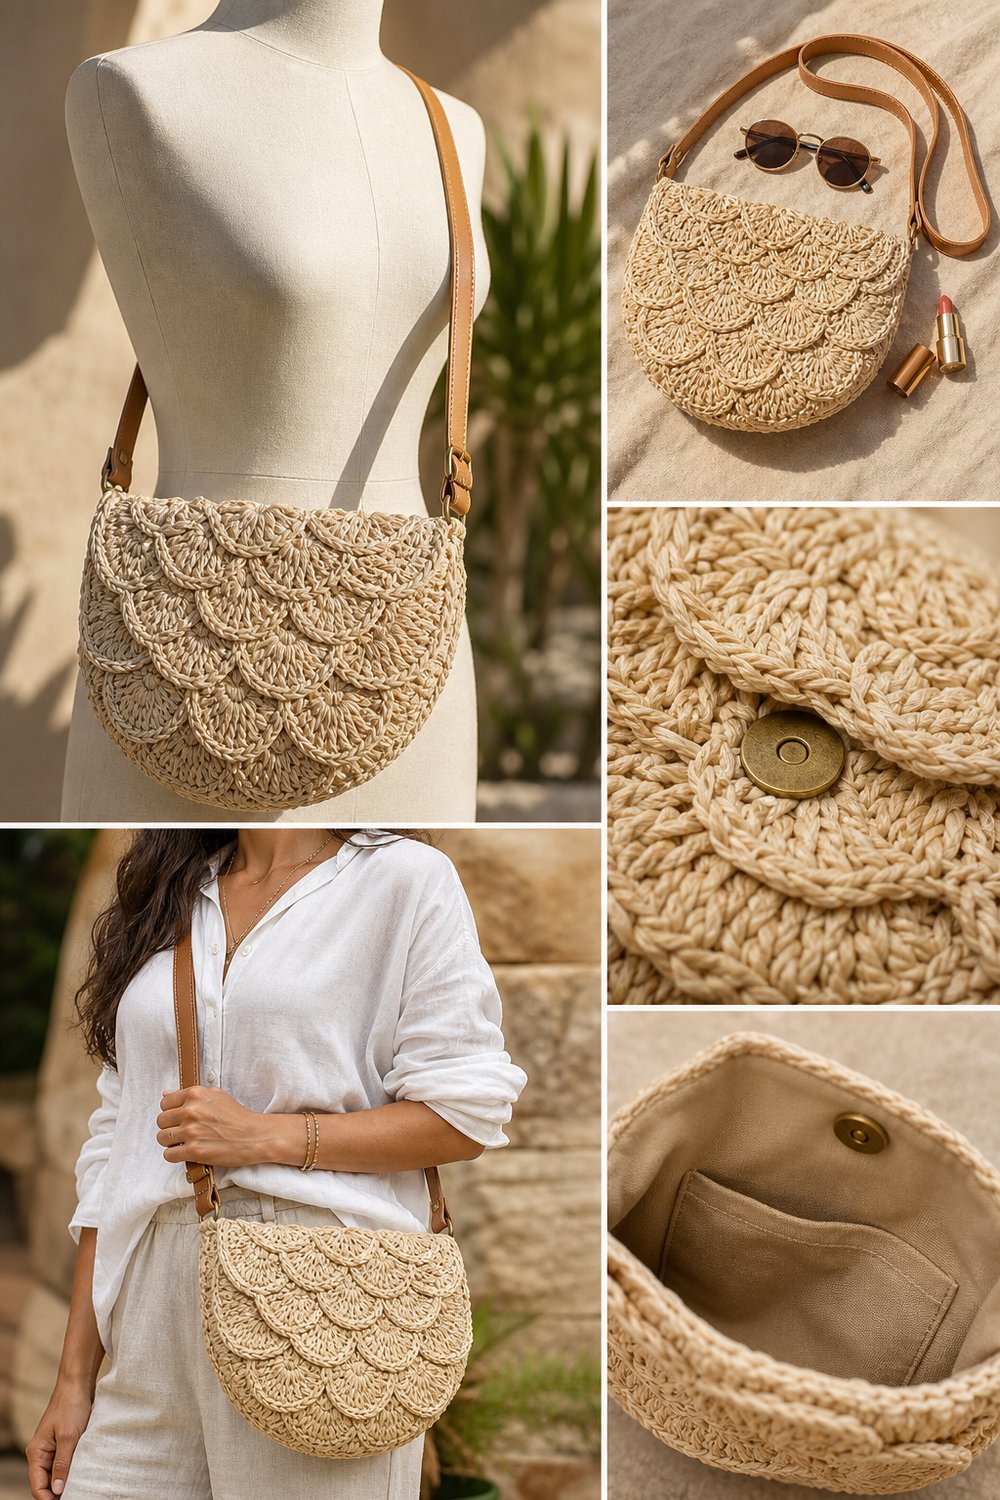
Stroll through a sun-drenched Saturday morning open-air market with the effortless chic of natural textures swaying at your hip. This crescent-shaped crossbody captures coastal sophistication and timeless European style, marrying structural raffia fiber with the rich tactile depth of layered scallop shell stitches.
French Market Scallop Crossbody Bag Free Purse Pattern
Quick Facts
This design utilizes foundational stitches alongside layered shell motifs, structured in a sleek crescent-shaped crossbody silhouette. It fits daily essentials like sunglasses, keys, and a smartphone, taking approximately 6 to 8 hours to complete. It makes a stunning seasonal handmade gift for fashion-forward friends or a luxurious treat for your own summer wardrobe.
Detailed sizing customization tips are included later in this post.
What Makes This French Market Scallop Crossbody Bag Special
The secret to this purse’s crisp definition and structure lies in combining firm natural raffia yarn with a dense, interlocking scallop shell stitch pattern. Working the stitches tightly creates a self-supporting crescent silhouette that holds its shape without requiring heavy plastic mesh inserts. A secure magnetic snap clasp keeps contents safe, while the clean interior fabric lining ensures durability. Combined with a rich tan leather strap, the finished accessory bridges the gap between handmade craft and high-end boutique appeal.
Skill Level
- Intermediate: Comfortable working in the round, skipping stitches, and following multi-row stitch pattern repeats.
- Advanced Beginner ready: If you have mastered basic shaping and are eager to learn textured shell repeats, step-by-step instructions make this entirely achievable.
Finished Measurements
| Measurement | Inches | Centimeters |
|---|---|---|
| Bag Width (Widest Point) | 11.5 inches | 29.2 cm |
| Bag Height (Center Depth) | 7.0 inches | 17.8 cm |
| Strap Length (Adjustable) | 42.0 – 48.0 inches | 106.7 – 121.9 cm |
| Base Gusset Depth | 3.0 inches | 7.6 cm |
Materials You Will Need
- Yarn: Worsted-weight paper raffia yarn (approx. 330 yards total)
- Hook: US Size G/6 (4.0 mm) crochet hook
- Notions: Tapestry needle, stitch markers, sew-in magnetic snap clasp, 0.75-inch wide pre-made tan leather shoulder strap with swivel lobster clasps, coordinating cotton fabric lining (optional).
| Color Name | Color Order | Yarn Weight | Approximate Yardage |
|---|---|---|---|
| Natural Unbleached | 1 | Worsted Raffia | 300 yds / 274 m |
| Tan Leather Accent | 2 | Leather / Hardware | N/A (Pre-made strap) |
Yarn Suggestions
| Brand & Line Name | Yarn Weight | Skein Yardage | Notes |
|---|---|---|---|
| Wool and the Gang Ra-Ra Raffia | Worsted / Aran | 273 yds / 250 m per spool | 100% long wood fiber paper; brilliant stitch definition. (Requires 2 spools) |
| Hobbii Friends Raffia | Aran / Worsted | 110 yds / 100 m per spool | Lightweight cellulose fiber with lovely crisp texture. (Requires 3 spools) |
| Circulo Yule | Aran | 120 yds / 110 m per ball | 100% viscose raffia with a slight natural sheen. (Requires 3 balls) |
⚠️ Note: Avoid using overly stretchy acrylic or plush wool yarns for this pattern. Raffia or stiff cellulose fibers are required to maintain the crisp crescent silhouette and prevent the bag from sagging when loaded.
Gauge
| Stitch / Motif | Over 4 Inches (10 cm) |
|---|---|
| Scallop Shell Pattern | 3 full shell repeats wide x 5 rows high |
| Single Crochet Base | 16 sts x 18 rows |
💡 Designer Tip: Always swatch using your raffia yarn and 4.0 mm hook before starting. Raffia behaves differently than standard yarn; maintaining a consistent, firm tension ensures your bag panels match the finished measurements precisely.
Abbreviations
| Abbreviation | Full Term |
|---|---|
| ch | chain |
| sc | single crochet |
| hdc | half double crochet |
| dc | double crochet |
| sl st | slip stitch |
| st(s) | stitch(es) |
| sk | skip |
| rep | repeat |
| RS | right side |
| WS | wrong side |
Special Stitches Explained
- Shell Stitch (Sh): Work 5 dc into the specified stitch or chain-space.
- Extended Scallop Anchor (ESA): Work 1 sc around the post of the corresponding dc from 2 rows below, pulling yarn up to the current working height to create a layered textured drop.
Pattern Instructions
Section 1: Crescent Base Panel (Make 2 identical)
Using Natural Unbleached raffia and 4.0 mm hook, ch 36.
Row 1 (RS): Working in the back bumps of the foundation chain, 1 sc in 2nd ch from hook, 1 sc in each ch across, turn. (35 sc)
Row 2: Ch 1, 2 sc in first st, 1 sc in each st across to last st, 2 sc in last st, turn. (37 sc)
Row 3: Ch 1, 1 sc in each st across, turn. (37 sc)
Row 4: Ch 1, 2 sc in first st, 1 sc in each st across to last st, 2 sc in last st, turn. (39 sc)
Row 5: Ch 1, 1 sc in each st across, turn. (39 sc)
✅ Checkpoint: You now have a solid crescent-shaped base panel measuring approximately 11.5 inches across its widest edge. Fasten off on Panel 1 only. Do not fasten off on Panel 2; you will continue directly into joining the panels.
Section 2: Body and Scallop Shell Pattern
With Panel 2 still attached to working yarn, place Panel 1 behind Panel 2 (RS facing outward). Working through both thicknesses along the curved bottom and side edges, join panels with an even row of sc.
Round 1: Ch 1, work sc evenly spaced around the outer curve of the crescent bag, join with sl st to first sc, turn. (84 sc)
Round 2: Ch 1, sk 2 sts, Sh in next st, sk 2 sts, sc in next st; rep from * around, join with sl st to top of starting ch-1, turn. (14 Shells and 14 sc)*
Round 3: Ch 3 (counts as 1 dc here and throughout), 2 dc in same sc, sk 2 dc, ESA around center dc of shell from previous round, sk 2 dc, 5 dc in next sc; rep from * around, ending with 2 dc in joining space, join with sl st to top of starting ch-3, turn. (14 layered shells)*
Rounds 4–7: Repeat Round 3 four more times, maintaining the layered scallop texture and stitch counts.
✅ Checkpoint: After completing Round 7, your bag body should feature 6 distinct tiers of rich, interlocking scallop shell stitches.
Section 3: Upper Band and Closure
Round 8: Ch 1, 1 sc in each of the next 3 dc of shell, 1 hdc in center dc, 1 sc in next 2 dc; rep from * around, join with sl st to first sc, turn. (84 sts)*
Round 9: Ch 1, 1 sc in each st around, join with sl st to first sc. Fasten off securely, weaving in all loose raffia ends. (84 sc)
Section 4: Finishing and Assembly
- Lining: Cut your cotton fabric to match the interior crescent shape of the bag, allowing a 0.5-inch seam allowance. Sew the lining, slip it inside the crochet purse, and hand-stitch the top edge securely beneath Round 9.
- Magnetic Snap: Install the sew-in magnetic snap clasp centrally on the interior upper band just below the final sc round.
- Strap Attachment: Securely stitch small D-ring tabs (or leather anchor loops) to the left and right upper side gussets of the bag. Clip the tan leather shoulder strap securely into place.
Size Customization Tips
- To make the bag wider: Add extra starting chain stitches in multiples of 6 during Section 1, ensuring your foundational stitch count aligns with the shell pattern repeats.
- To make the bag deeper: Work 2 additional rounds of the Scallop Shell Pattern in Section 2 (Rounds 6 and 7 repeats), which increases the vertical bag height by approximately 1.5 inches (3.8 cm).
Care Instructions
Spot clean gently using a damp cloth and mild soapy water. Do not submerge completely in water or machine wash, as natural raffia paper fibers can lose their crisp structure when saturated. Reshape while damp and allow to air dry completely in shade.
French Market Scallop Crossbody Bag Free Purse Pattern
Thank you so much for joining me for this pattern adventure! I genuinely hope you love stitching and styling your new French Market Scallop Crossbody Bag as much as I loved designing it for you. Be sure to save this post to your Pinterest boards, drop a comment below if you have any questions along the way, and tag me on social media using #FrenchMarketCrossbody so I can admire your gorgeous handmade creation!