
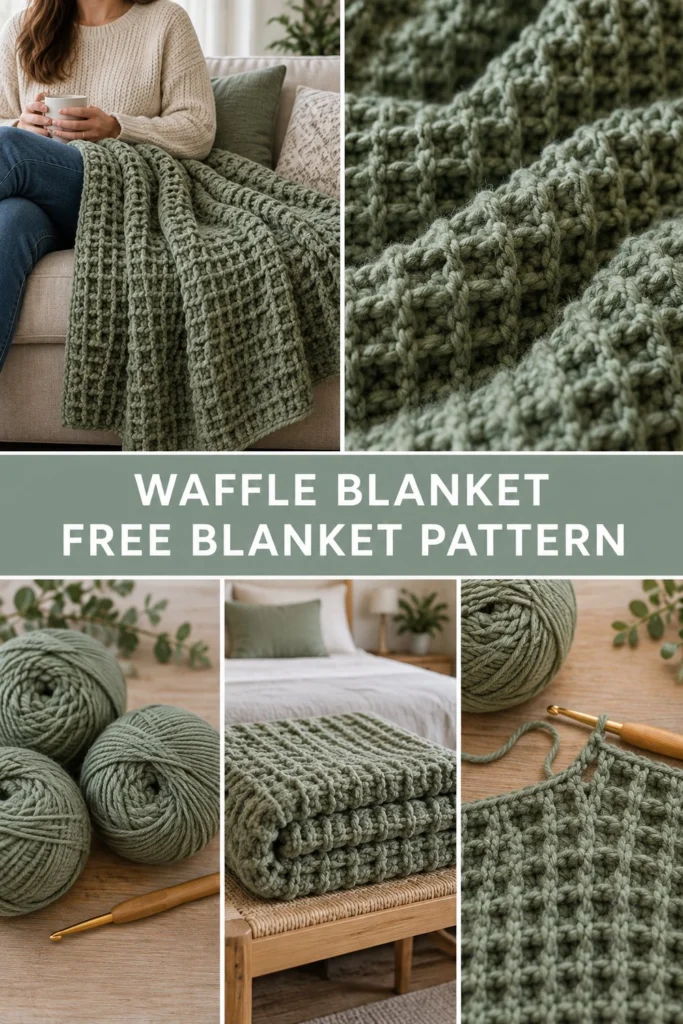
Wrap yourself in pure comfort with the waffle stitch crochet throw blanket, featuring a rich, dimensional grid that looks stunning on any sofa or bed. This beginner-friendly pattern uses only two fundamental stitches to create a thick, squishy texture that traps warmth on chilly evenings.
Waffle Stitch Crochet Throw Blanket Free Pattern
Quick Facts
- Skill level: Beginner
- Finished size: 48 inches wide by 60 inches long (122 cm by 152 cm)
- Yarn: Bulky weight (No. 5) yarn, approx. 1,600 yards (1,463 meters)
- Hook: 6.5 mm (US K/10.5) crochet hook
- Stitches used: Chain (ch), Double Crochet (dc), Front Post Double Crochet (FPdc)
- Time to make: 25 to 30 hours
What Makes This Textured Crochet Blanket Special
The secret to this cozy throw blanket is the waffle stitch, which alternates standard double crochets with front post double crochets. This technique builds deep, squishy squares that mimic a cozy kitchen waffle while providing exceptional warmth. A simple, sturdy border wraps around the entire perimeter to keep the edges straight and polished, making it a relaxing, rhythmic project you can easily work on while watching a movie.
Skill Level
- Basic crochet knowledge (chain, double crochet)
- Familiarity with working around post stitches (Front Post Double Crochet)
- Ability to maintain a consistent gauge over long rows
Finished Measurements
| Dimension | Inches | Centimeters |
|---|---|---|
| Width | 48 in | 122 cm |
| Length | 60 in | 152 cm |
Materials You Will Need
| Material / Item | Details / Color | Quantity |
|---|---|---|
| Bulky Yarn (No. 5) | Sage Green / Moss | 1,600 yds / 1,463 m (approx. 8 skeins) |
| Crochet Hook | 6.5 mm (US K/10.5) | 1 hook |
| Tapestry Needle | For weaving in ends | 1 needle |
| Stitch Markers | To track row beginnings | 4 markers |
Yarn Suggestions
| Yarn Line | Weight | Skein Yardage | Notes |
|---|---|---|---|
| Lion Brand Hue + Me | Bulky (5) | 137 yds (125 m) / 125g | 80% Acrylic, 20% Wool; excellent stitch definition. |
| Bernat Velveteen / Blanket | Bulky (5) | 220 yds (201 m) / 300g | Super soft chenille alternative, check gauge carefully. |
| Premier Yarns Basix Bulky | Bulky (5) | 175 yds (160 m) / 140g | 100% Acrylic; budget-friendly and machine washable. |
Gauge
- 11 stitches x 7 rows = 4 inches (10 cm) in waffle stitch pattern using a 6.5 mm hook.
- Always check your gauge before starting to ensure you do not run out of yarn.
Abbreviations
- ch = chain
- dc = double crochet
- FPdc = front post double crochet
- st(s) = stitch(es)
- rep = repeat
- sk = skip
- sp = space
- t-ch = turning chain
- [ ] = work instructions within brackets as directed
Special Stitches Explained
- Front Post Double Crochet (FPdc): Yarn over, insert hook from front to back to front around the post of the indicated stitch from the row below, yarn over, pull up a loop, [yarn over and pull through 2 loops] twice.
Pattern Instructions
Pattern Notes:
* The turning chain 3 at the beginning of rows counts as a dc throughout.
* The foundation chain is a multiple of 3 plus 2 (for a 48-inch width, chain 122).
Section 1: Main Blanket Body (Sage Green, make 1)
Foundation Chain: Ch 122.
Row 1: 1 dc in 4th ch from hook (skipped 3 ch count as first dc), 1 dc in each ch across, turn (120 dc).
Row 2: Ch 3 (counts as dc here and throughout), 1 FPdc around next dc, 2 dc in next dc; rep from * across, ending with 1 FPdc around second-to-last dc, 1 dc in top of t-ch, turn (120 sts).
Row 3: Ch 3, 2 FPdc around next 2 dc, 1 dc in next dc; rep from * across, ending with 2 FPdc around next 2 sts, 1 dc in top of t-ch, turn (120 sts).
Rows 4 to 100: Repeat Rows 2 and 3 alternately until blanket measures approximately 58 inches, ending after completing a Row 2 repeat (120 sts).
Section 2: Border (Sage Green, make 1)
Rnd 1: Do not fasten off. Ch 1, work 1 sc in each st across top edge to corner, work 3 sc in the corner st; evenly work sc down the side edge (approx. 1 sc per row end), work 3 sc in the bottom corner; work 1 sc in each st across bottom foundation edge, work 3 sc in the corner; work sc evenly up the final side edge, work 2 sc in the final corner, join with a sl st to first sc (approx. 490 sc).
Rnd 2: Ch 1, 1 sc in each st around, working 3 sc in each of the 4 corner st spaces, join with a sl st to first sc (506 sc).
Fasten off, leave a 12-inch tail.
Assembly & Finishing
- Thread your tapestry needle with the 12-inch tail and weave all remaining yarn ends securely into the back of the waffle ridges.
- Block the blanket lightly with steam if desired to straighten the edges, taking care not to flatten the raised waffle texture.
Size Customization Tips
- To change the width: Chain any multiple of 3, then add 2 for the turning/edge stitches. Each 3-stitch repeat adds approximately 1.1 inches to the total width.
- To change the length: Simply work more or fewer repeats of Rows 2 and 3 before starting the border rounds. Keep in mind that longer blankets will require additional skeins of yarn.
Care Instructions
- Machine wash on a gentle cycle with cold water.
- Tumble dry on low heat or lay flat to dry to preserve the soft squishiness of the yarn.
- Do not bleach or iron directly on the waffle texture.
FAQ
Can I use a different yarn weight for this pattern?
Yes, you can use worsted weight (No. 4) or bulky weight yarn, but remember that changing the yarn weight will change your gauge, finished dimensions, and total yardage required. Be sure to adjust your hook size accordingly.
Why are my blanket edges curling?
Slight curling during the first two or three rows is completely normal for post-stitch blankets. Once you reach Row 3 and the waffle squares begin interlocking, the fabric will flatten out naturally.
Is this blanket suitable for a baby bed?
Yes! To make a smaller baby blanket or stroller throw, simply reduce your starting chain to a smaller multiple of 3 plus 2 (such as ch 74 for a 30-inch width) and work fewer rows.