
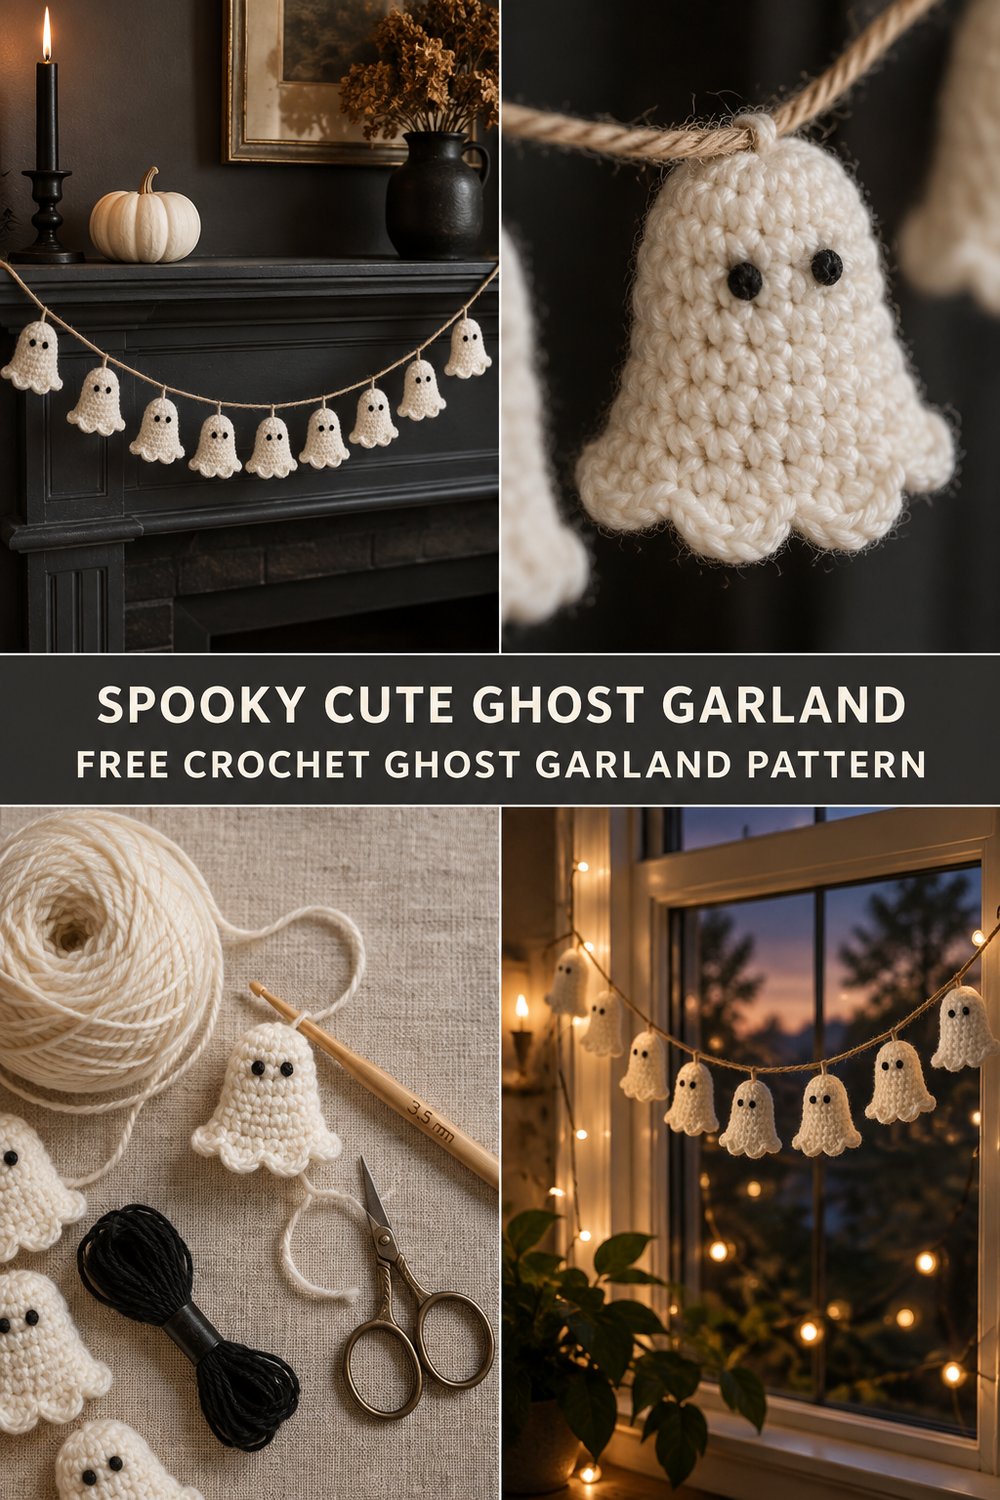
Nothing sets a playful Halloween mood faster than the soft drape of ivory ghosts strung across a dark charcoal mantel. This crochet ghost garland brings effortless, tactile charm to your autumn styling, combining clean single crochet rows with sweet hand-embroidered faces for a truly bespoke holiday piece.
Spooky Cute Crochet Ghost Garland Free Pattern
Quick Facts
- Stitches Used: ch, sc, hdc, dc, sl st, reverse sc (optional)
- Garment Type / Size Fit: Home decor garland / One size (customizable length)
- Estimated Hours to Complete: 3 to 4 hours total
- Gift-Appeal Framing: An ideal quick-make host gift or seasonal housewarming present that tucks easily into a greeting card envelope
💡 Designer Tip: Sizing customization tips are included later in this article to help you lengthen or shorten your garland for any mantel, window frame, or doorway.
What Makes This Spooky Cute Crochet Ghost Garland Special
This design relies on a clever combination of structured single crochet rows and a lightweight cotton yarn to achieve crisp, defined stitch edges that hold their shape without heavy blocking. Each ghost is worked flat from the bottom up, creating a scalloped hem and a gently rounded head that requires just a whisper of stuffing for a delightful 3D effect. Paired with natural jute twine and neat French-knot eyes worked in black embroidery floss, this crochet ghost garland balances a spooky aesthetic with modern, minimalist craft styling.
Skill Level
- Skill Level: Advanced Beginner
- Required Skills:
- Working flat in rows and turning chains
- Basic increases and decreases (sc2tog)
- Simple surface embroidery (French knots)
- Basic assembly and threading onto twine
- Reassurance Line: If you can master a standard single crochet and follow simple row counts, you have all the skills needed to complete this cheerful halloween crochet decor project.
Finished Measurements
| Measurement | Inches | Centimeters |
|---|---|---|
| Individual Ghost Height | 4.5 in | 11.5 cm |
| Individual Ghost Width | 3.5 in | 9.0 cm |
| Garland Length (9 Ghosts) | 60.0 in | 152.4 cm |
| Jute Twine Total Length | 84.0 in | 213.3 cm |
Materials You Will Need
| Color Name / Order | Yarn Weight / Type | Yardage / Meters Needed |
|---|---|---|
| Ivory | DK / Light Worsted (100% Cotton) | 120 yds / 110 m |
| Natural Jute | 3-ply Jute Twine | 3 yards / 3 meters |
| Black | 6-strand Cotton Embroidery Floss | 2 skeins (approx. 16 yds) |
- Crochet Hook: US E/4 (3.5mm) bamboo or ergonomic hook
- Additional Tools: Tapestry needle for weaving ends, embroidery needle for facial details, small sharp scissors, polyester fiberfill stuffing (a tiny pinch per ghost).
Yarn Suggestions
| Yarn Brand & Line | Weight | Yardage Per Skein | Notes |
|---|---|---|---|
| Knit Picks Dishie | Worsted / DK | 190 yds / 173 m | 100% cotton with a tight twist for crisp stitch definition. |
| Drops Paris | Aran / Worsted | 82 yds / 75 m | Unmercerized cotton for a matte, rustic craft finish. |
| Lion Brand 24/7 Cotton | Worsted | 186 yds / 170 m | Mercerized sheen that hangs beautifully on a garland string. |
⚠️ Note: Avoid fluffy acrylic or fuzzy mohair yarns for this crochet ghost pattern; you want smooth plant fibers that showcase individual stitches and keep the ghosts looking sharp.
Gauge
| Gauge Type | Stitches & Rows | Measurement |
|---|---|---|
| Single Crochet | 20 sts x 22 rows | 4 x 4 inches (10 x 10 cm) |
⚠️ Note: Gauge is not overly critical for this free crochet ghost pattern, but matching the suggested gauge ensures your ghosts maintain the intended proportions and don’t consume extra yarn. Swatch before starting if you tend to crochet tightly.
Abbreviations
| Abbreviation | Full Term |
|---|---|
| ch | Chain |
| sc | Single crochet |
| hdc | Half double crochet |
| dc | Double crochet |
| sl st | Slip stitch |
| st(s) | Stitch(es) |
| sc2tog | Single crochet 2 stitches together (decrease) |
| RS | Right side |
| WS | Wrong side |
| rep | Repeat |
Special Stitches Explained
- Sc2tog (Single Crochet 2 Together): Insert hook in next stitch, yarn over and pull up a loop (2 loops on hook), insert hook in following stitch, yarn over and pull up a loop (3 loops on hook), yarn over and draw through all 3 loops on hook.
- Scallop Bottom Trim: Worked across the foundation chain edge by working
(sc, dc, sc)into designated skipping spaces to create a gentle, wavy hemline.
Pattern Instructions
Section 1: The Ghost Body (Make 9)
Using Ivory cotton yarn and a 3.5mm hook, ch 19.
Row 1 (RS): Working in the back bumps of the foundation chain, sc in 2nd ch from hook and in each ch across, turn. (18 sc)
Rows 2-4: Ch 1 (does not count as st here and throughout), sc in each st across, turn. (18 sc)
Row 5: Ch 1, sc2tog, sc in next 14 sts, sc2tog, turn. (16 sc)
Row 6: Ch 1, sc in each st across, turn. (16 sc)
Row 7: Ch 1, sc2tog, sc in next 12 sts, sc2tog, turn. (14 sc)
Rows 8-9: Ch 1, sc in each st across, turn. (14 sc)
Row 10: Ch 1, sc2tog, sc in next 10 sts, sc2tog, turn. (12 sc)
Row 11: Ch 1, sc in each st across, turn. (12 sc)
✅ Checkpoint: At the end of Row 11, your piece should measure approximately 3.5 inches wide at the base and taper smoothly toward the upper head section. Verify you have (12 sc) before moving on to shaping the head.
Section 2: Head Shaping and Edging
Row 12: Ch 1, sc2tog, sc in next 8 sts, sc2tog, turn. (10 sc)
Row 13: Ch 1, sc in each st across, turn. (10 sc)
Row 14: Ch 1, sc2tog, sc in next 6 sts, sc2tog, turn. (8 sc)
Rows 15-16: Ch 1, sc in each st across, turn. (8 sc)
Row 17: Ch 1, (sc2tog) 4 times, turn. (4 sc)
Row 18: Ch 1, sc in each st across. Do not fasten off. (4 sc)
Outer Border & Scallop Hem:
Turn work to continue down the left side edge. Working evenly down the side of the head and body, work sc down to the bottom foundation chain.
Along the bottom foundation edge, work [skip 1 ch, (sc, dc, sc) in next ch] across to create the signature spooky scalloped bottom hem.
Continue working sc evenly up the right-hand side edge back to the top of the head. Fasten off, leaving a 10-inch tail for securing to the garland string. Weave in all remaining starting tails.
Section 3: Facial Embroidery and Finishing
- Thread your embroidery needle with two strands of black embroidery floss.
- Position the eyes on Row 14 or 15 of the head, spacing them about 2 to 3 stitches apart.
- Stitch two neat French knots for the eyes, wrapping the floss around the needle twice for a bold, classic look. Securely knot the thread on the WS of the work.
- Lightly stuff the head cavity from the open back edges with a tiny pinch of polyester fiberfill before anchoring the back seam if desired, or leave them flat for a crisp, modern banner look.
- Repeat for all 9 ghosts.
Section 4: Garland Assembly
- Cut a length of natural jute twine measuring 84 inches.
- Using the hanging tails left at the top of each ghost (or small lengths of ivory yarn if tails were woven in), attach each ghost securely to the twine using a simple cow hitch knot.
- Space the ghosts evenly across the central 60 inches of the twine, leaving 12 inches of bare twine on each end for easy hanging. Adjust spacing until balanced.
Size Customization Tips
- To Make a Shorter Garland: Work only 5 or 7 ghosts instead of 9, reducing your total twine length to 60 inches while maintaining the same 6-inch spacing between each piece.
- To Make a Longer Garland: Crochet additional ghosts in batches of 3, adding 18 inches of total jute twine length per 3 extra ghosts to ensure your mantel or window frame gets full, festive coverage.
Care Instructions
Spot clean your crochet ghost garland with a damp cloth and mild soap if dust accumulates during the autumn season. Do not submerge in water if fiberfill stuffing was used. Lay flat on a towel to air dry completely before packing away in a breathable cotton bag for next year’s spooky celebrations.
Spooky Cute Crochet Ghost Garland
I hope you love styling this easy crochet project in your home as much as I loved designing it for you! If you hook up your own string of ghosts, please share your spooky crochet decor on social media. Tag me and use the hashtags #CrochetGhostGarland #HalloweenCrochet #FreeCrochetPattern #EasyCrochet #SpookyCrochet. Don’t forget to save this tutorial to your Pinterest Halloween boards, and leave a comment below to let me know where you plan to hang your new handmade garland!